


This time, we will be reviewing
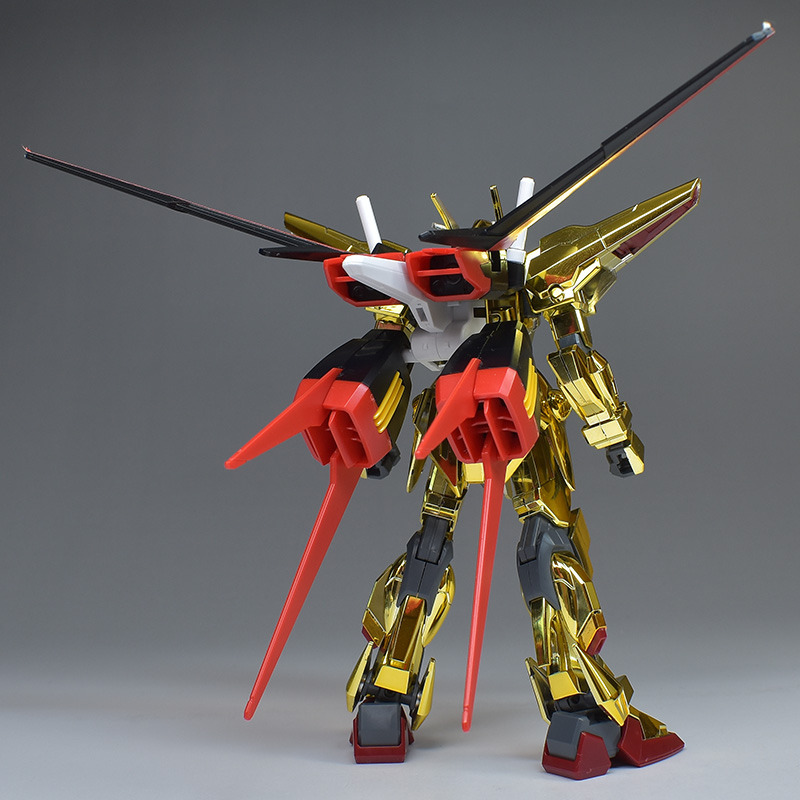
the HG 1/144 ORB-01 Shiranui Akatsuki Gundam, which was released in January 2006 !
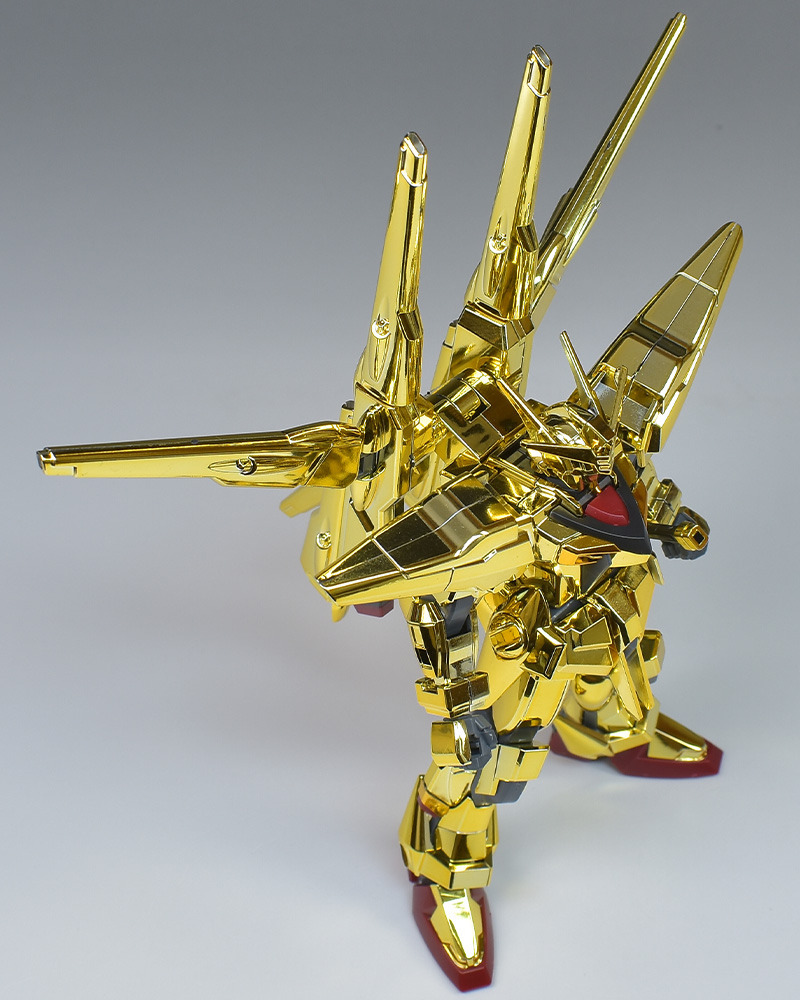
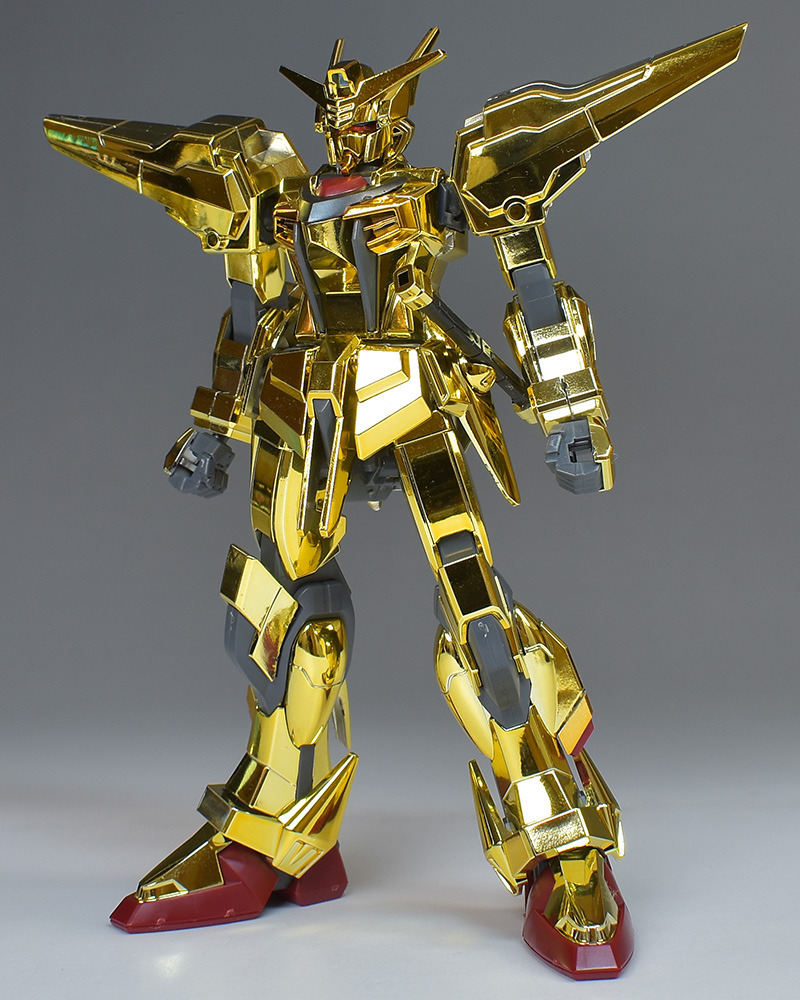
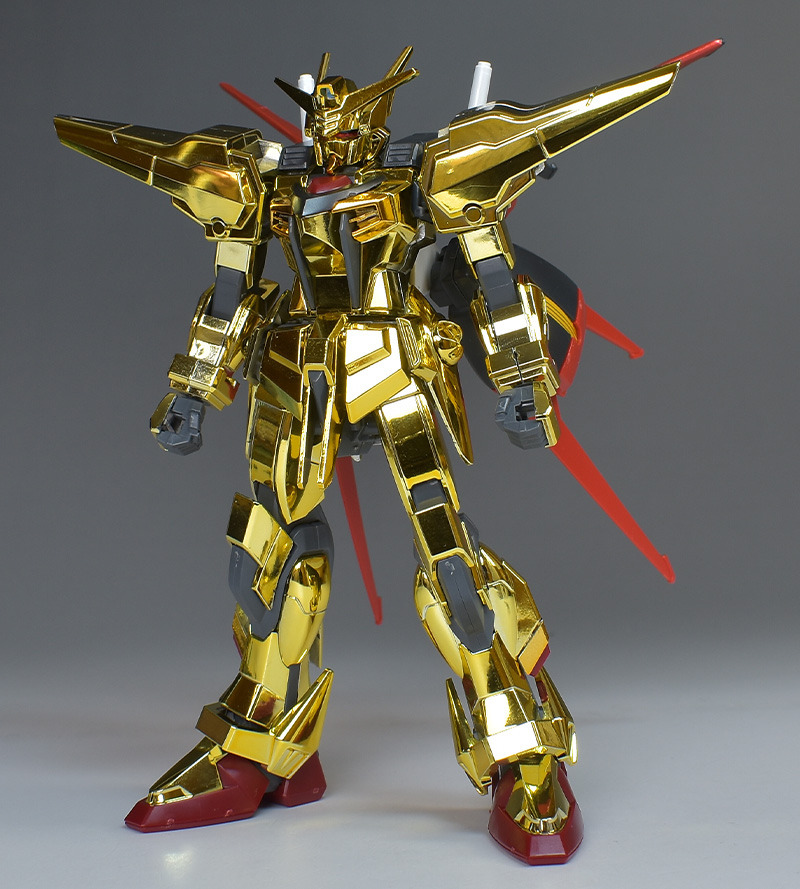
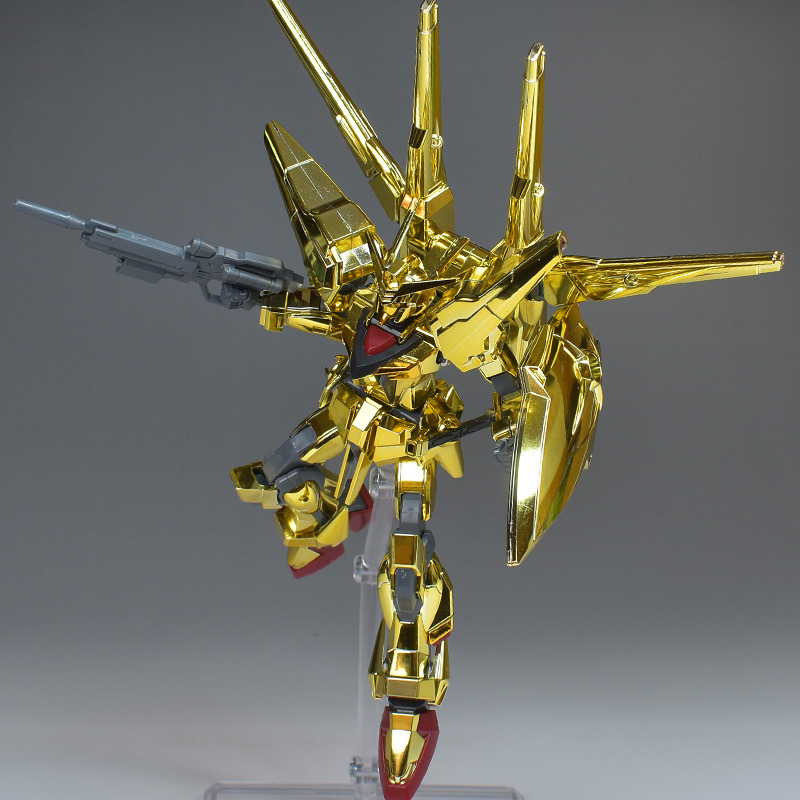
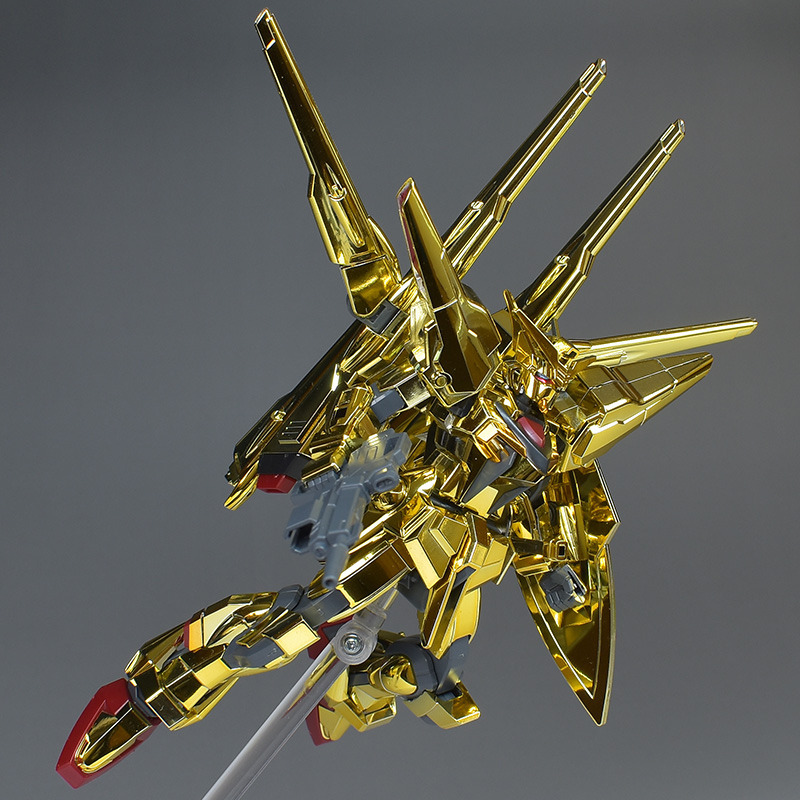
HG Shiranui Akatsuki Gundam is a 1/144 scale model kit of the MS “ORB-01 Shiranui Akatsuki Gundam” that appears in “Mobile Suit Gundam SEED DESTINY”. The glittering color of the entire body is reproduced with gold-plated parts. The kit includes effect parts that allow you to recreate the firing state of the triple beam cannon on the back. The price is 2,640 yen (tax included).

The Akatsuki Gundam is equipped with the M531R guided mobile beam turret system and is a space combat version of the Gundam, piloted by Neo Roanoke (Mu La Flaga) in the film. The ORB-01 Shiranui Akatsuki Gundam, which also contributed to the destruction of Requiem alongside Athrun’s Infinite Justice, is now available in HG SEED.
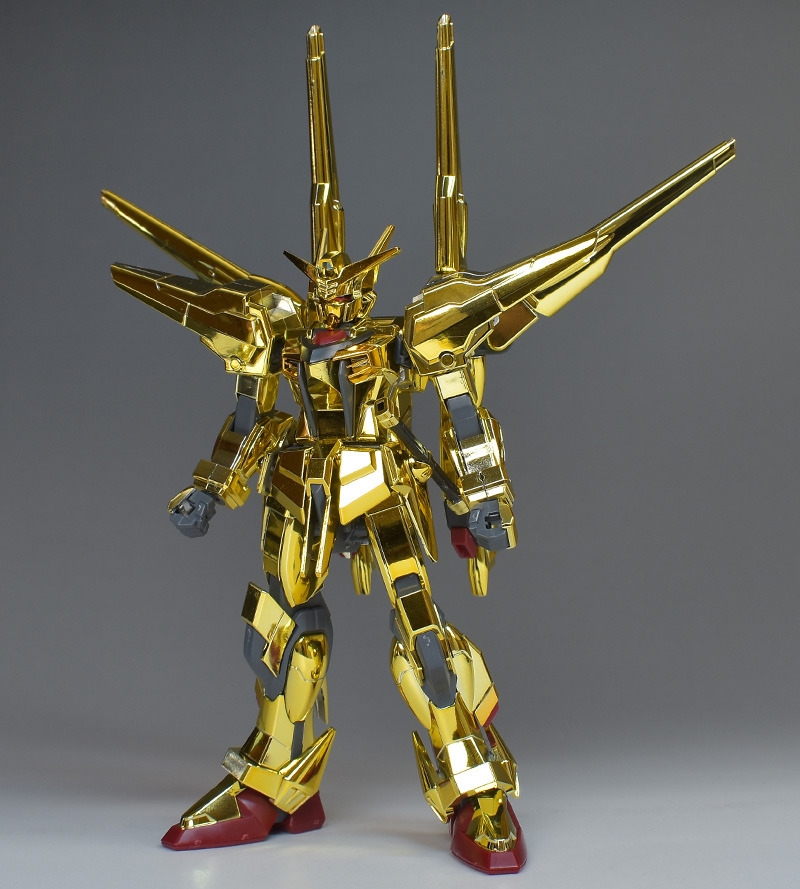
In addition to its gorgeous gold appearance reminiscent of the HD remastered version’s suit color, the suit’s distinctive shape, including the “Shiranui” unit equipped with a triple beam cannon on its back , is reproduced with new molding.
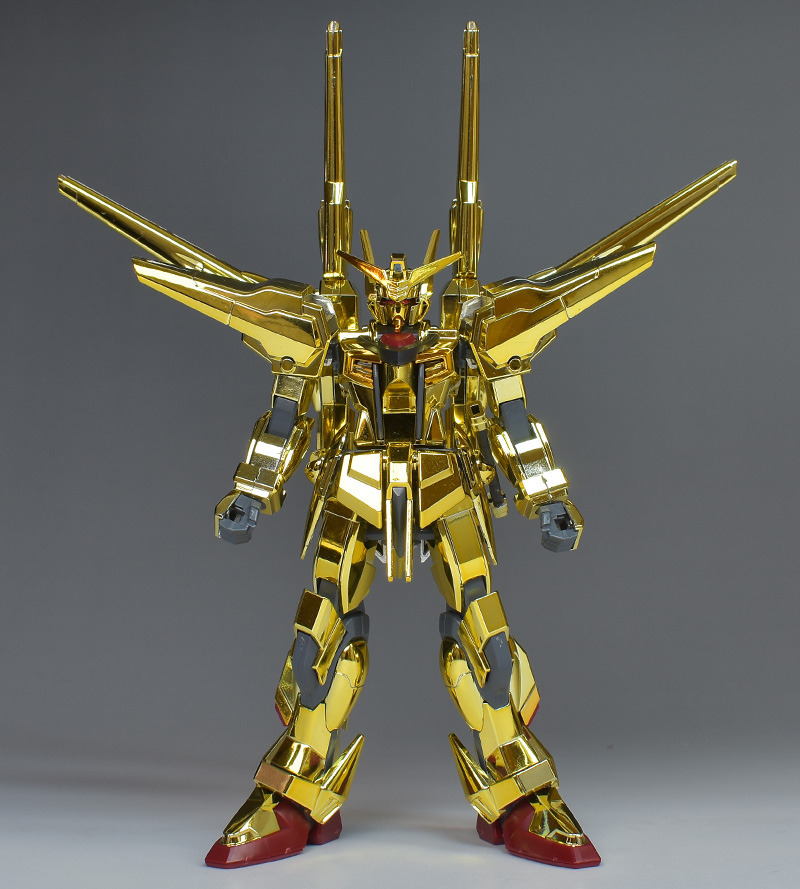
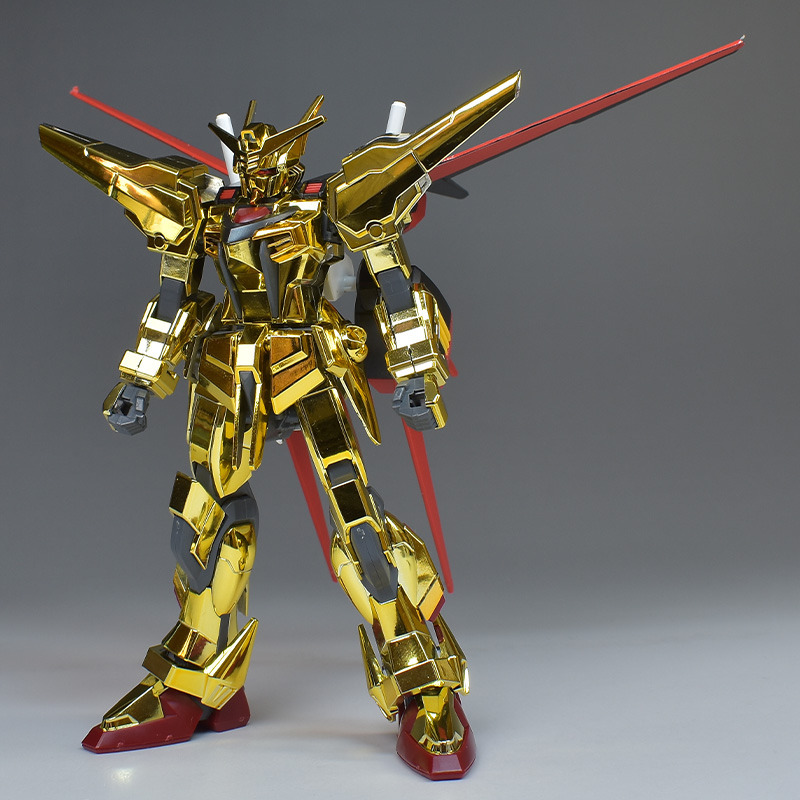
The entire body is molded in gold. The chest air intakes and leg thruster ports are plated in a slightly reddish gold. Other parts are wine red for the chest and soles, black for the chest and saber handle, and gray for the abdomen, knees, internal joints, and weapons.
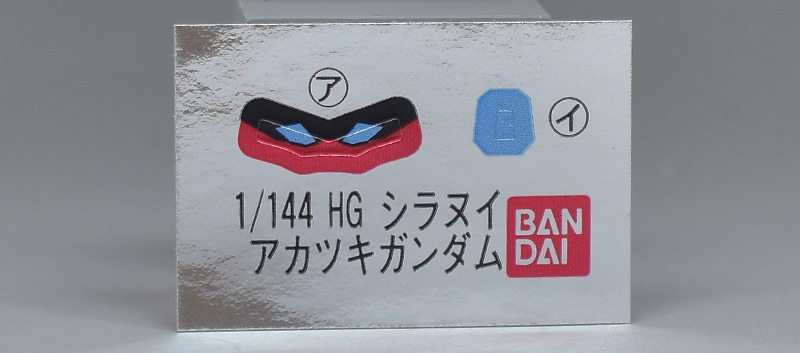
The foil stickers are only a little, just to cover the twin eyes and the forehead sensor. You will need to paint the shoulders, parts of the beam cannon on the back, and parts of the shield, but the color separation is reproduced so well that it doesn’t look out of place even when assembled without any modification.
The grey molded parts have a slightly matte feel similar to KPS, and ABS is used for the parts that require strength, such as the internal joints and joints.
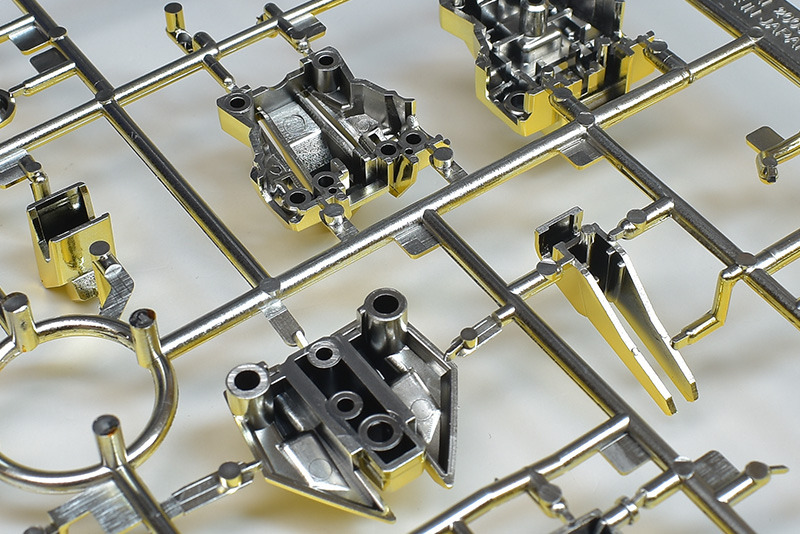
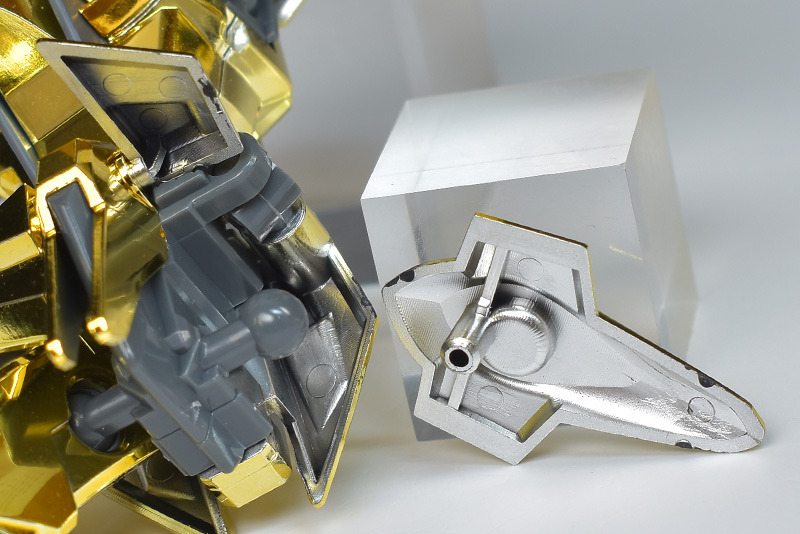
The plated parts used on the exterior are under-gate type, so the gate marks are not exposed and the finish looks great just by assembling it.
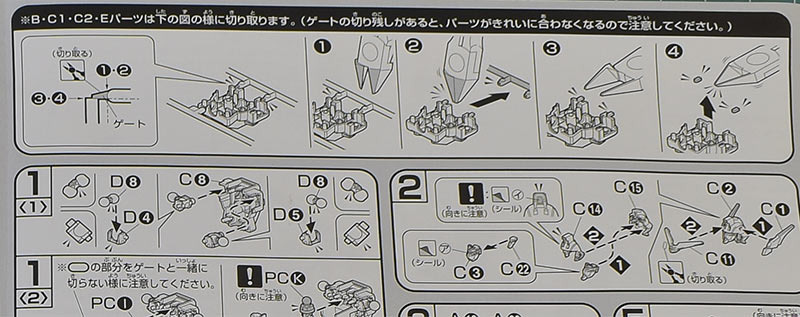
There is a simple explanation in the instruction manual, but it does not say where the undergate is located, so be careful not to forget to cut it. The plating gets a little fingerprinted, but it was not too noticeable.
The polycaps used are PC-123 Plus. The elbow and knee joints are made of polycaps, so the joint strength is quite high. Although it is equipped with a large backpack on its back, it has good ground contact and can stand on its own stably, even if it puts a little strain on it.
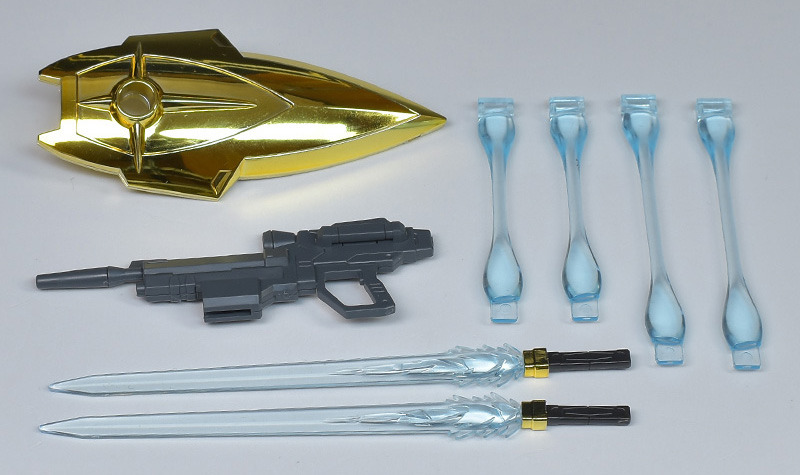
Includes beam rifle “Hyakurai”, Type 71 experimental shield, Type 73J2 experimental dual-bladed beam sabers (handle, beam blade) x 2, and effect parts (2 long, 2 short) to recreate the firing state of the M531R guided mobile beam turret system.
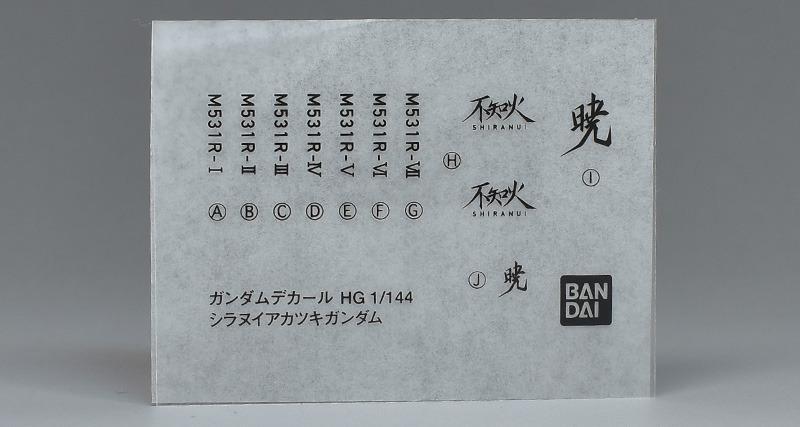
Gundam decals are included, including the numbers on the rear beam cannons and Japanese characters such as “Shiranui” and “Akatsuki.”
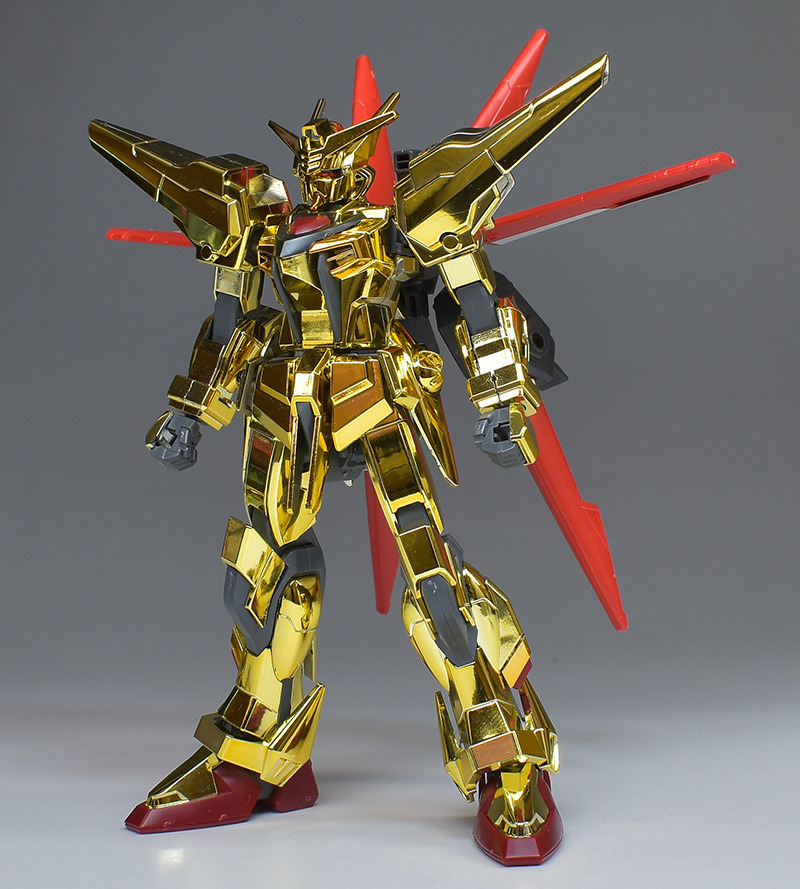
With the rear unit removed.
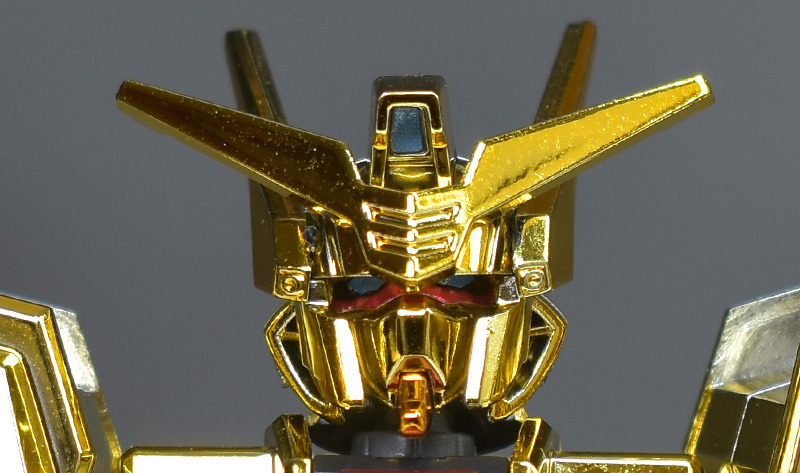
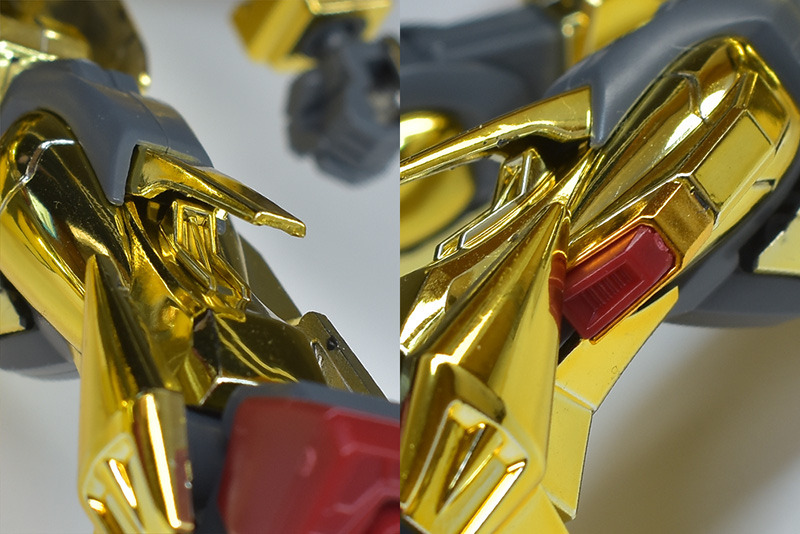
Head. The four antennae and the slit armor on the forehead are impressive. The design exudes a heroic and heavy atmosphere. The jaw is colored with reddish plating, but the left and right vulcans need to be painted gray.
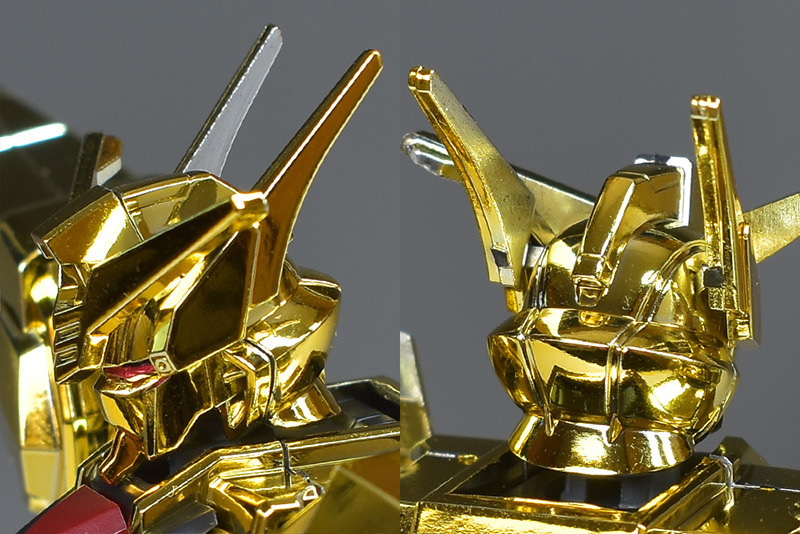
The helmet part is a combination of front and back parts, but the seams look like they have steps or are molded, so it may be fine to leave it as is.
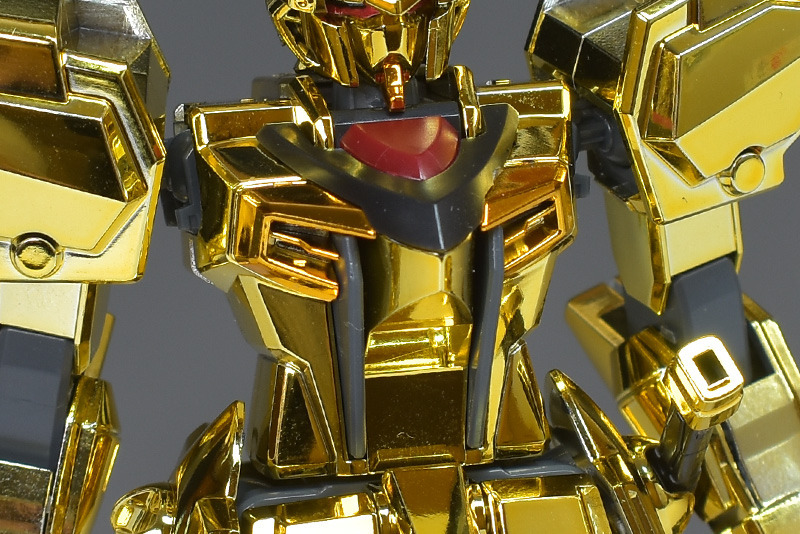
The chest and abdomen have air intakes, frame armor, and other parts that are color-coded in detail. The air intakes are colored with reddish plated parts.
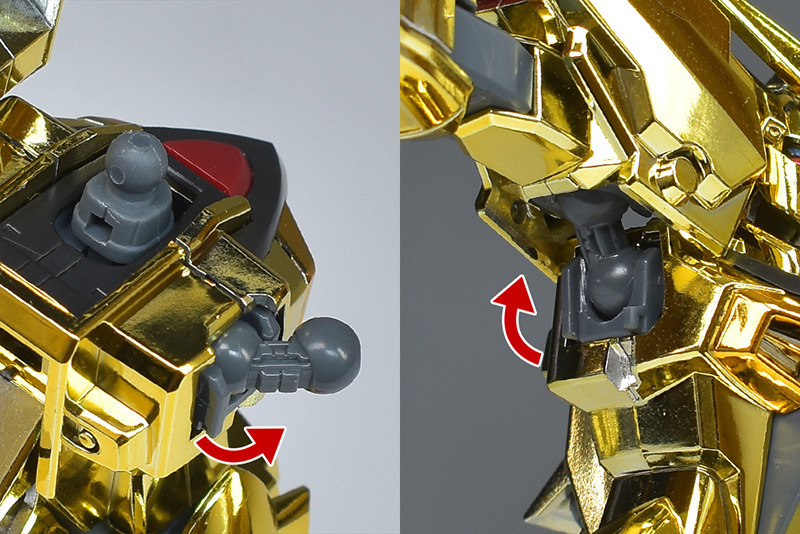
The neck is connected with a polycap, allowing it to move back and forth. The shoulders are connected with double ball joints, allowing them to swing forward and up and down.
.
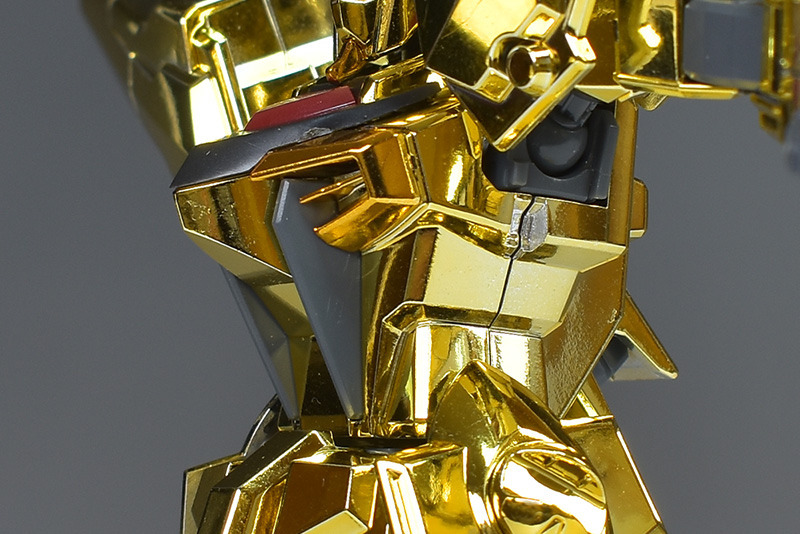
Although the waist area is somewhat thorny, it is lightly armored and easy to move around in. The armor has a moderate amount of undulations and a three-dimensional feel. The inside of the rear duct needs to be painted gray.
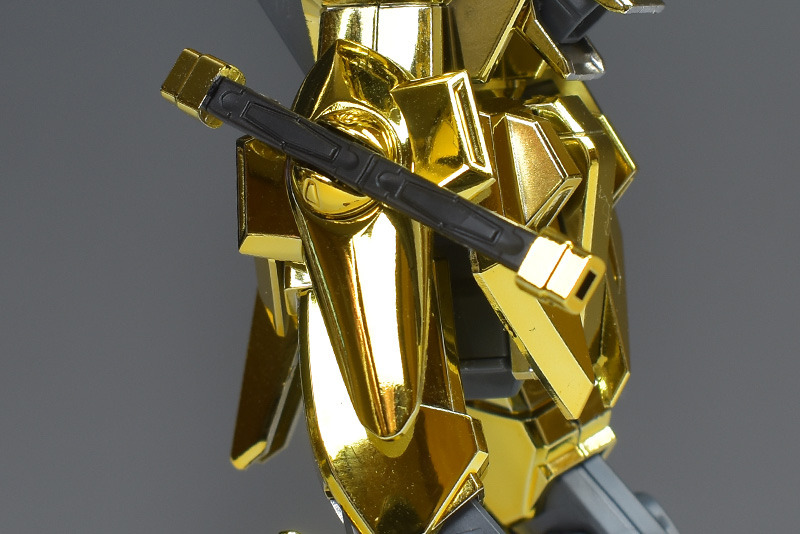
The left side armor is equipped with a connected saber hilt (Type 73J2 experimental twin-bladed beam saber). This is a special beam saber developed after Akatsuki’s plan was frozen. Please note that the fixing strength is not very high and it will come off easily with even the slightest interference.
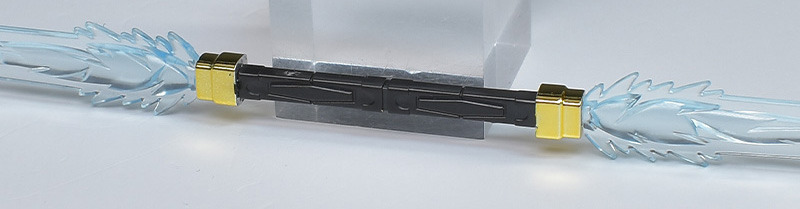
By attaching the beam blade, it can be used as a naginata-like weapon. The handle is color-coded with plated and black parts, but some of the molding needs to be painted wine red or gold. The beam blade is also clear blue, so it needs to be painted clear pink.
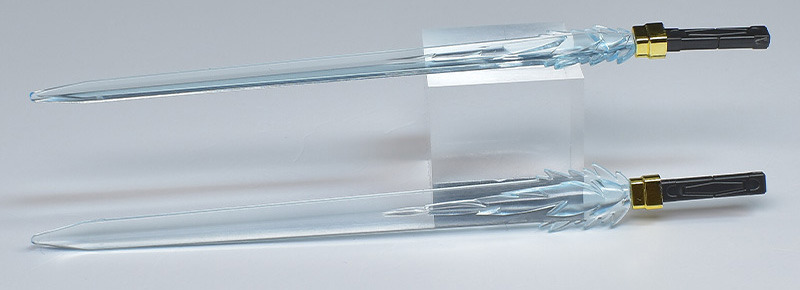
A separate beam saber is also included. The handle of this one also needs to be painted.
The back of the waist armor is simple and does not have any backing parts. It is shaped to fit the surface. The crotch area is connected with a ball joint.
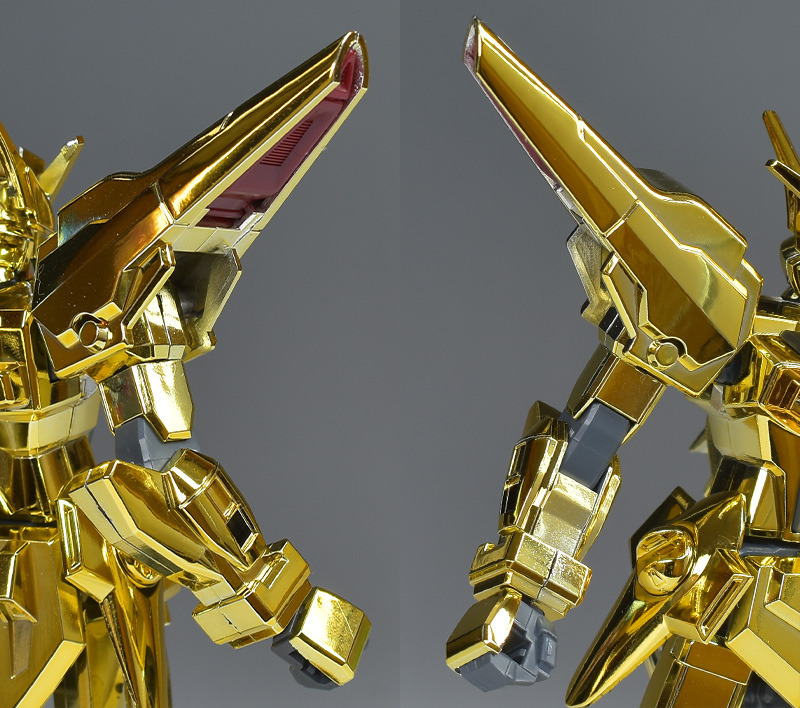
Arms. The upper arms and below are moderately thick and undulating, and have a mechanical feel. The shoulder armor is long and wide, giving it a strong presence.
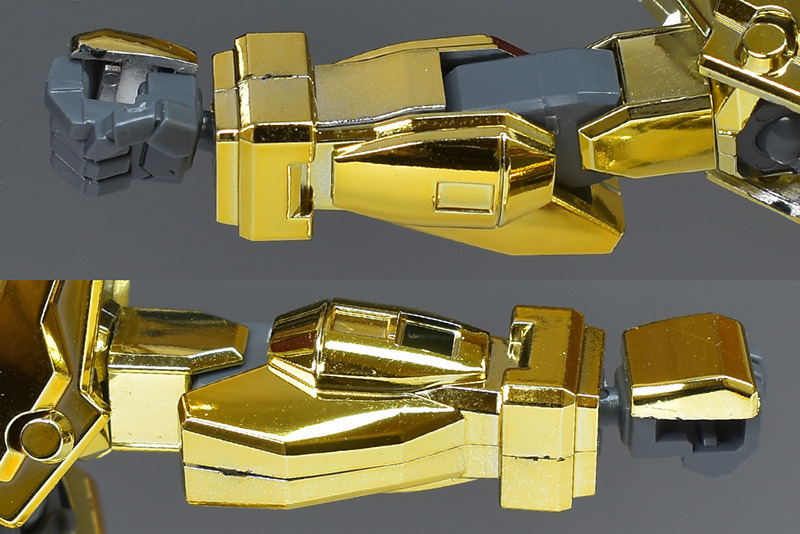
The upper arms are cylindrical and have no seams. The forearms are a combination of left and right, with seams at the front and back. If you want to keep the plating as is, it may be difficult to remove the seams. If you really want to remove them, you will probably need to remove the plating, remove the seams, and then paint with a plating-like paint.
The shoulder armor also has a seam at the top when combined. Some of the armor on the shoulder side needs to be painted gray. The ducts on the sides are colored wine red.
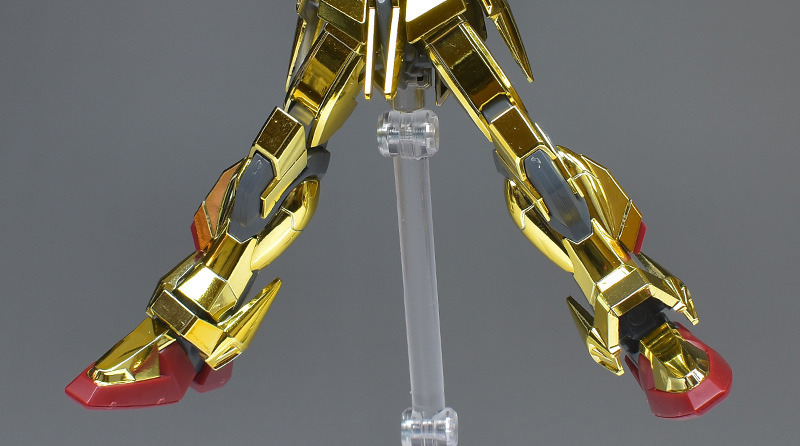
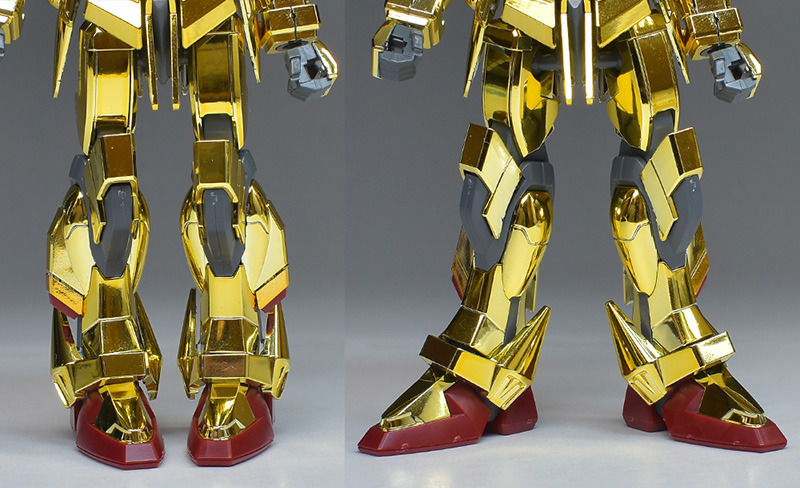
The legs. They are also mechanical with a moderate width and undulations. The thruster ports on the sides are reddish plated, and the frame parts such as the knees are also finely colored with gray armor.
The thighs and the grey knee frame are combined on the left and right, and the thighs have seams at the back, and the knee frames have seams at the front and back. Even if you want to remove the seams of the frames, it seems that detailed processing such as rear fitting will be necessary from a structural standpoint.
A simple rectangular thruster port is molded inside the rear thruster. It is not very visible, but it would be good to paint it separately. The thruster cover is slightly movable. The inside of the duct on the side also needs to be painted gray.

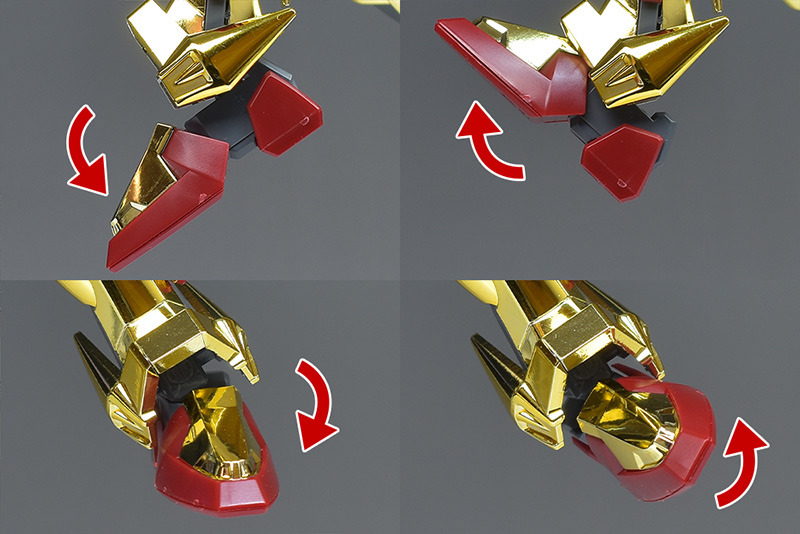
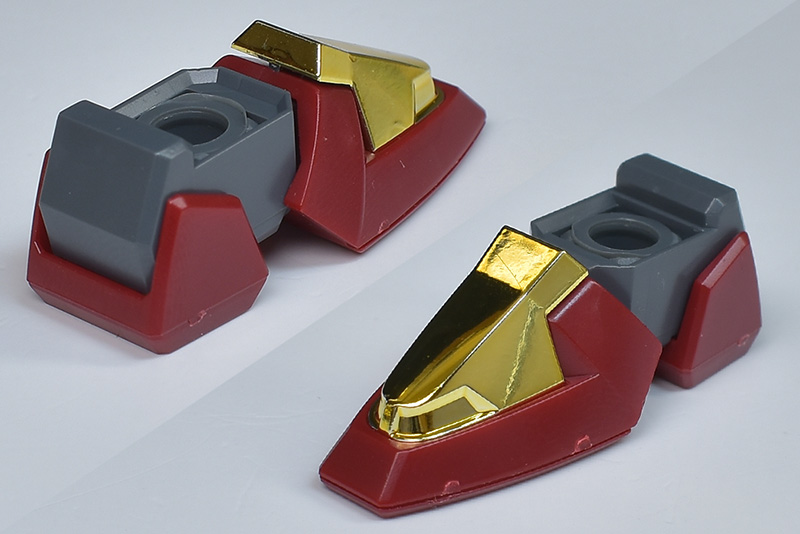
Sole. The structure is simple and the design is not flashy, but each part is color-coded. Only the inside of the duct at the tip of the leg needs to be painted black.
The soles of the feet are also finely molded and are solidly constructed with no holes.
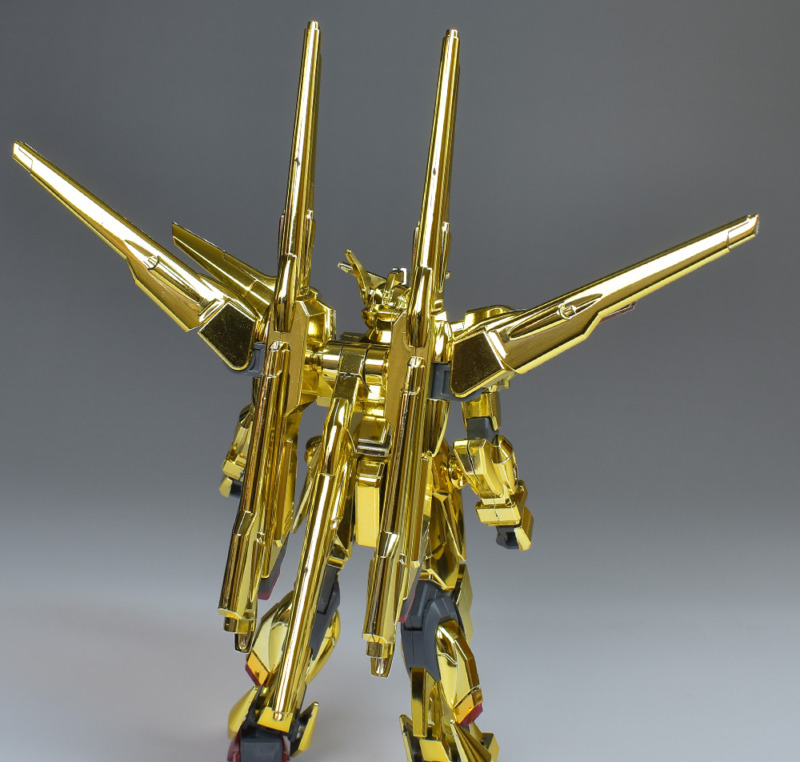
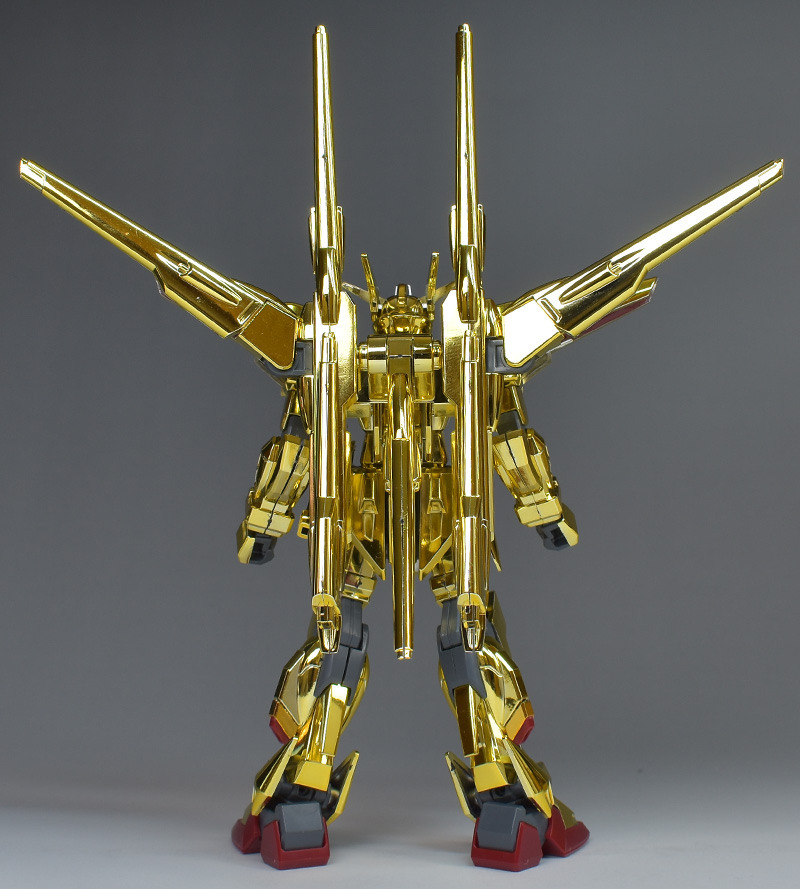
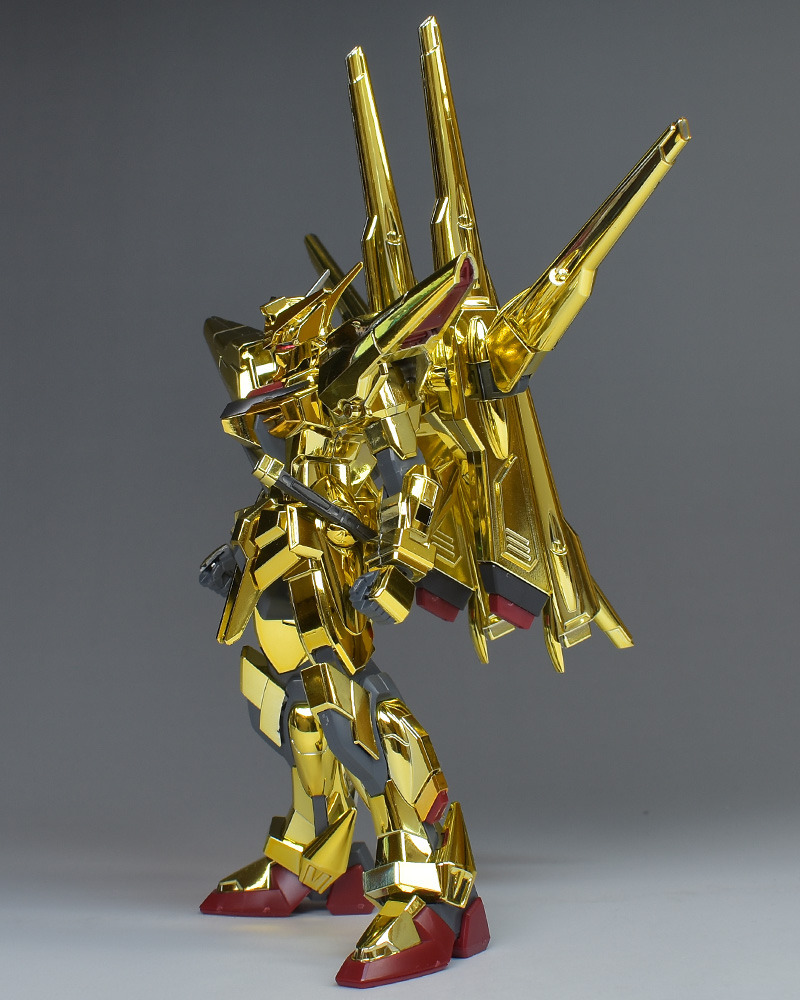
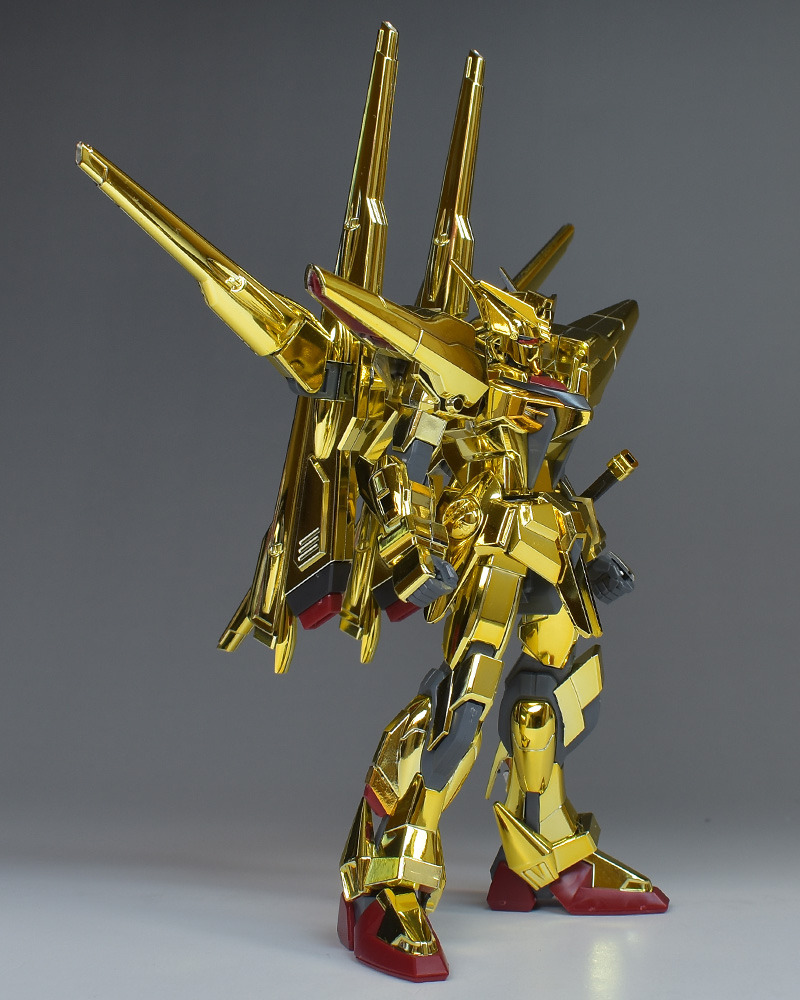
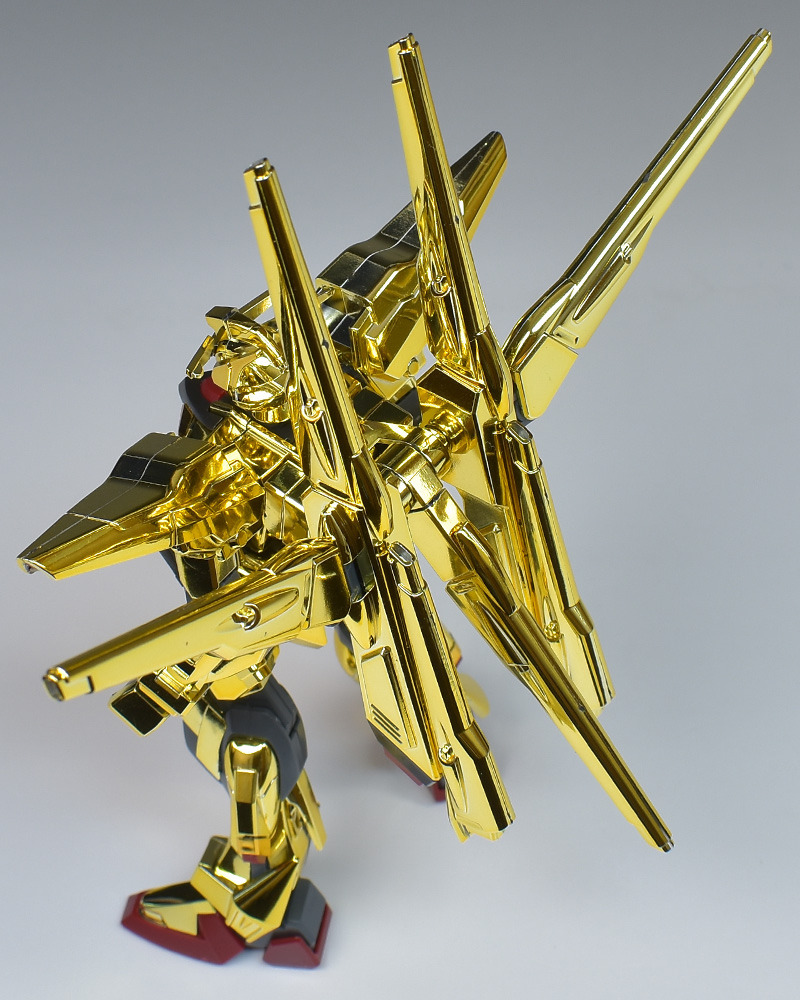
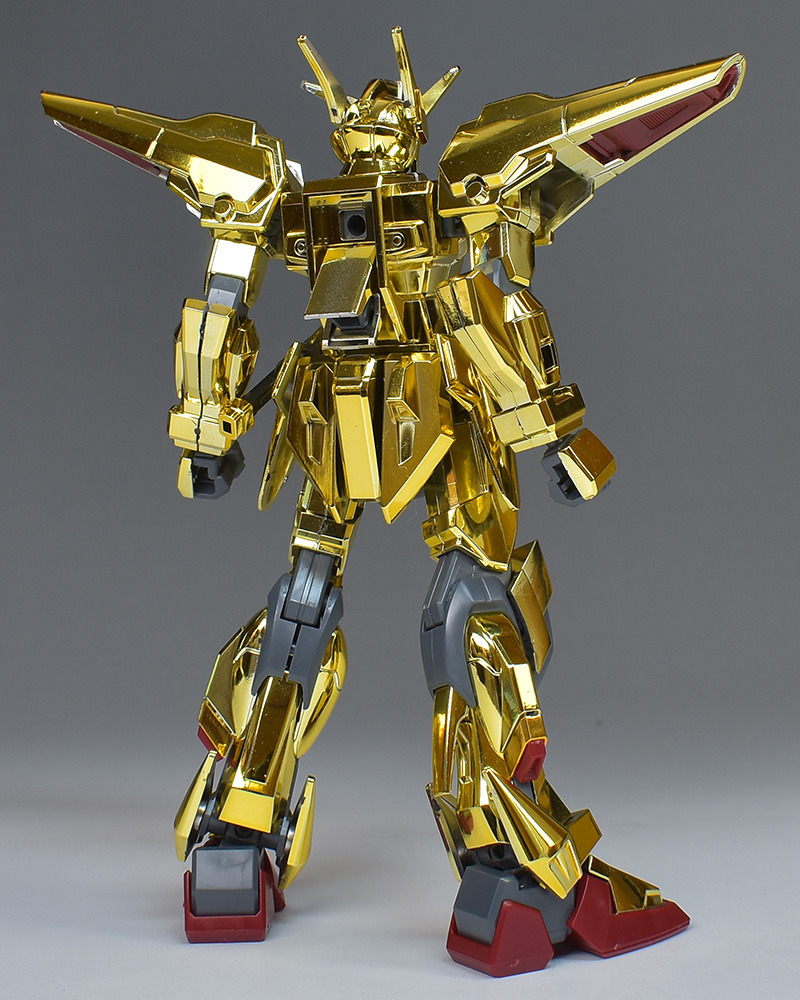
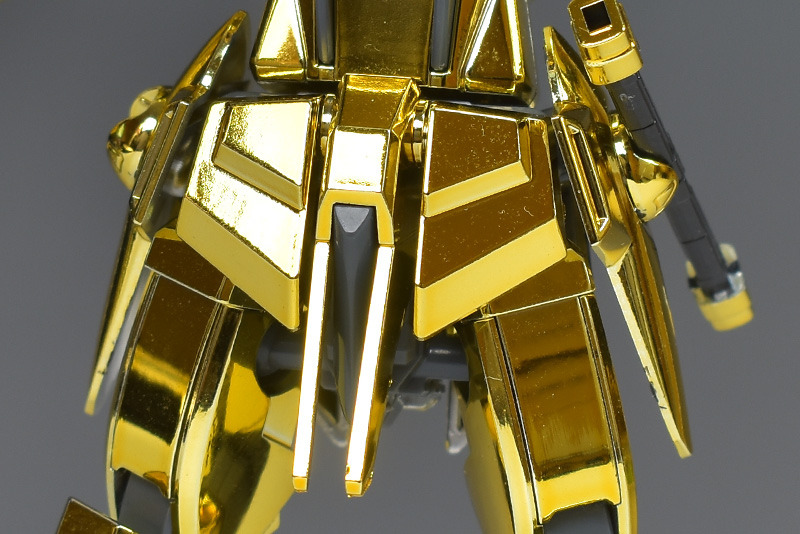
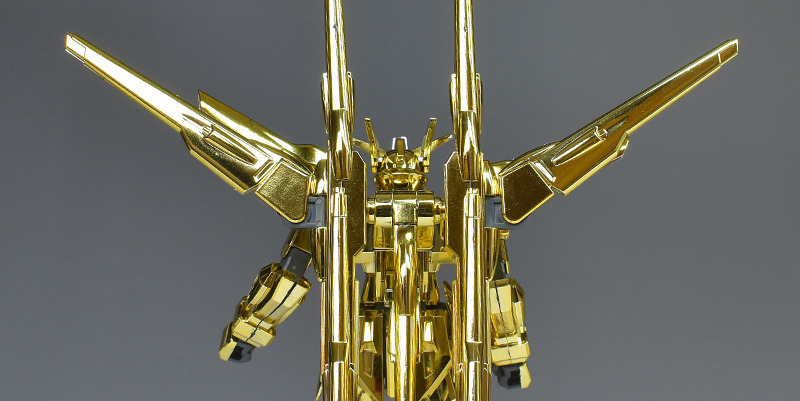
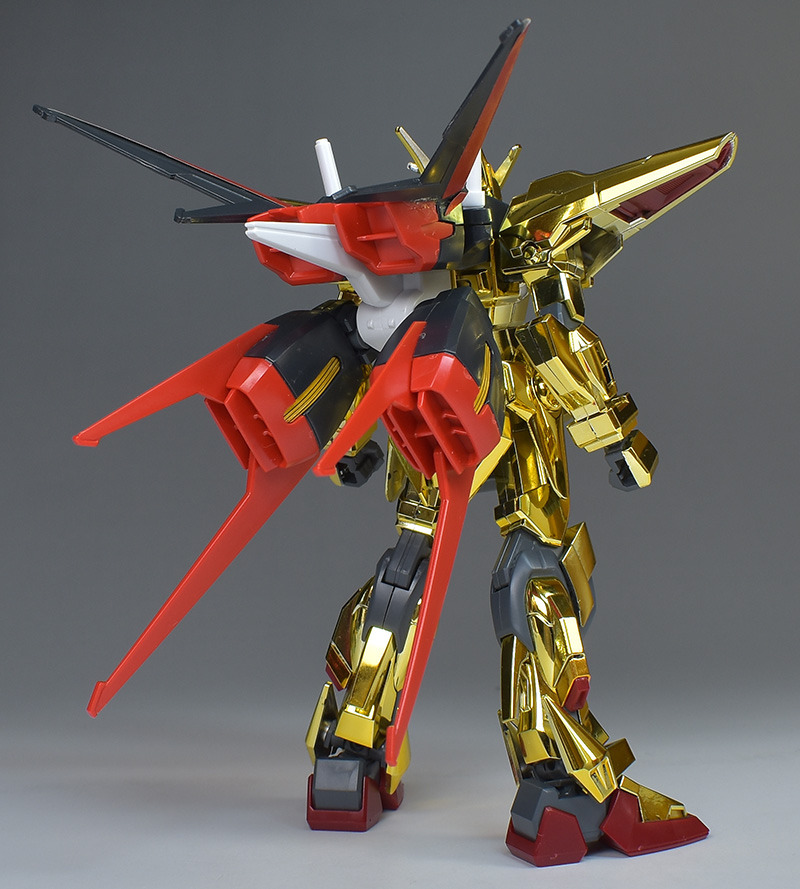
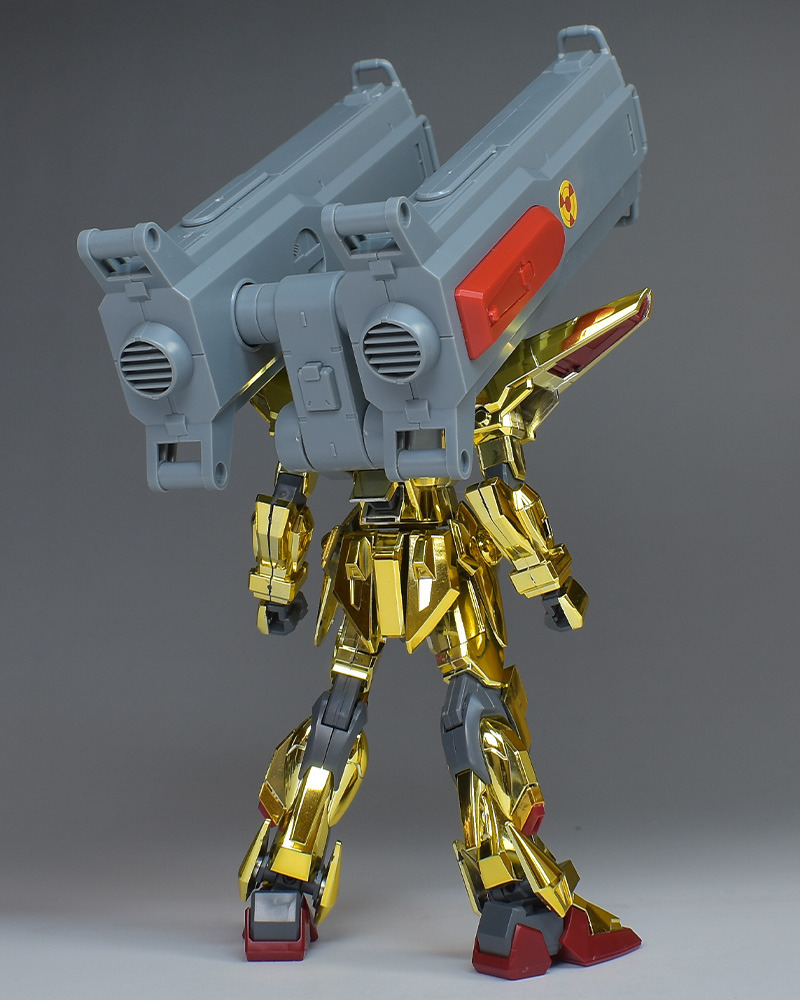
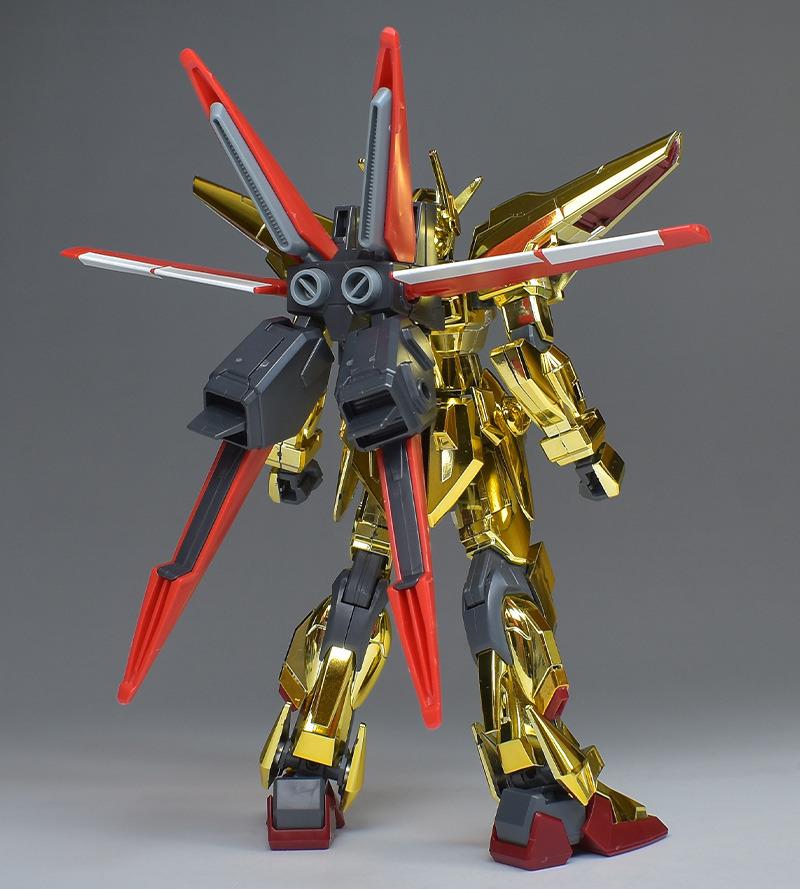
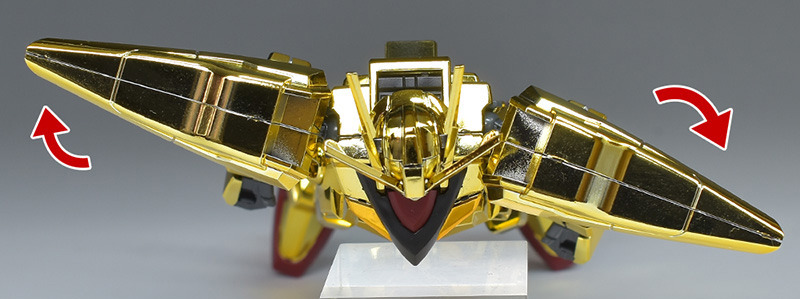
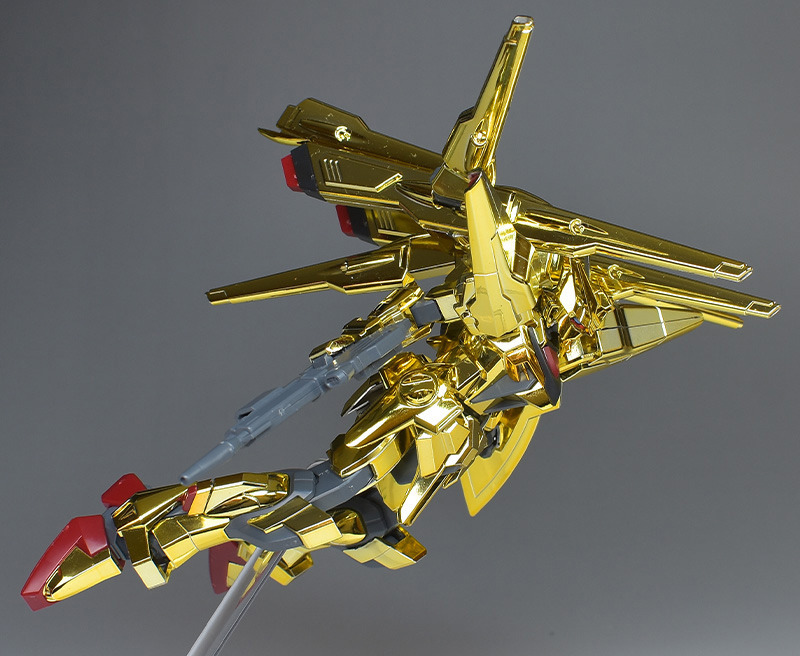
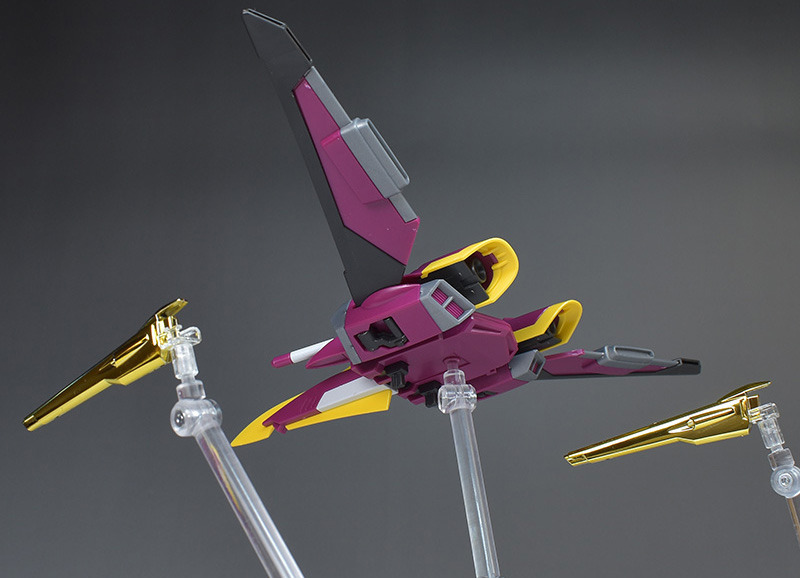
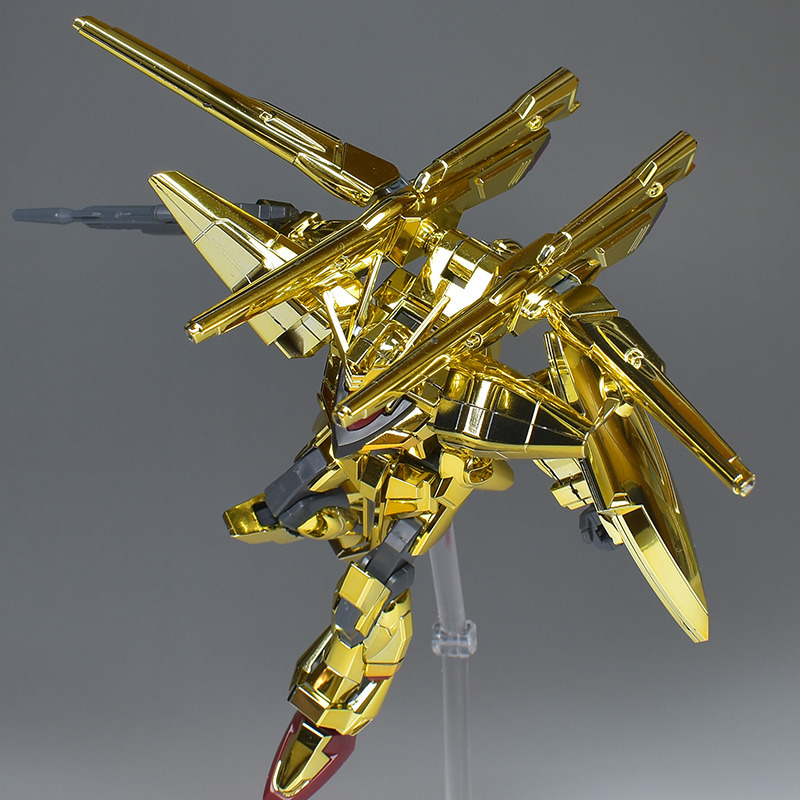
The back is equipped with the space combat equipment “Shiranui” , which is a striking unit equipped with the M531R guided mobile beam turret system ( triple beam cannon ) in each part.

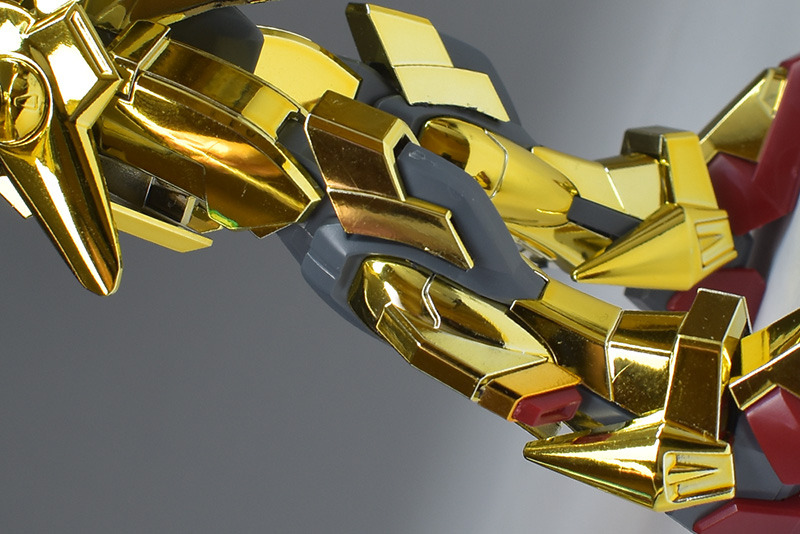
ユニットには合計7基の3連装ビーム砲があり、片側には3基(左右で6基)装備しています。もう1基は中央下部にスタビライザーのように配置されています。
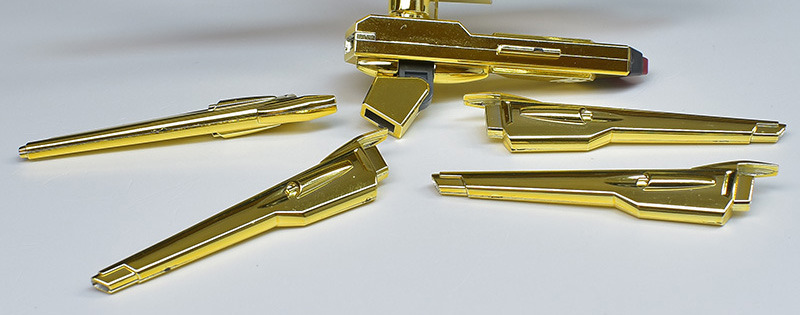
各部ビーム砲は脱着が可能。
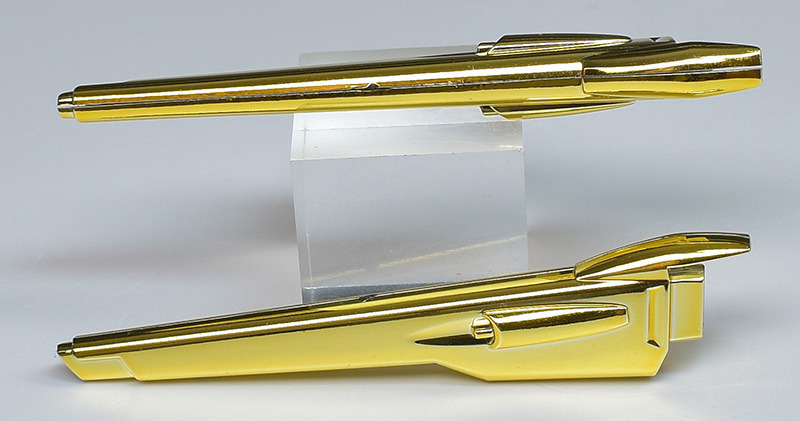
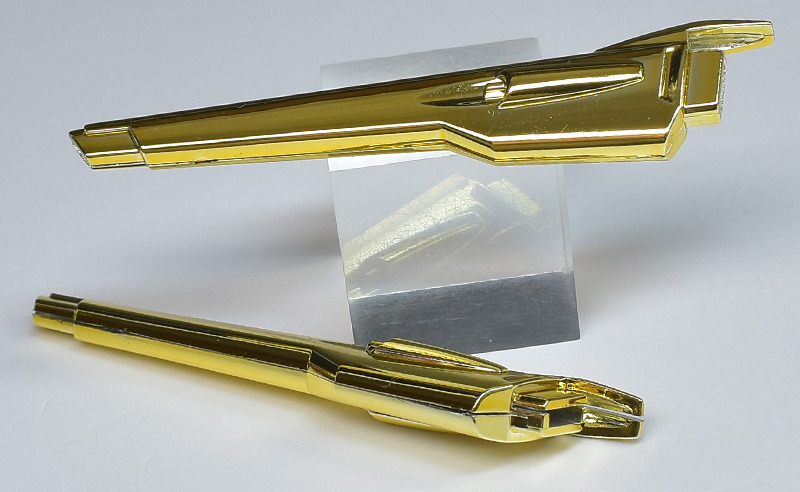
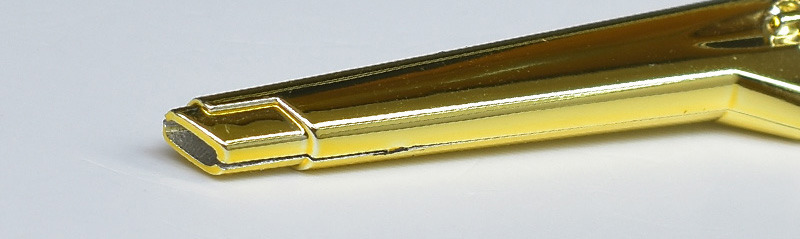
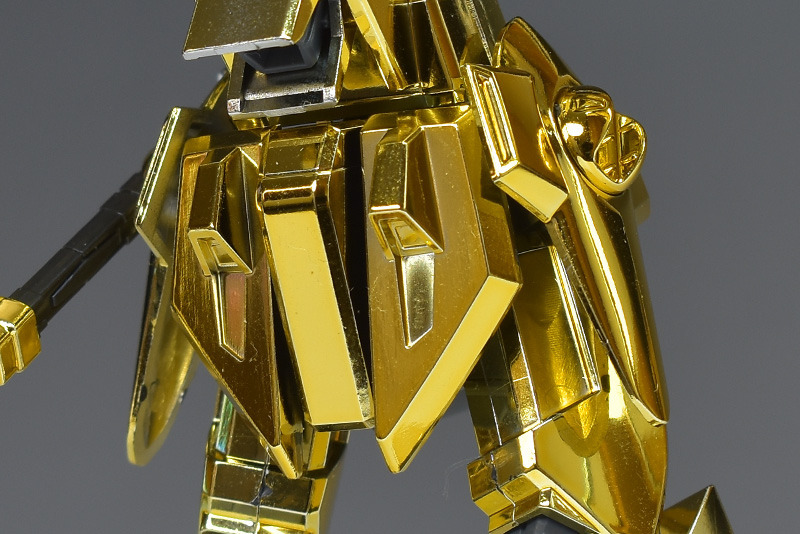
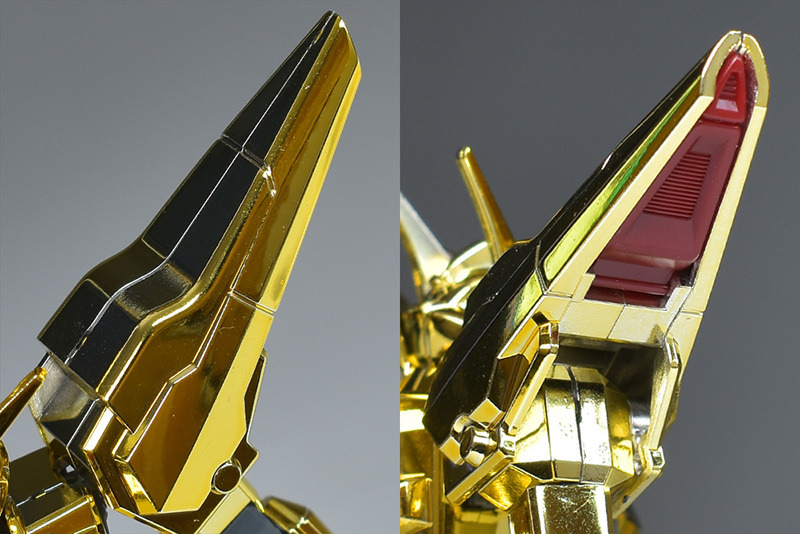
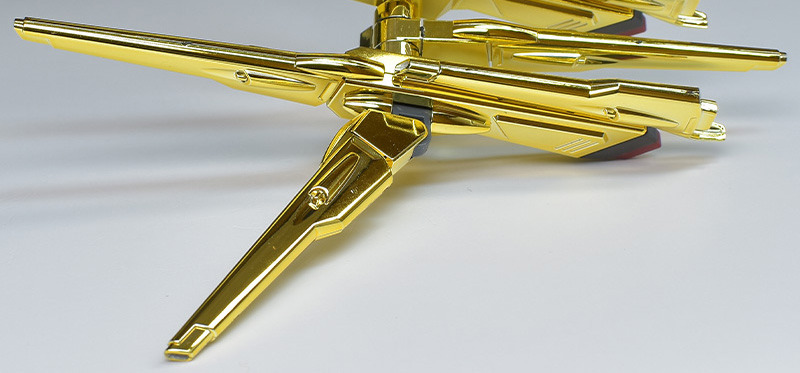
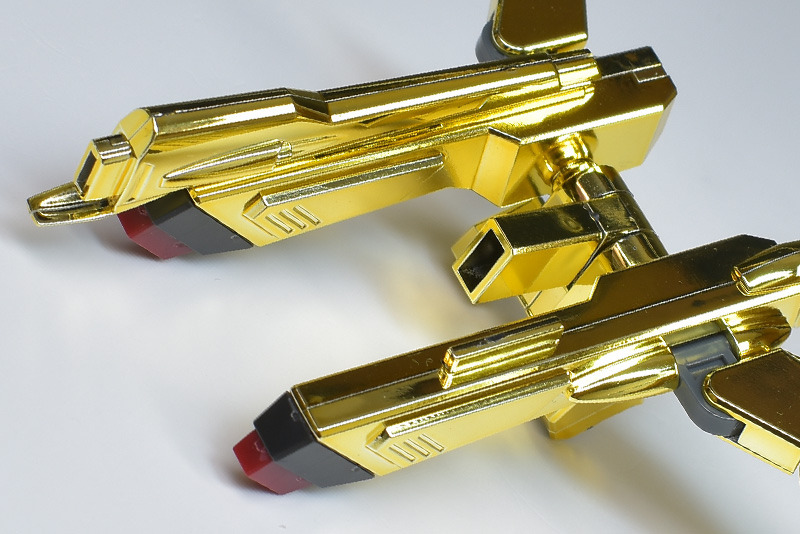
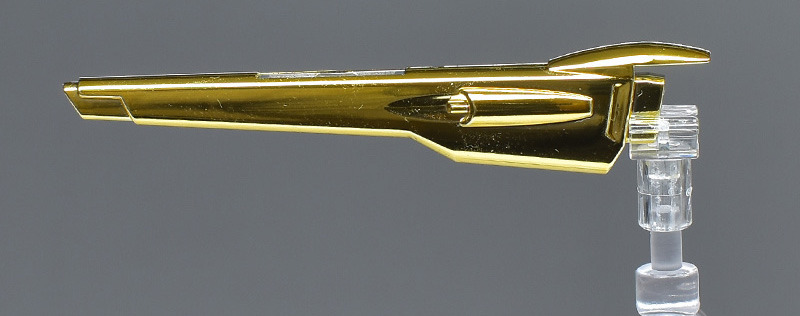
上部や側面、下部にスタビライザーとして配置されているビーム砲は形状が同じ。簡単なモナカ割で上下などに合わせ目ができます。先端部はグレーに、末端部はスラスターとしてワインレッドに塗り分けが必要。
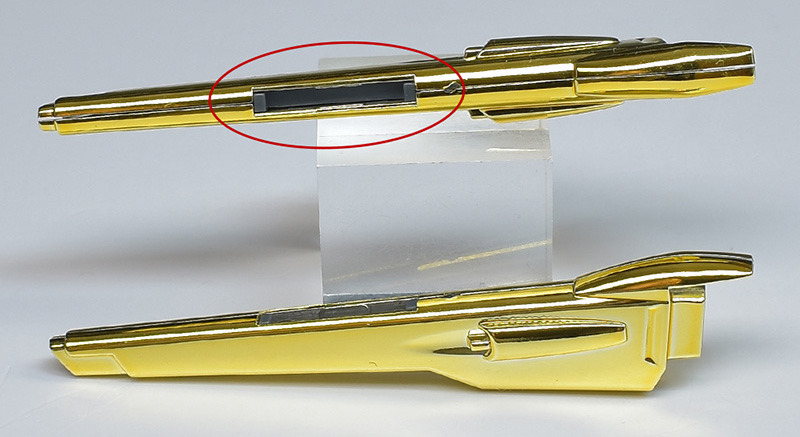
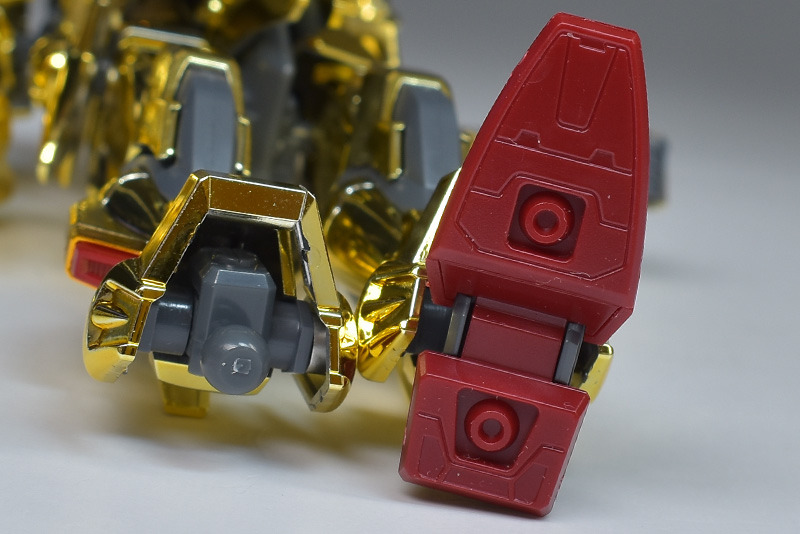
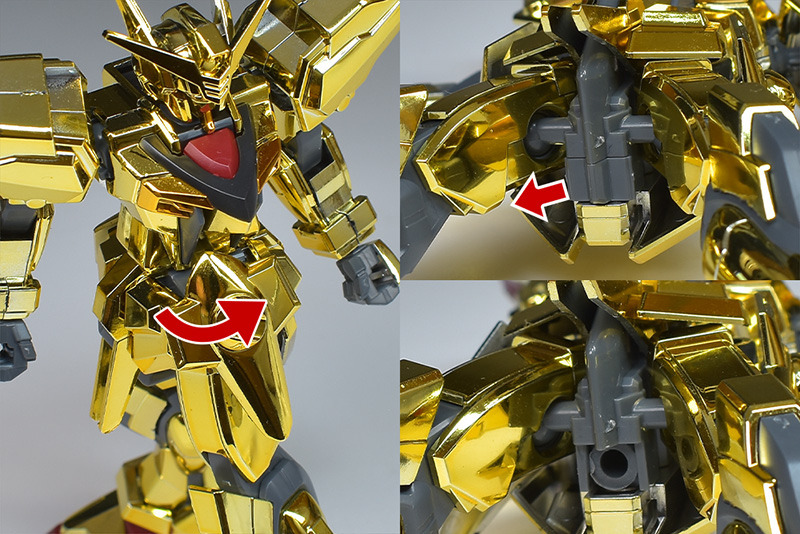
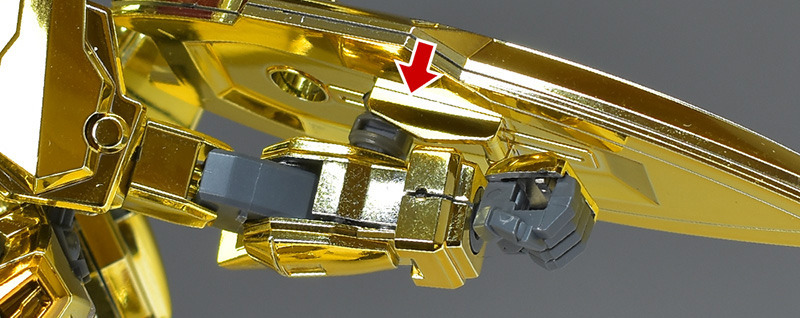
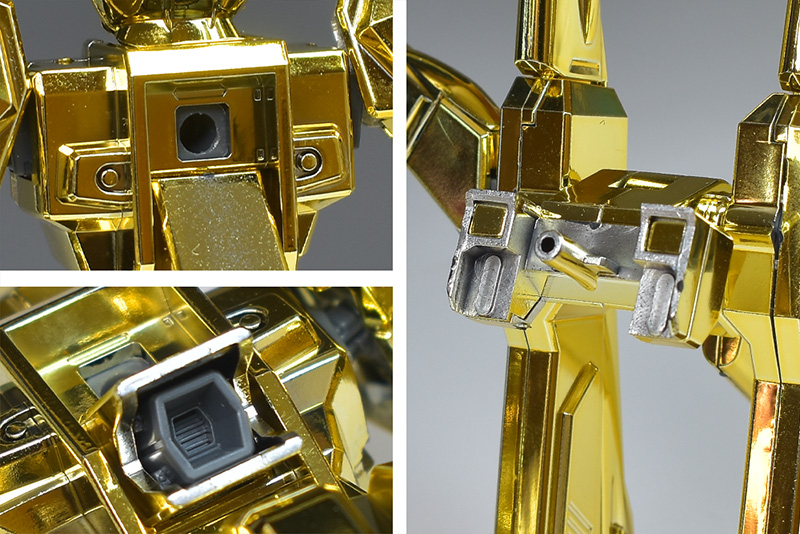
ユニット基部の上側に組み付けるビーム砲も左右の組み合わせで上下に合わせ目ができますが、一部ジョイント穴(赤◯)が造形。グレーのパーツが内側に組み込んであり、固定できる構造になっています。

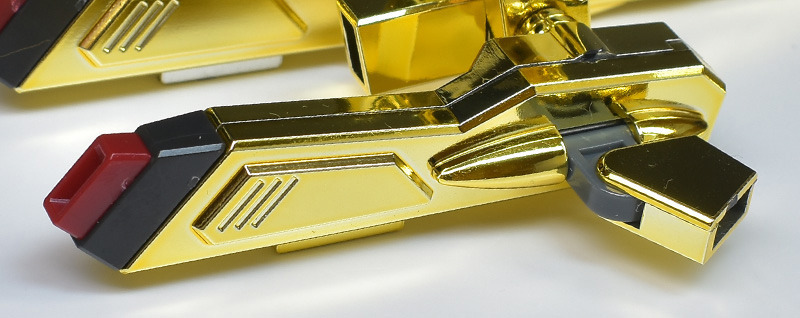
ユニット基部も左右の組み合わせで前後に合わせ目ができます。後部スラスターはパーツで細かく色分けされています。

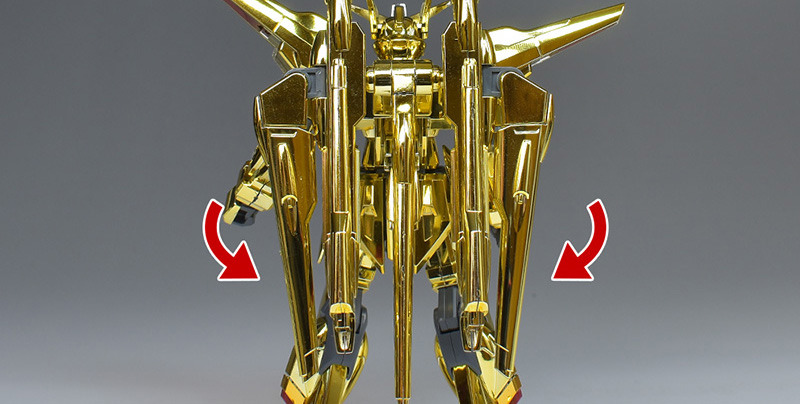
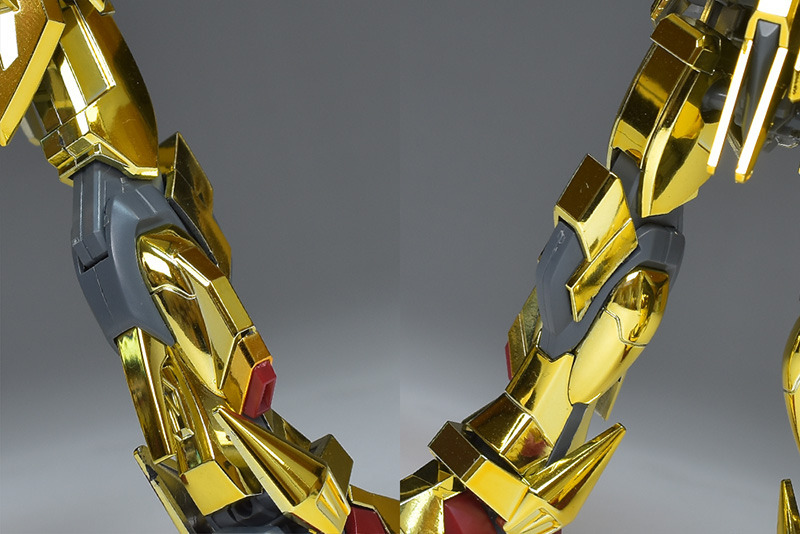
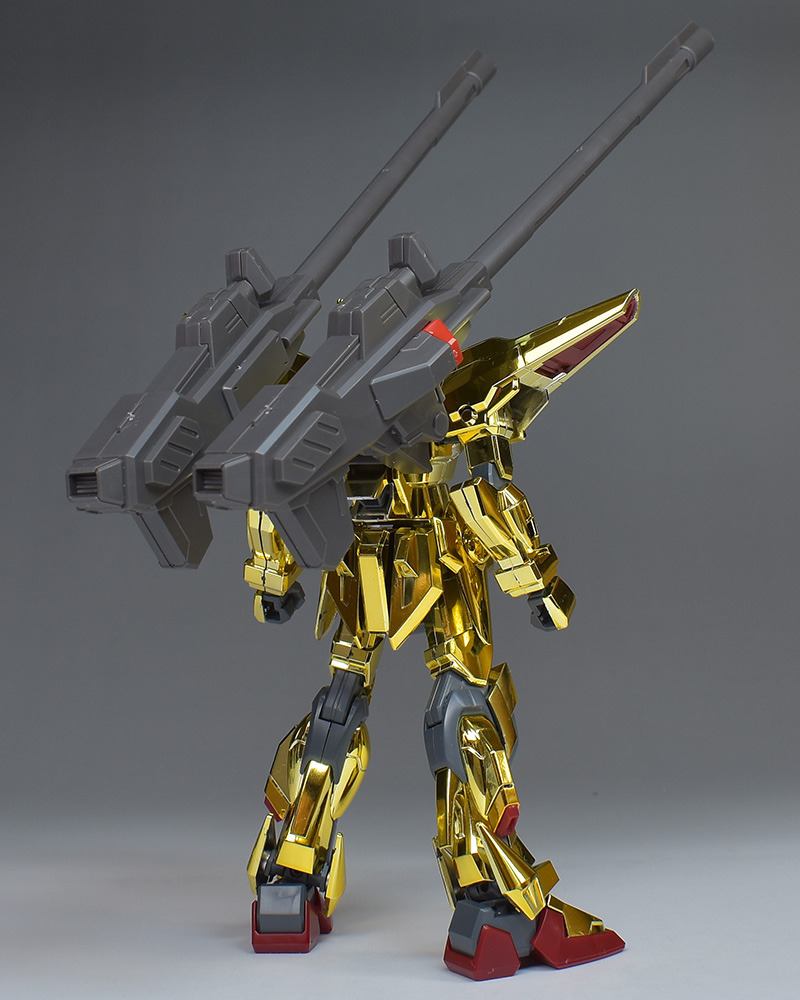
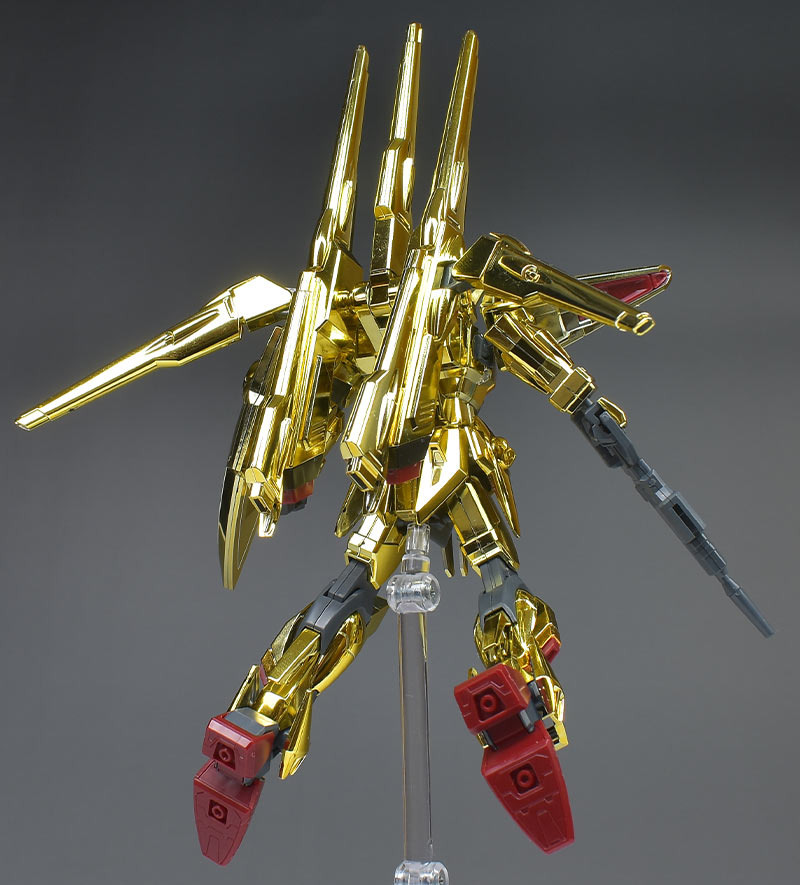
左右のビーム砲マウント基部は前後や上下にスイング可能。
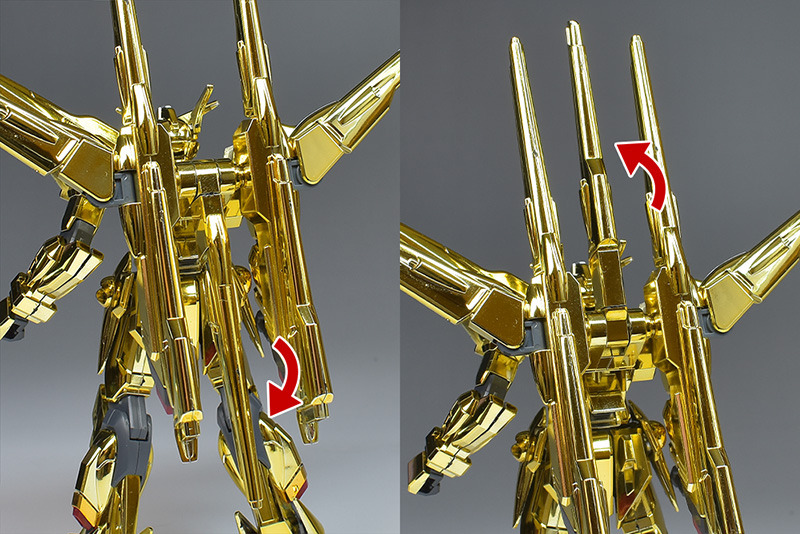
スタビライザーも上下にスイングさせることができます。
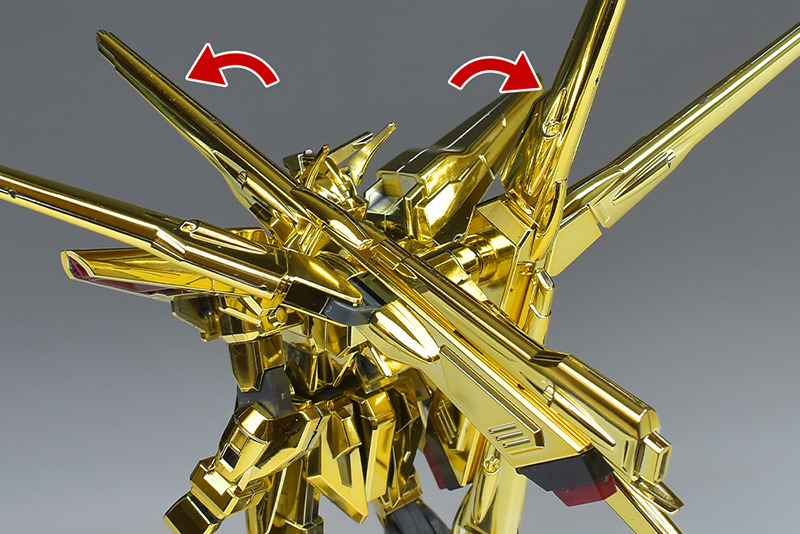
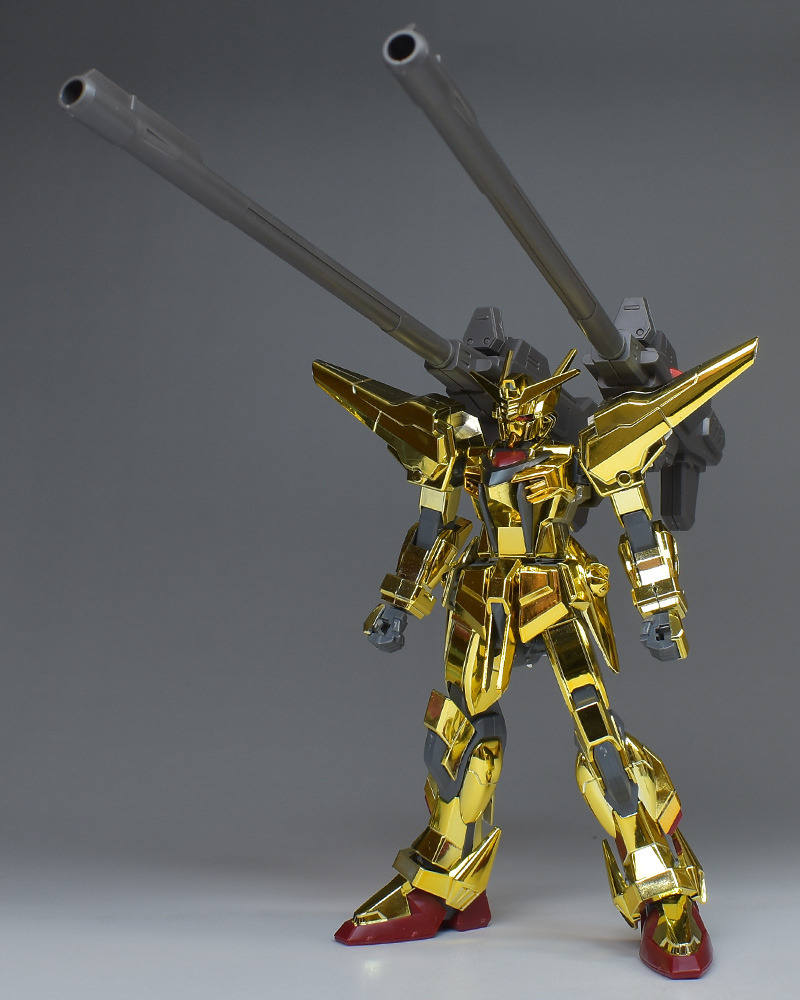
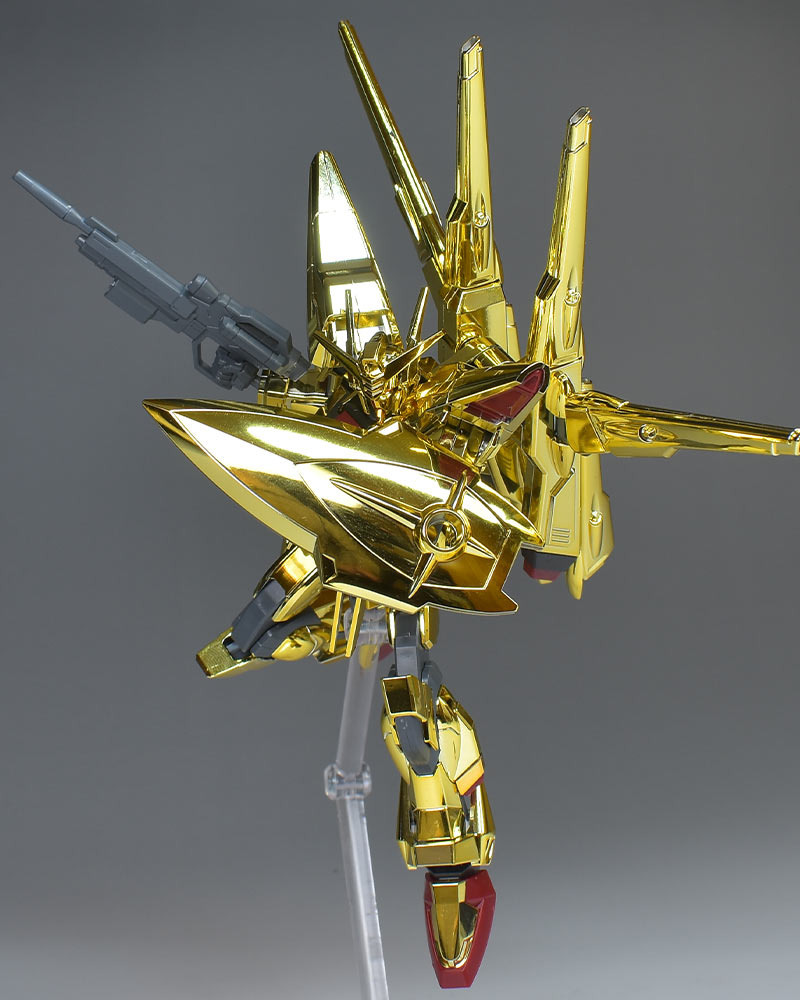
ユニット基部も前後にスイングが可能。なので前方に向けてキャノンで射撃するようなポーズも再現することができます。
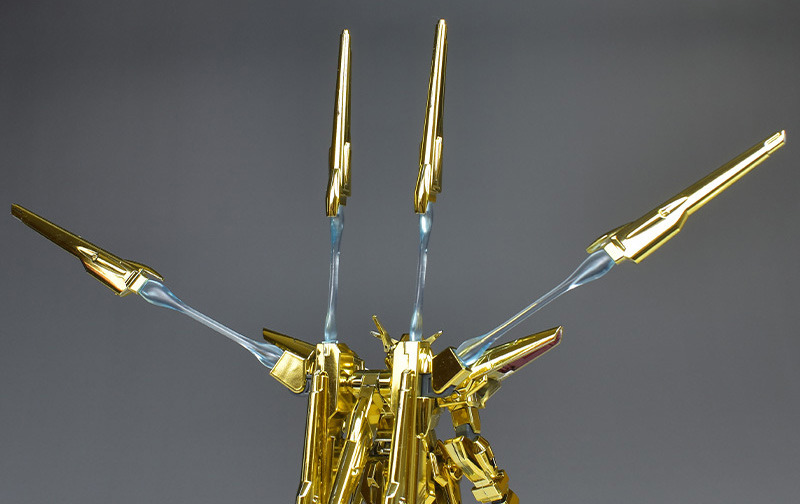
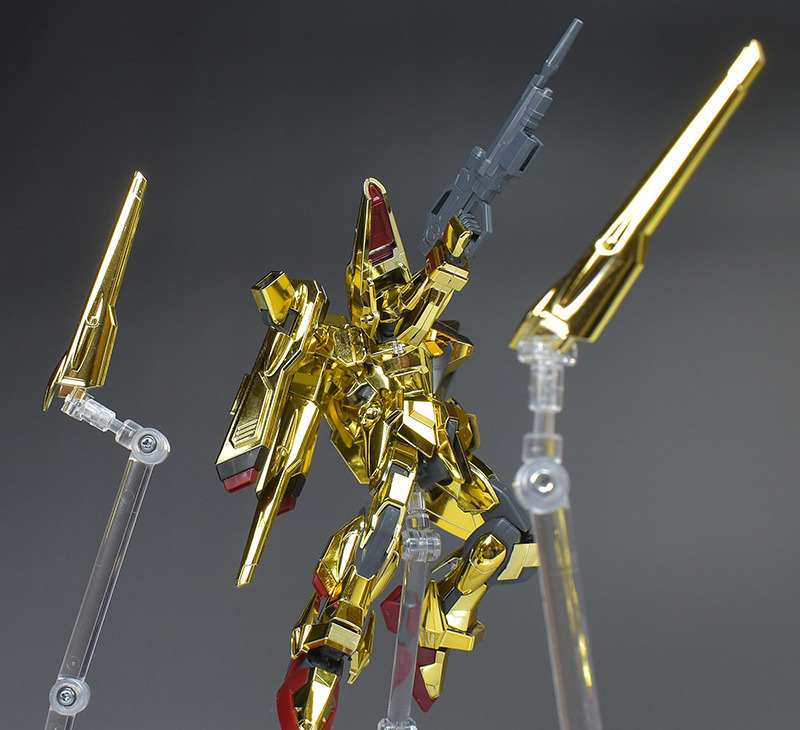
付属のエフェクトパーツを組み付けることで、ビーム砲の射出直後の状態を再現することができます。

エフェクトパーツは組付け部分に少し角度がついているので、組み間違えないように注意します。上部と側面で長さも違っているので注意。

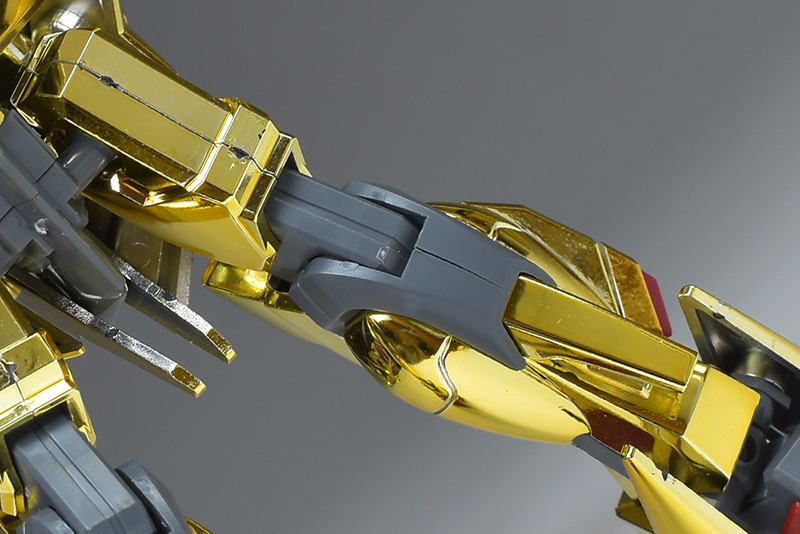
背部バックパックとアカツキ本体とはポリキャップによる1ダボ接続。アカツキの背部フレームは一部をグレーに塗り分けが必要です。下部の角型スラスター内部も別パーツで細かく色分けされています。
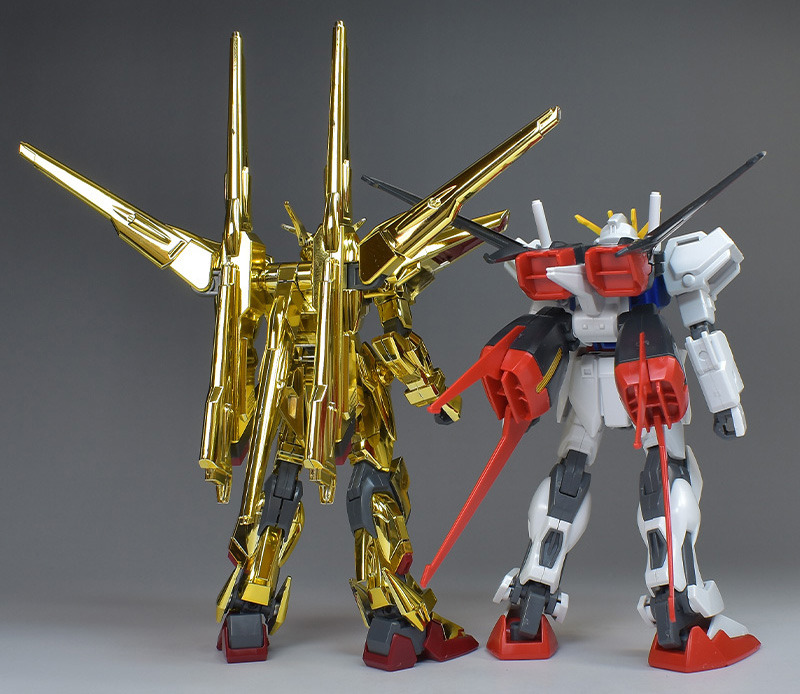
背部形状がHG エールストライクガンダムなどと同形状なため、発売されているストライカーパック各種を装備させることができます。まずはエールストライカーを装備して。(HG SEED、HGCE共に装備可能。)
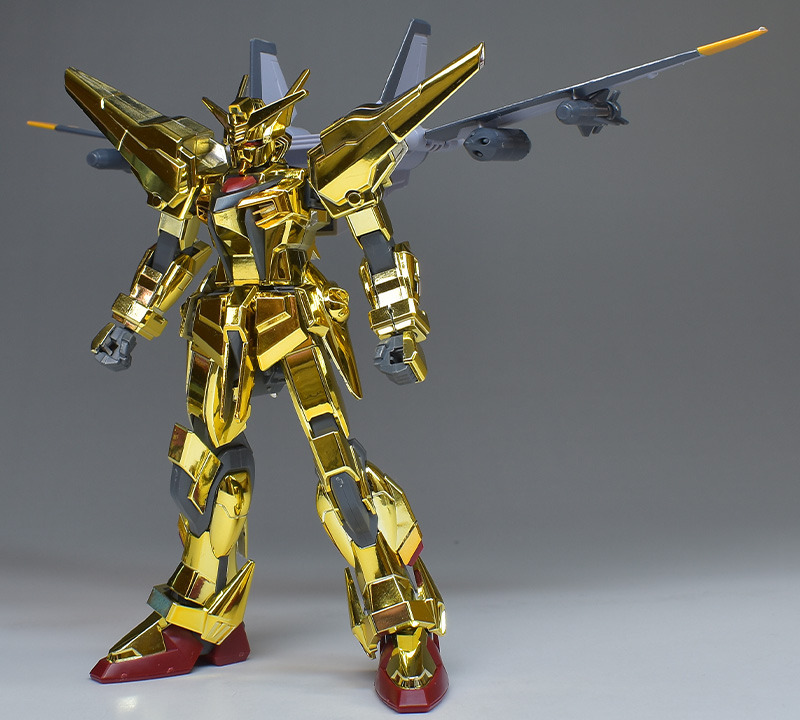
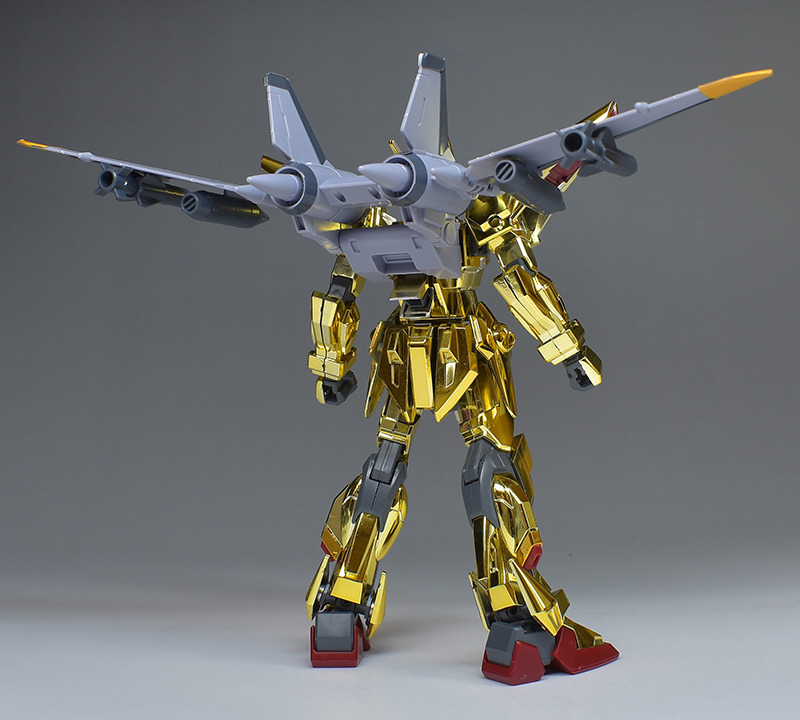
ジェットストライカー(HGウインダムに付属)を装備して。アカツキの造形バランスが良いからか、どのストライカーパックを装備しても合いますね。
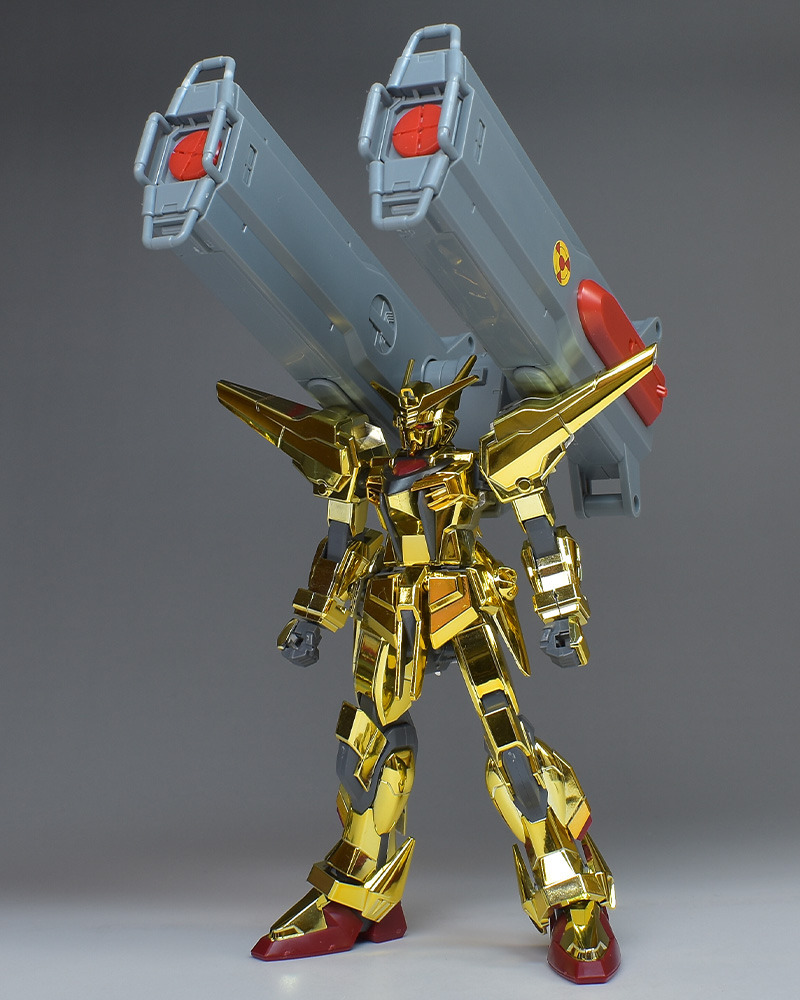
その他、マルチランチャーパックやドッペルホルン連装無反動砲も装備させることが可能。マルチランチャーパックはかなり重量がありますが、バランスよく配置することで問題なく自立させることができます。
ちょっと固定が甘いですが、フライトユニット(HGガンダムアストレイレッドフレーム フライトユニット装備に付属)も一応組み付けが可能でした。
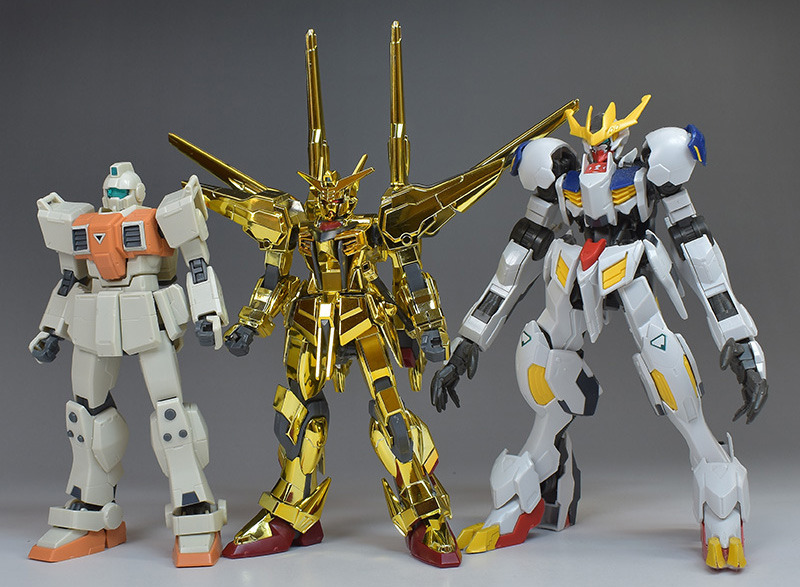
HG陸戦型ジム、HGルプスレクスと並べてサイズを比較。HG SEEDシリーズなので比較的小柄。本体部分だけだと陸ジムよりも小さいくらいですが、背部ユニットが大柄なため、その分幅と高さが増しています。シラヌイアカツキの全高は18.74m。
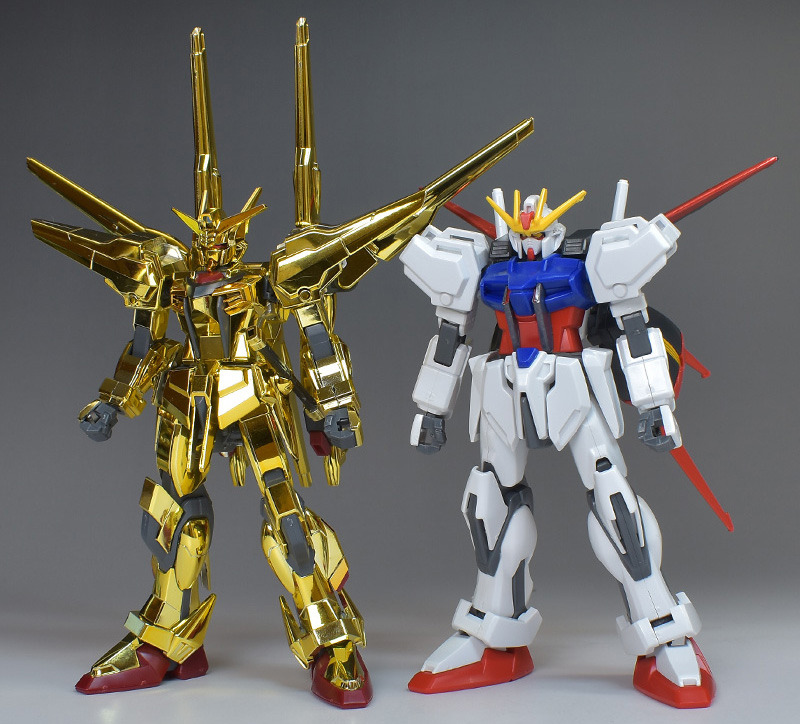
設計が流用されたため、構造に共通点が見られるというストライクガンダム(HG SEED エールストライクガンダム 2002年11月発売)と並べて。発売時期に4年ほどの差がありますが、アカツキのほうが脚長でプロポーションが良く見えますね。
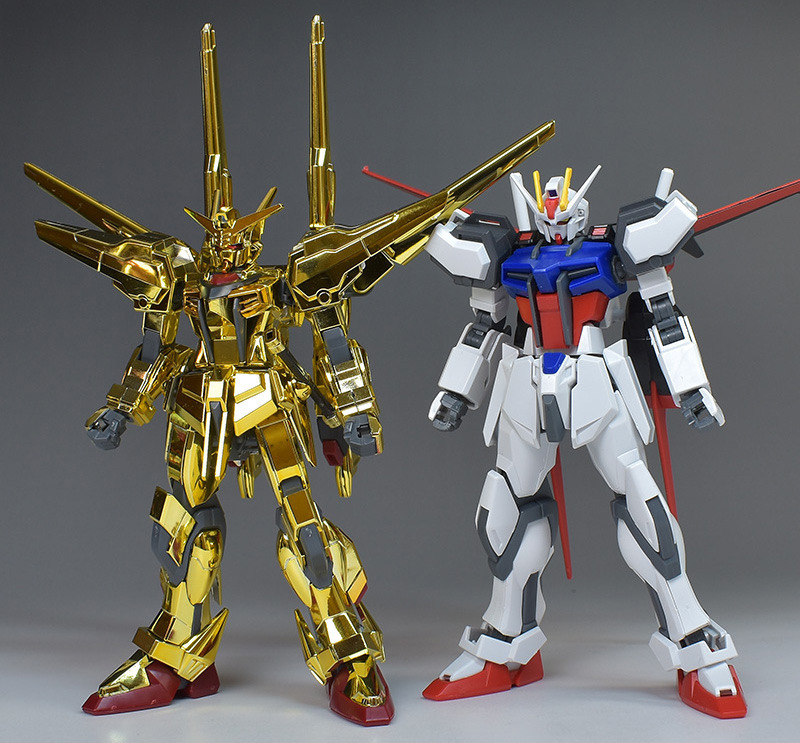
HGCEエールストライクガンダムと並べて。多少プロポーションに差はありますが、並べてもそんなに違和感はないのかなと思います。
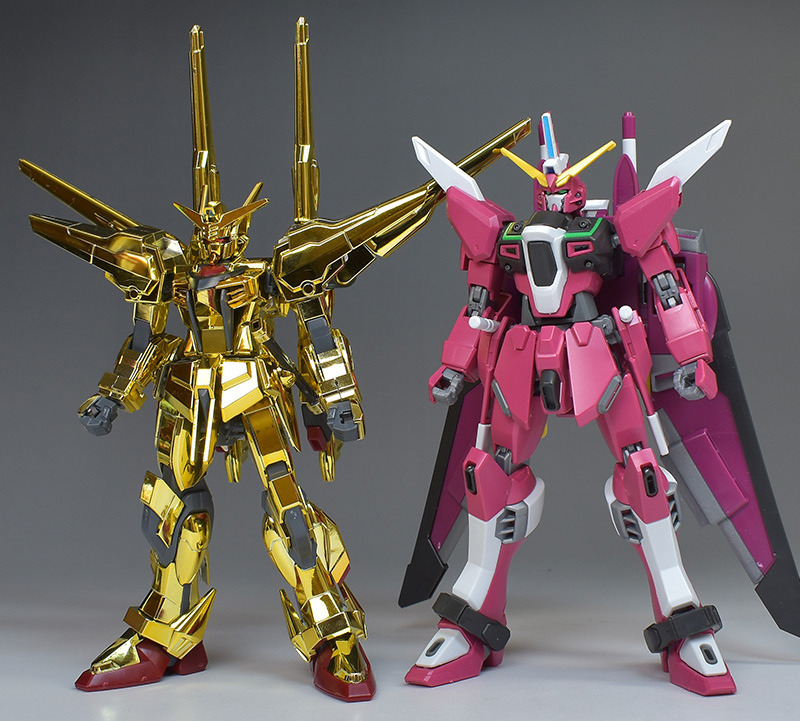
劇中で共にレクイエムを撃破したインフィニットジャスティス(HGCE インフィニットジャスティスガンダム)とも並べて。
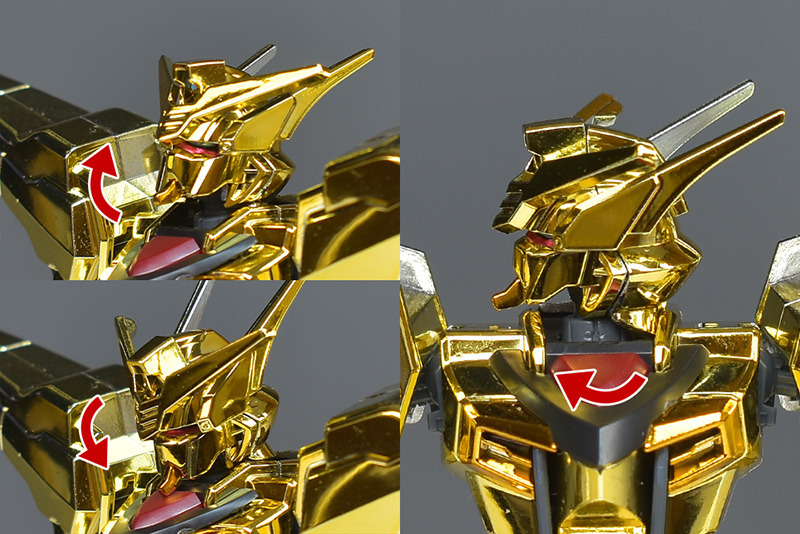
顎や襟が干渉するため、頭部は少し上下する程度。顎が少し干渉しますが、左右へは問題なくスイングさせることができます。
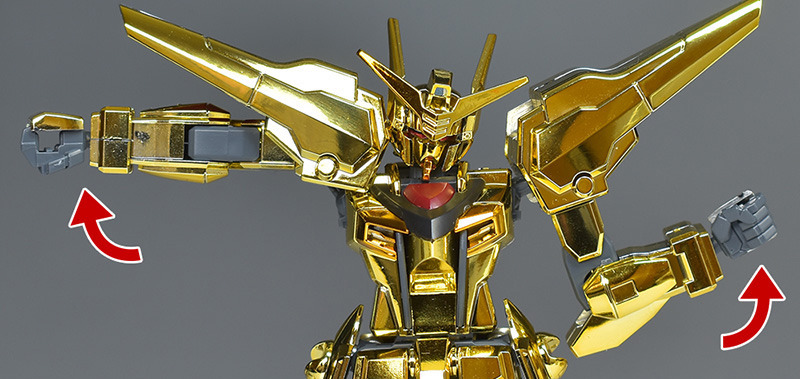
ショルダーアーマーが干渉し易いですが、腕は水平まで上げることができます。肘は1重関節で90度程度まで曲げることが可能。
肩はダブルボールジョイントによって少し前後にスイング可能。前方へは広めにスイングできるようになっています。

腰のポリキャップの可動によって上半身を少し前後させることができます。
腰は干渉なく360度回転可能。アクションベースやスタンドへは、股間部のカバーパーツを外し、ポリキャップ穴に3.0mm軸を差し込んでのディスプレイです。
前後開脚は、フロントアーマーが適度に可動するため、前方へは広く展開させることができます。後方はリアアーマーが可動しないのでそれなり。
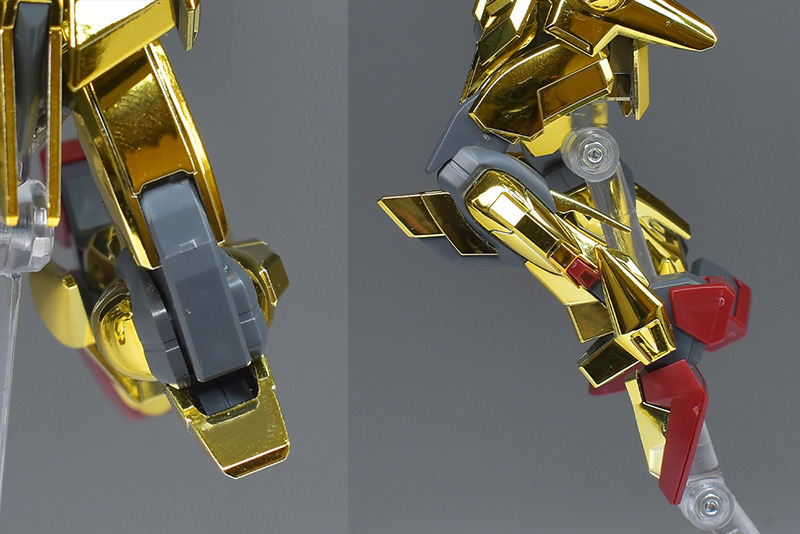
膝は2重関節でくの字程度まで曲げることが可能。
足首は前後左右ともまずまず可動します。
股間部がボールジョイントなので、左右への開脚はハの字程度まで。
内股、ガニ股は共に45度程度まで可動します。
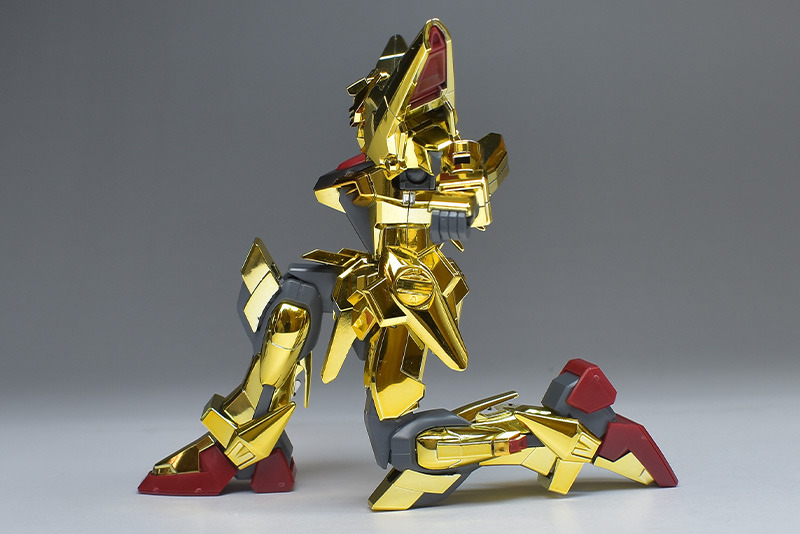
立膝はまずまずきれいな姿勢で再現することができました。
可動域の総括としては、大部分はHG SEEDのフォーマットでまずまずの可動域。肩部はショルダーアーマーが大柄なため、干渉が気になるところですが、ダブルボールジョイント構造でそのぶん広く可動するようになっています。これだけ可動すればポージングでもそんなに不自由な感じはなさそうですね。
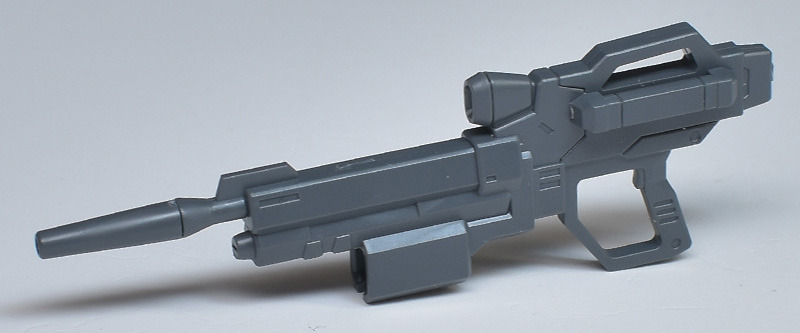
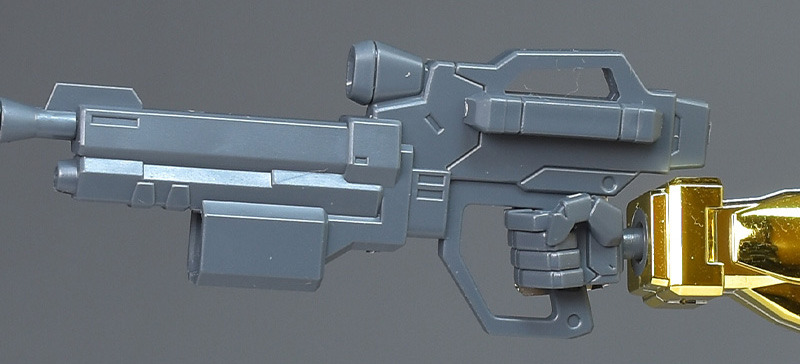
72D5式ビームライフル「ヒャクライ」。アカツキ計画が凍結された後に改めて開発されたビームライフルで、コンパクトながらも威力は高く、「百雷」という名前に相応しい連射性能に優れているとのこと。上部のセンサーは白く塗り分けが必要です。
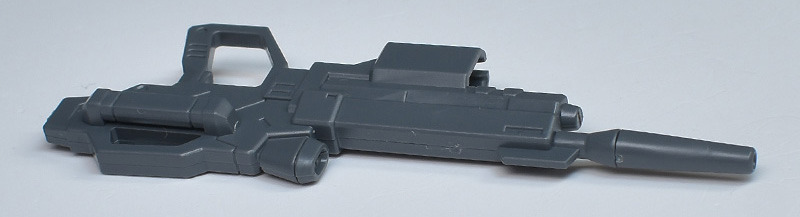

本体部分は簡単なモナカ割で上下に合わせ目ができます。
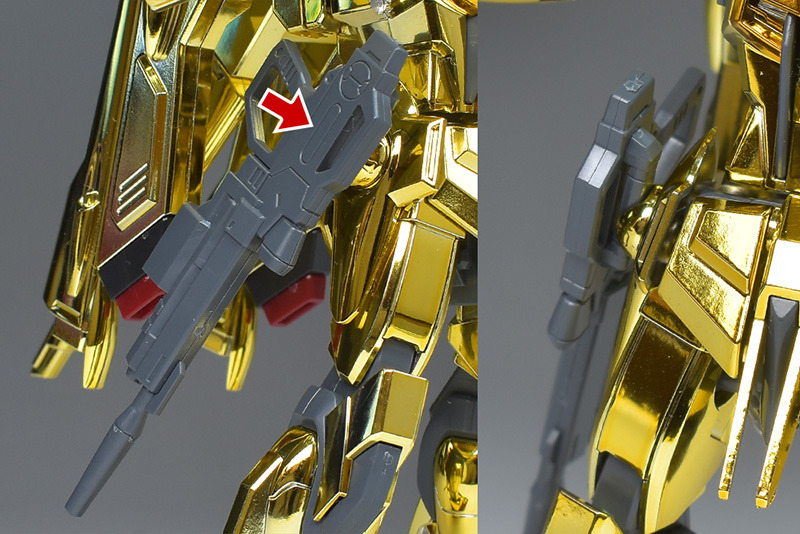
ヒャクライはサイドアーマーにマウント可能。はじめはある程度固定できますが、徐々に外れやすくなってくるので注意です。
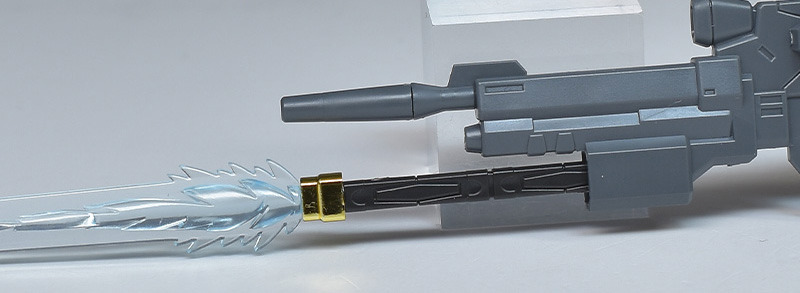
銃身下部には連結型のビームサーベル柄がマウント可能。銃剣として使用することができます。

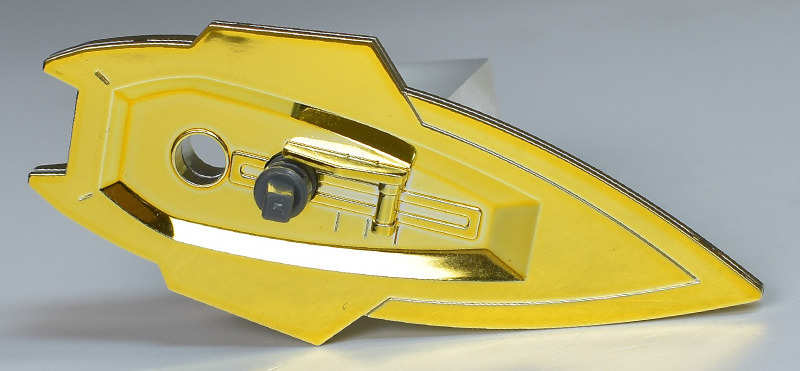
試製71式防盾。アカツキ専用の試作型シールドになります。主にミサイルや砲弾などの実体弾兵器の防御を行うとのこと。下端が鋭く尖っているため、接近戦では打突兵器としても使用することができます。簡単な2枚パーツ構成なので、表面の十字周りはブラックとホワイト、下部のふちはホワイトに塗り分けが必要。
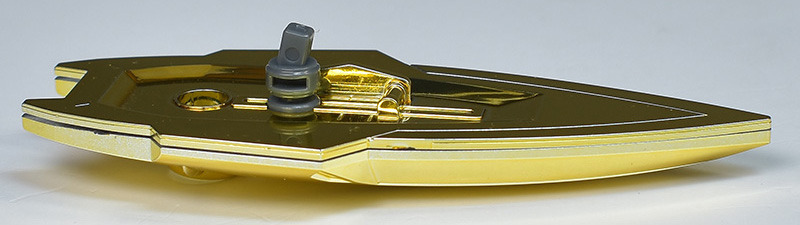
ジョイントパーツを挟んでの2枚パーツ構成で側面に合わせ目ができます。

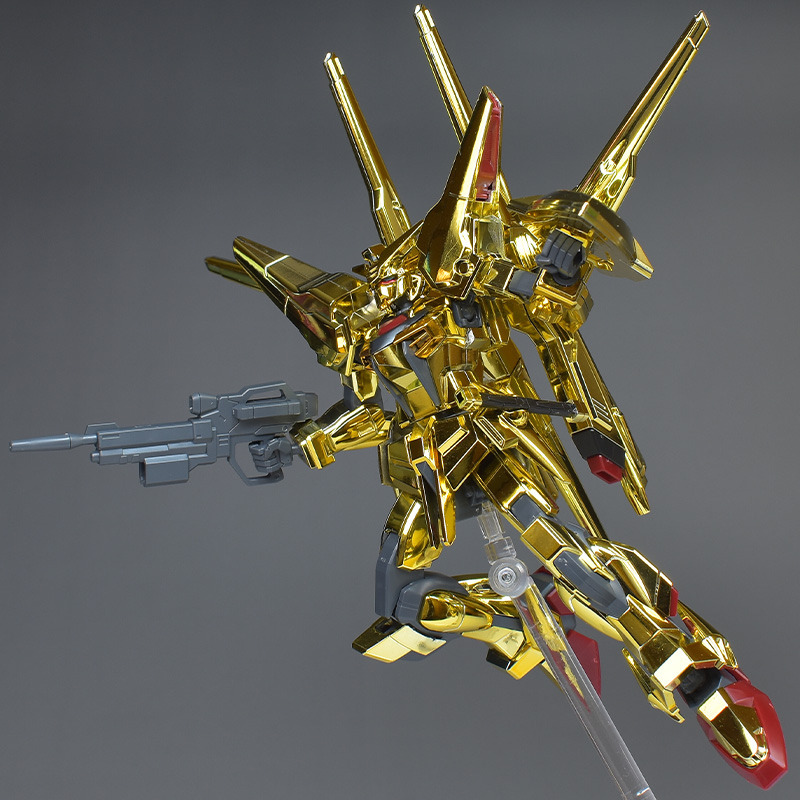
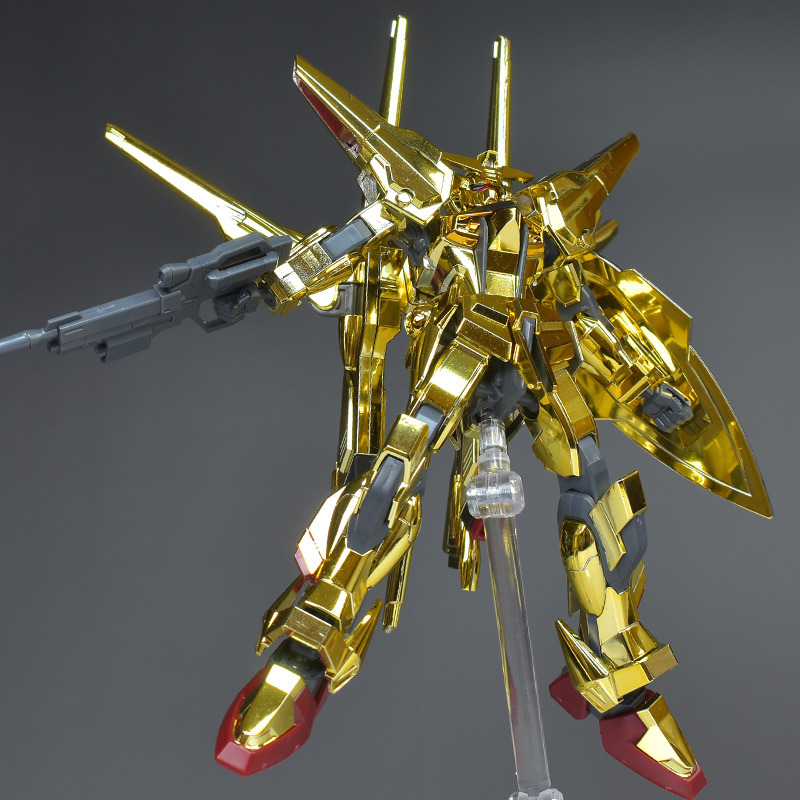
一通り武装して。
ビームライフル「ヒャクライ」は特に専用の持ち手などは付属していないので、通常の握り手でグリップを挟んで保持します。


グリップとハンドパーツとの間に隙間があるため、少しふらつきやすいですが、手甲パーツがしっかりと固定できるので落としたりすることはありません。
試製71式防盾は前腕にダボ固定します。角型ダボでしっかりと固定されるため、安定した保持が可能です。背部のビーム砲が可動するので干渉も避けることができます。
73J2式試製双刀型ビームサーベルもハンドパーツで挟んで保持します。少し隙間があるため、スルッと移動しやすいので、うまくモールドを引っ掛けて中間部で保持できるようにします。
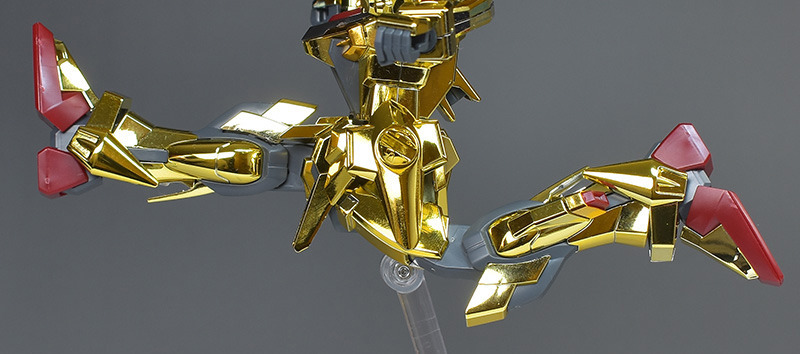
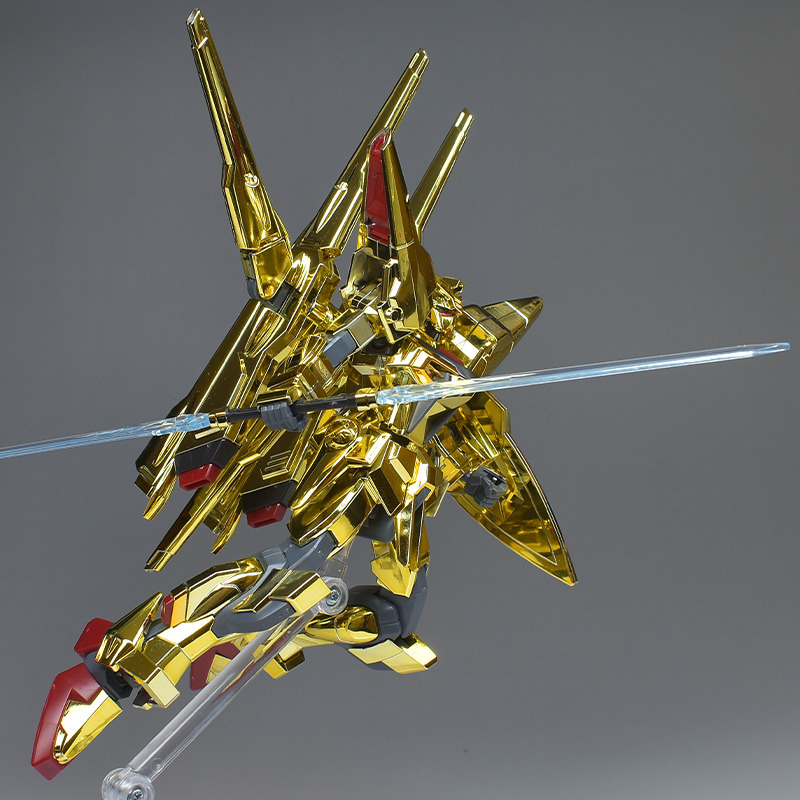
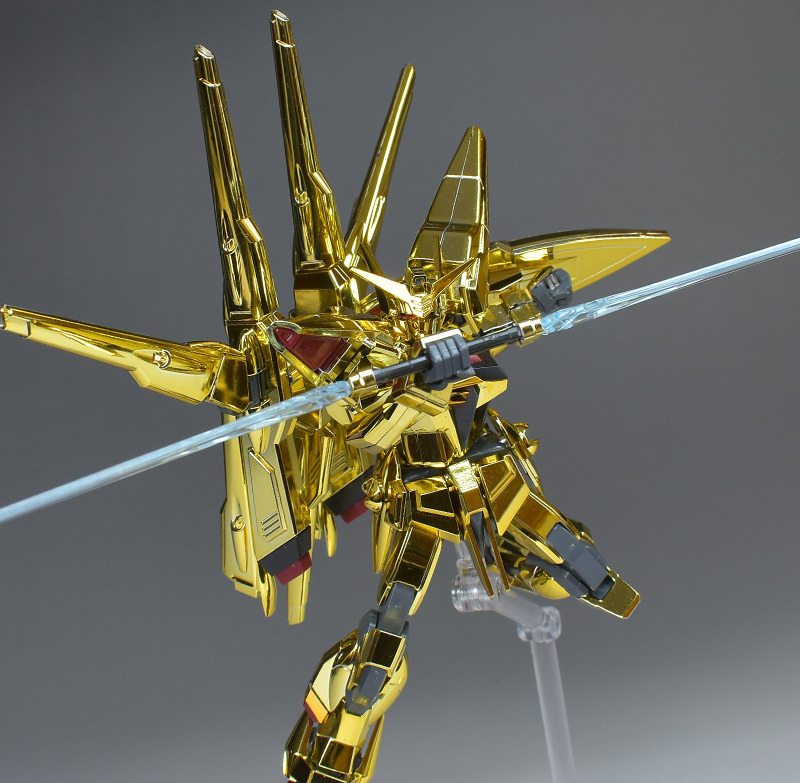
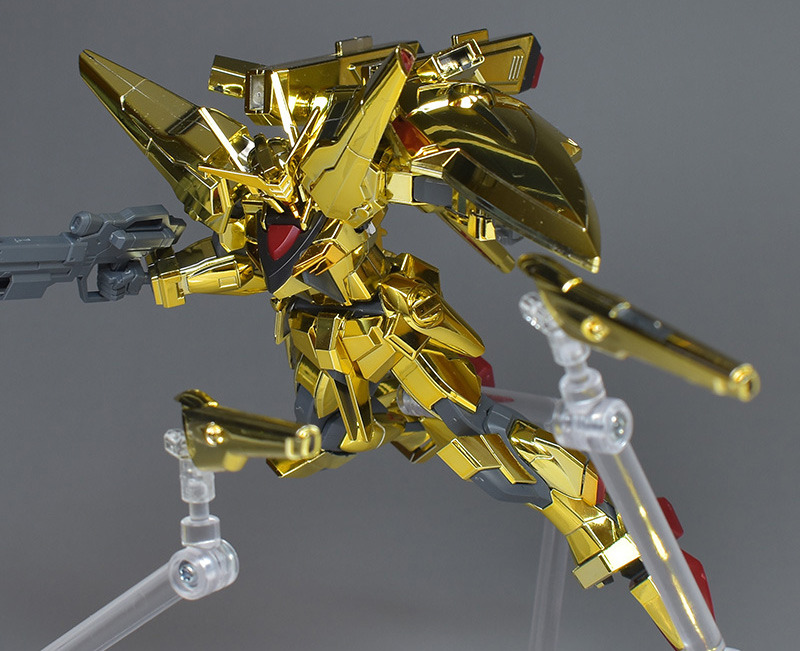
Although it is a little awkward, the poses are good. It can easily recreate poses such as swinging down the beam saber, shooting with the beam rifle, and blocking with the shield. The saber handle on the waist is prone to falling off, so I decided to remove it for the photo.
The beam sabers in their separated state can easily come off the hand parts, so you need to adjust the angle as you hold it.
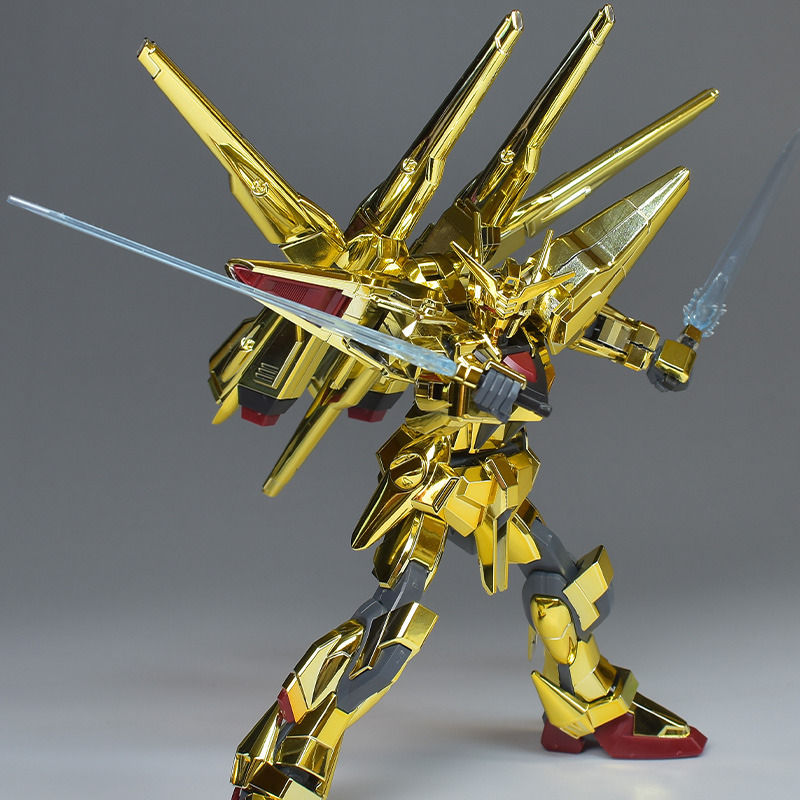
Since the crotch area is a ball joint, it does not open very much and feels a little awkward, but the ankles can bend just enough so it is fairly stable when posing while standing on its own.
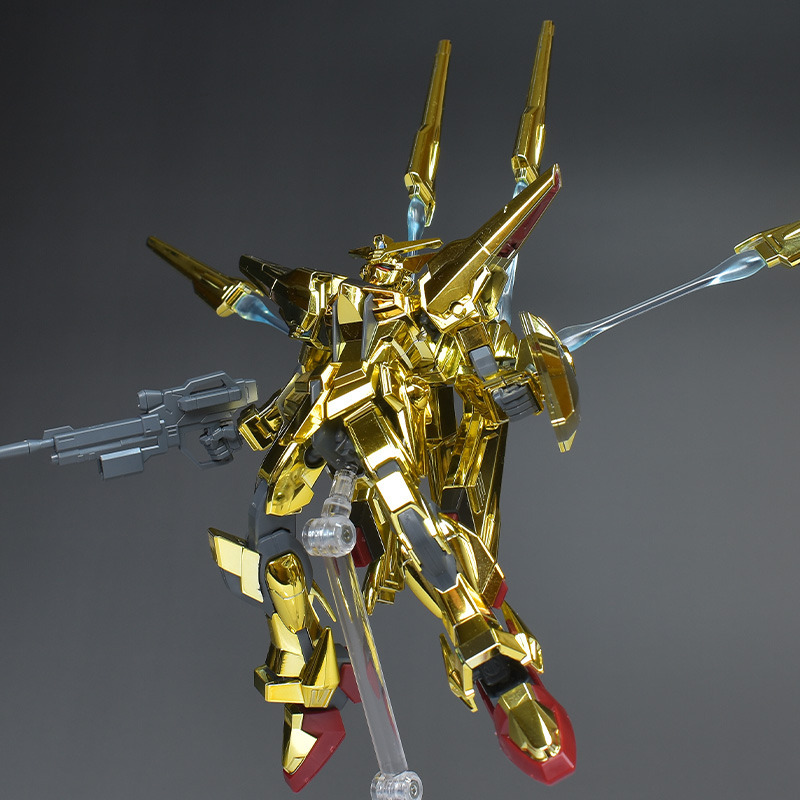
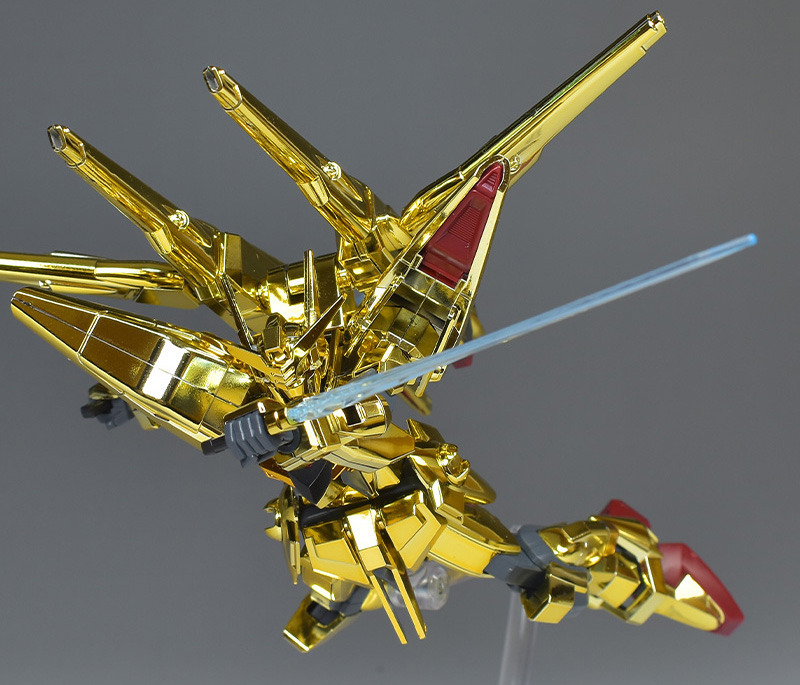
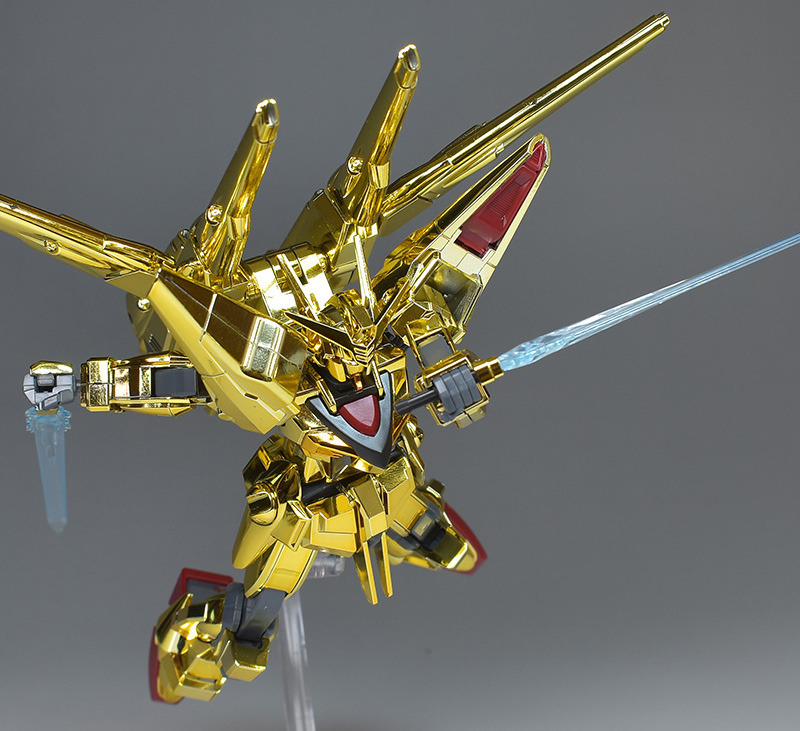
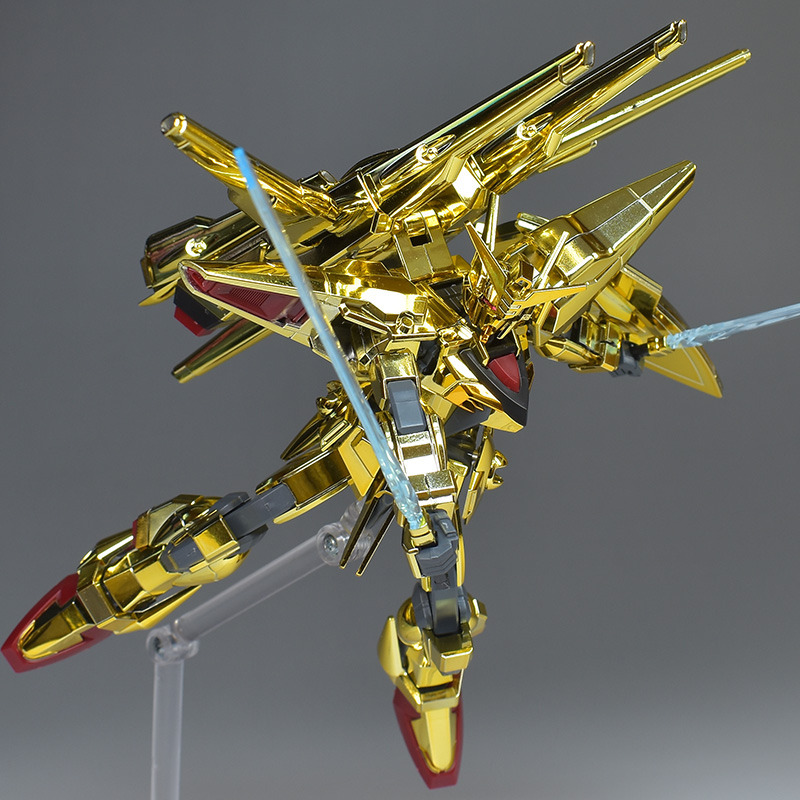
By attaching effect parts, you can recreate the triple beam cannon firing state. Although it is not possible to recreate the beam barrier that protects the Archangel, you can recreate the image of the cannon firing as seen in the movie.
“It’s okay!” “I’m not going anywhere anymore!”
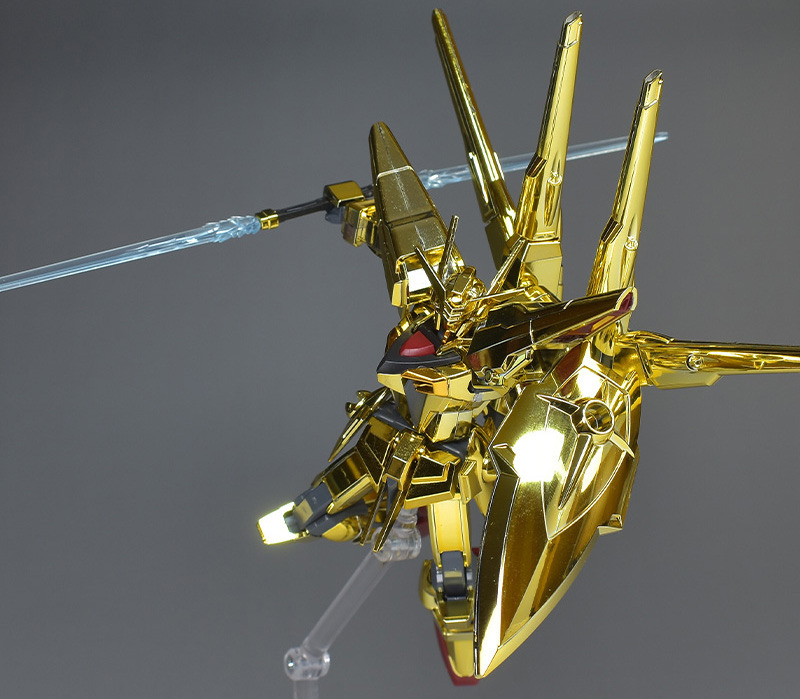
By moving each part, the facial expression can be changed in detail, expanding the range of poses.

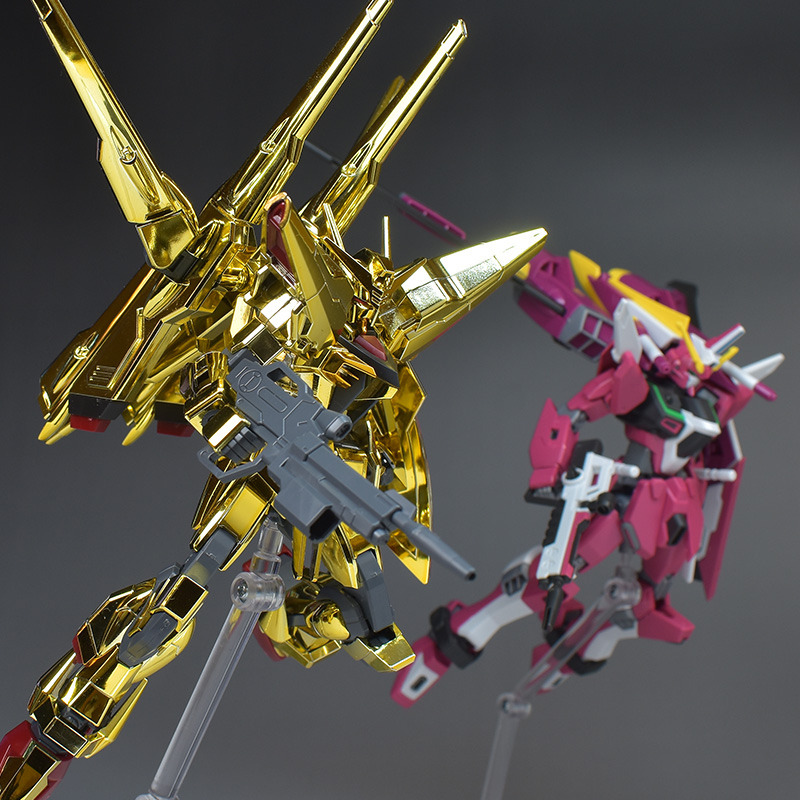
The beam cannon is not compatible with 3.0mm joints, but it can be displayed on its own by attaching the joint parts included with the Mercury Witch Weapon Display Base .

It would also be interesting to combine it with Fatum-01 to recreate the scene where Requiem is destroyed.
Please feel free to take a few.

The gold plating is gorgeous and gorgeous, and the brilliant appearance shown in the HG remastered version is well reproduced, giving it a different look from the normal aircraft. The color separation of the parts is also very detailed, and the fact that it doesn’t require much painting is a nice touch. The modeling is solid and the gimmick is well reproduced, and the back beam cannon can be realistically reproduced in its ejection state.
The only point of concern is that although it is roughly stated that the undergate specification requires cutting the gate, the assembly flow does not indicate where the undergate is located. Therefore, care must be taken not to leave gate marks. If they are left, there may be gaps in the joints. Also, be aware that the saber handle and beam rifle assembled on the waist can easily fall off.
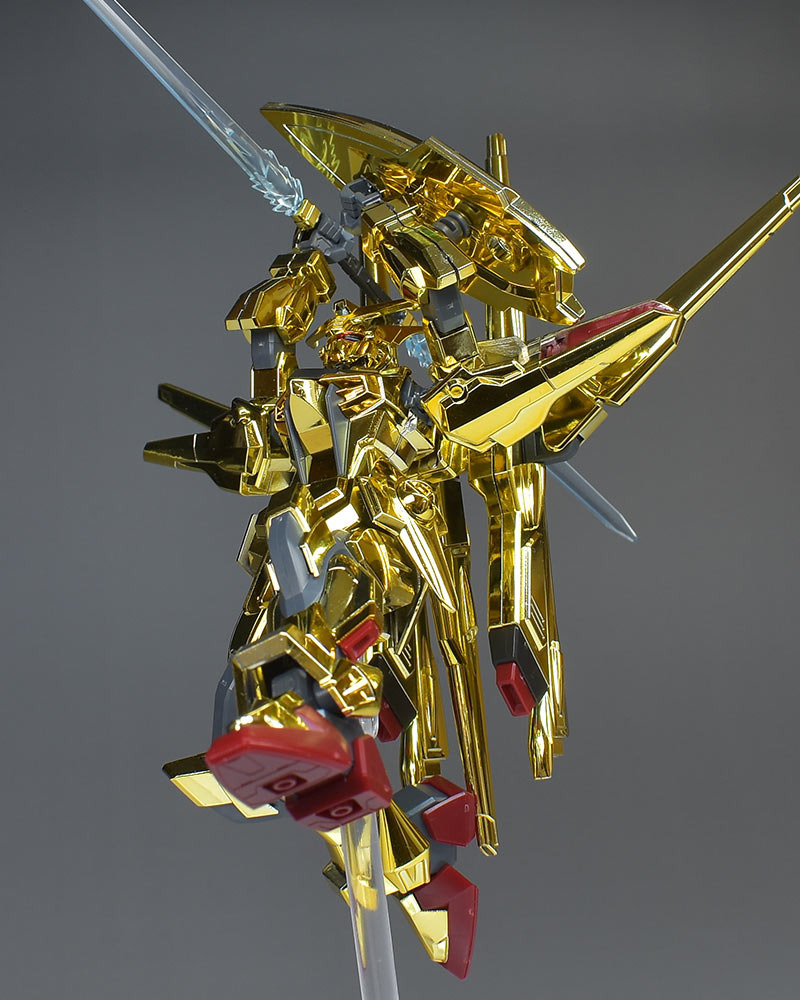
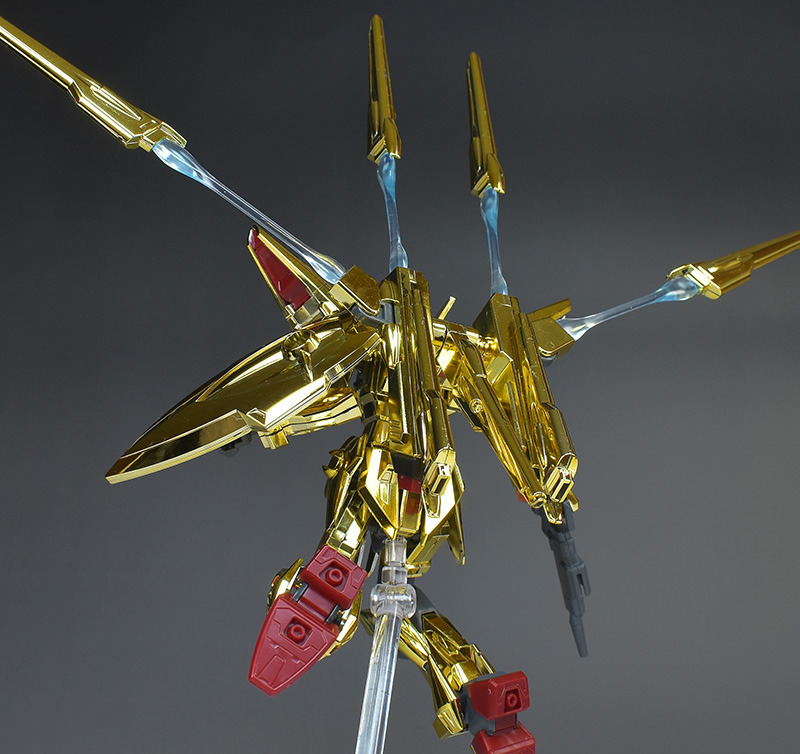
The three beam cannons can be reproduced in the ejection state with effect parts, and if you play your cards right, you can display it as a stand-alone model like the Dragoon. The back unit is also movable in detail and has sufficient expressiveness. It was also present in the theatrical version of SEED FREEDOM, but it would be great if the Zeus silhouette and other interlocking items that give the image of the play are also made into a kit as a Gunpla.

Leave a comment