


This time, we will be reviewing
the HG 1/144 FP/A-77 Gundam Falact !
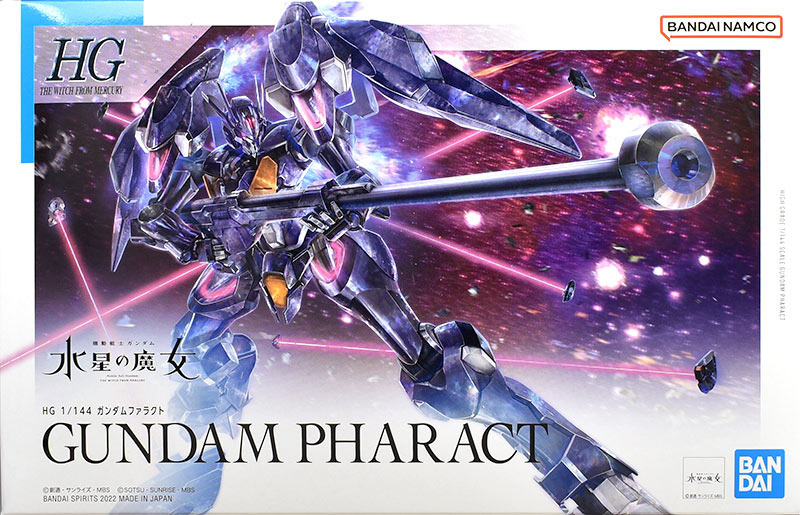
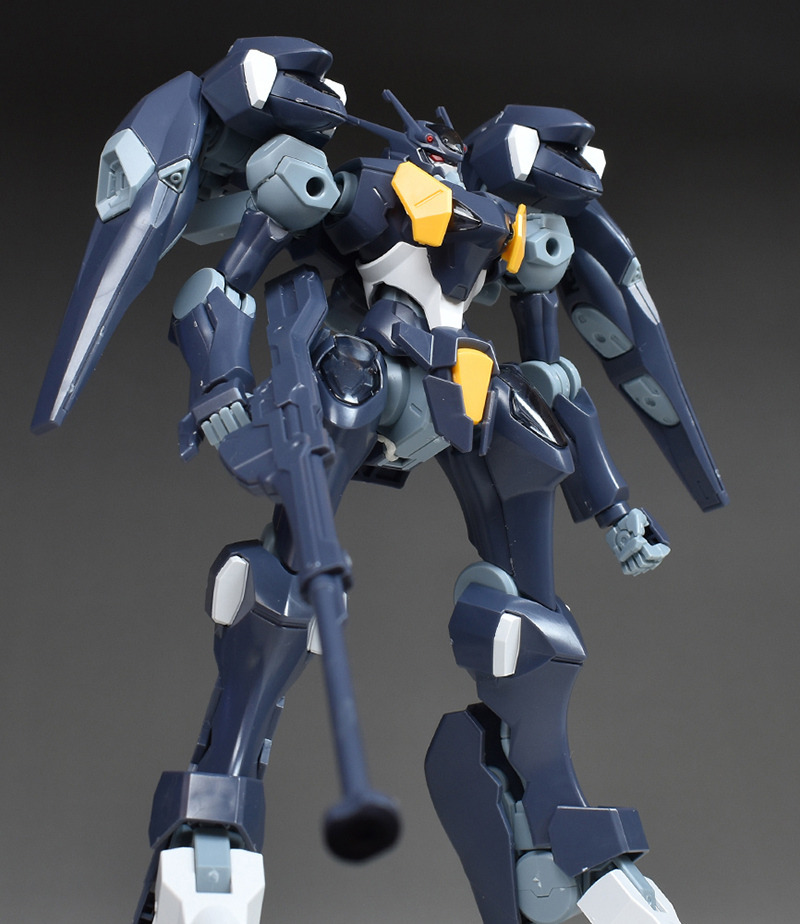
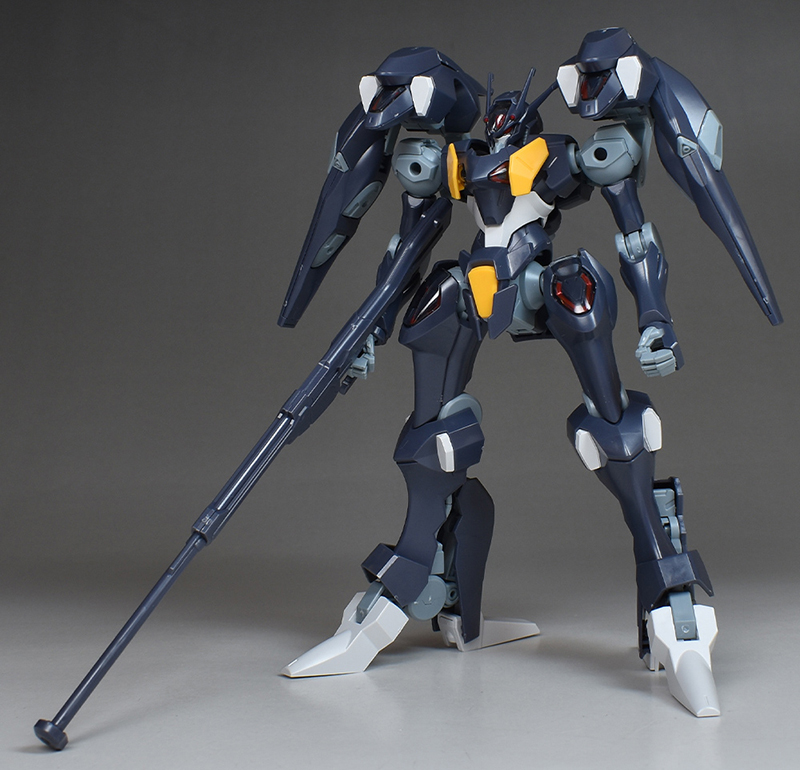
HG Gundam Falact is a 1/144 scale model kit of the MS “FP/A-77 Gundam Falact” that appears in “Mobile Suit Gundam: The Witch of Mercury”. The slender and characteristic body shape of the Pale Technologies series is reproduced with new molding. This kit is equipped with various deployment, storage, and transformation gimmicks such as back boosters, gambit deployment, beam saber grip storage, and foldable feet. It comes with a large rifle, beam sabers, and flat hands with expressions. The price is 2,090 yen (tax included).
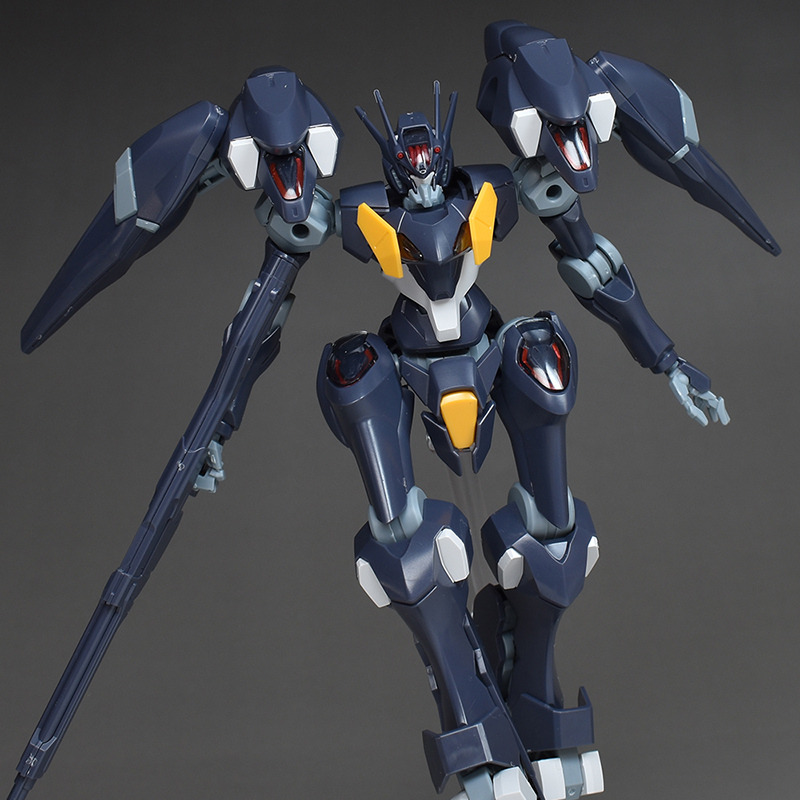
The FP/A-77 Gundam Falact, a Gundam-type mobile suit developed by Pale Technologies and featured by Eren Ceres, which is capable of deploying Gambits with a stun effect and possessing ultra-precise sniping tactics, has been made into an HG kit.
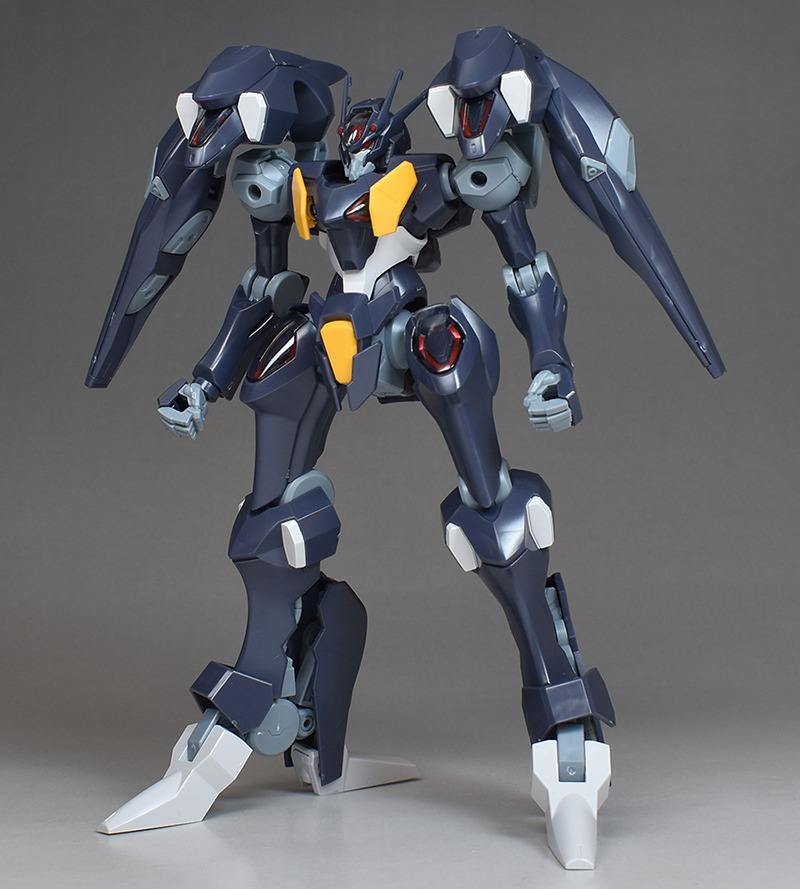
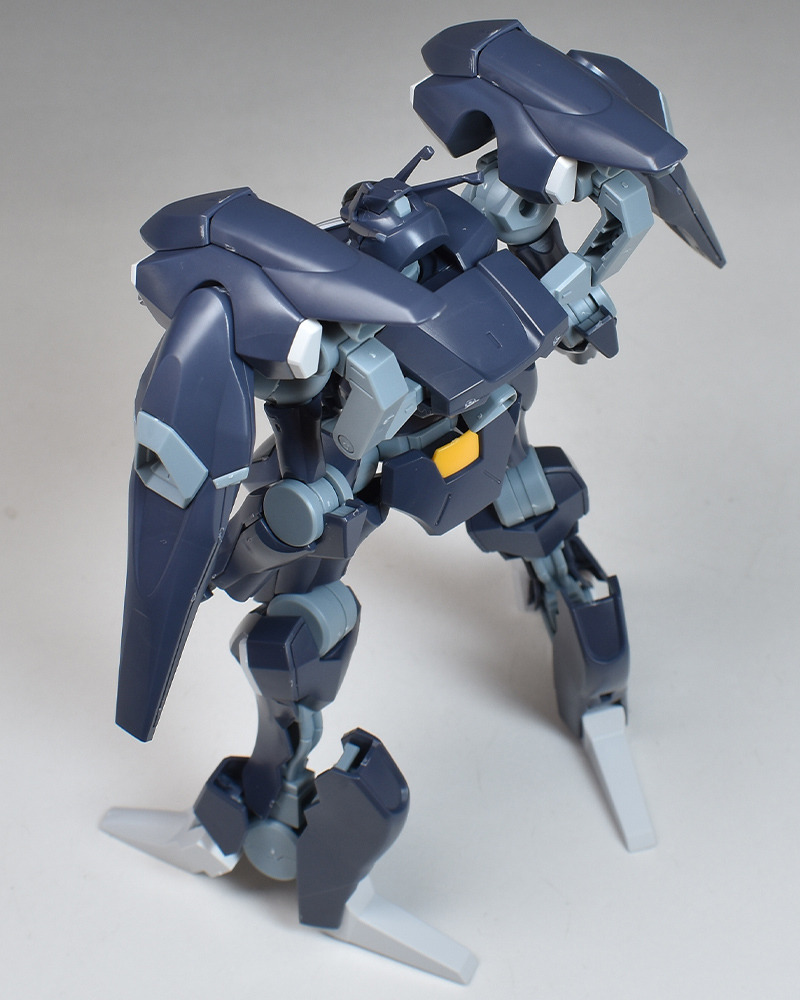
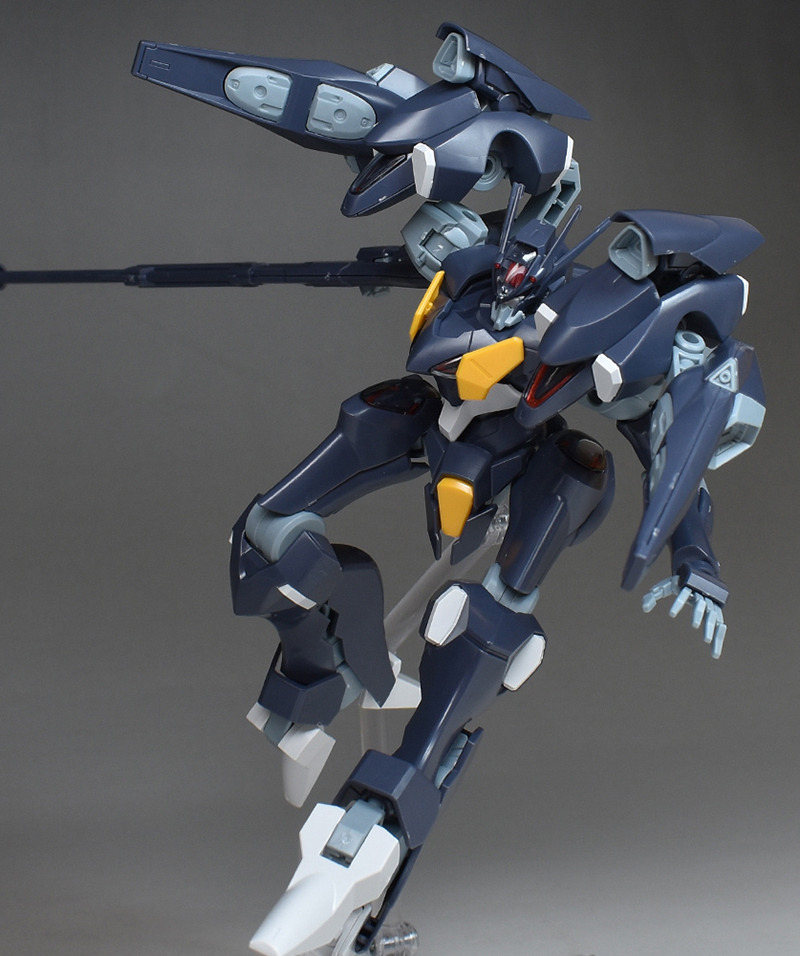
It reproduces its distinctive equipment, such as its slender body shape which prioritizes space combat, the back boosters on both shoulders, the “Koraki” gambit stored in the back boosters, the “Beakfoot” foot unit reminiscent of a bird’s beak, and the “Beam Arquebus” portable firearm for sniping.

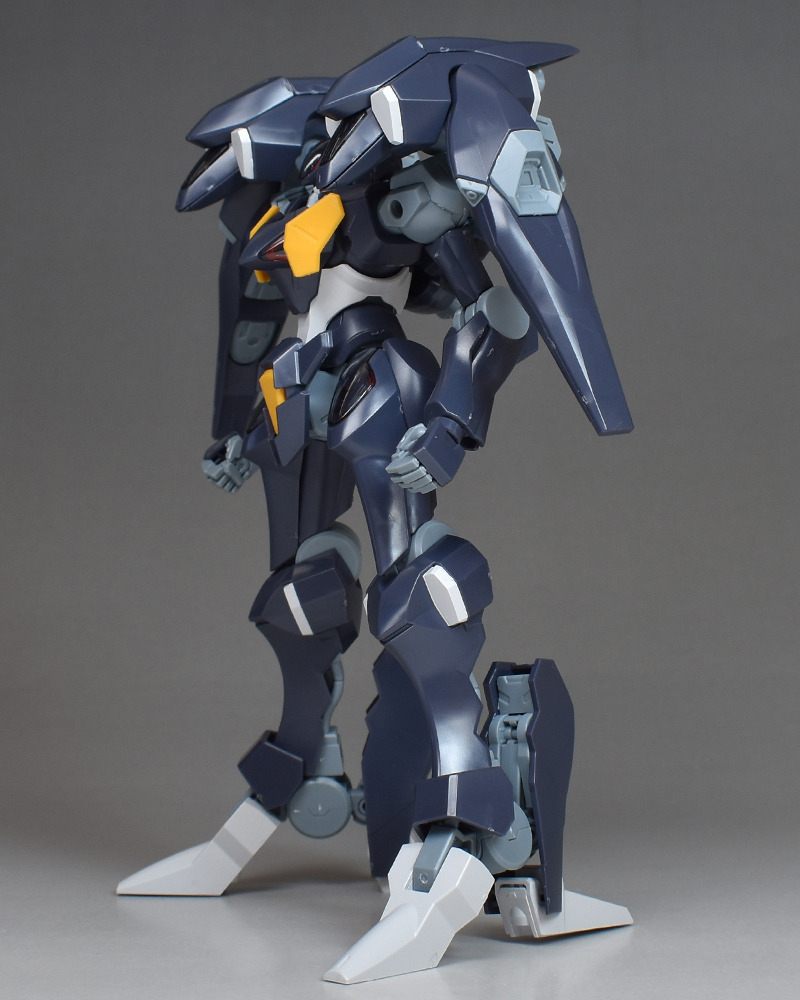
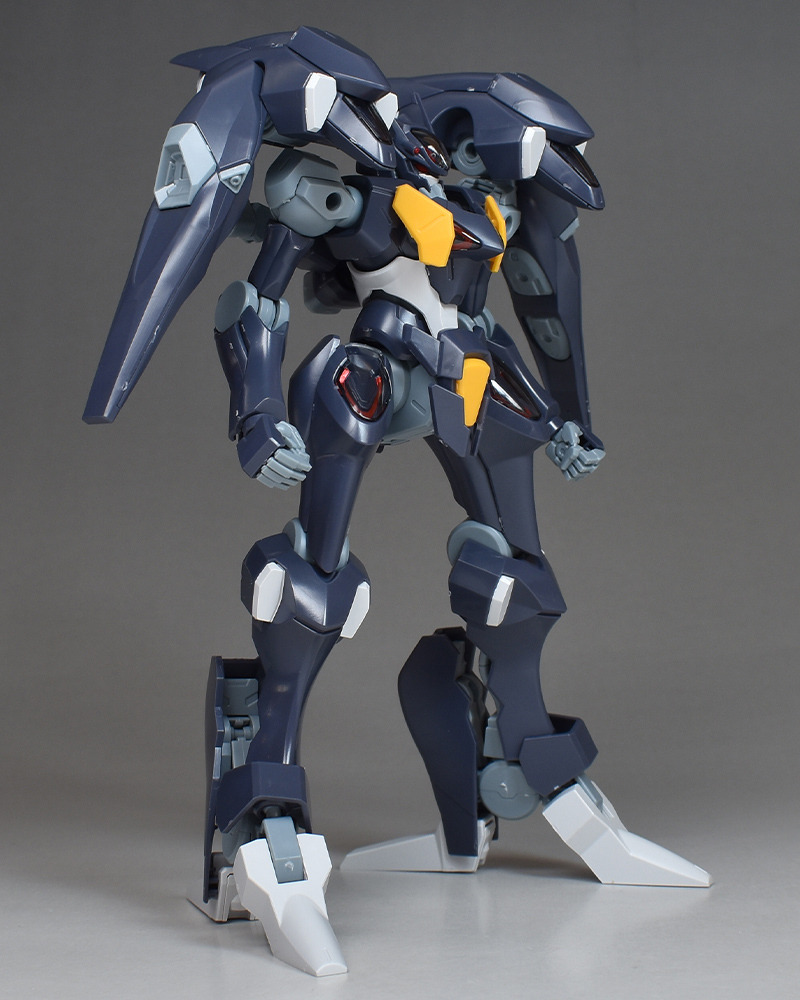
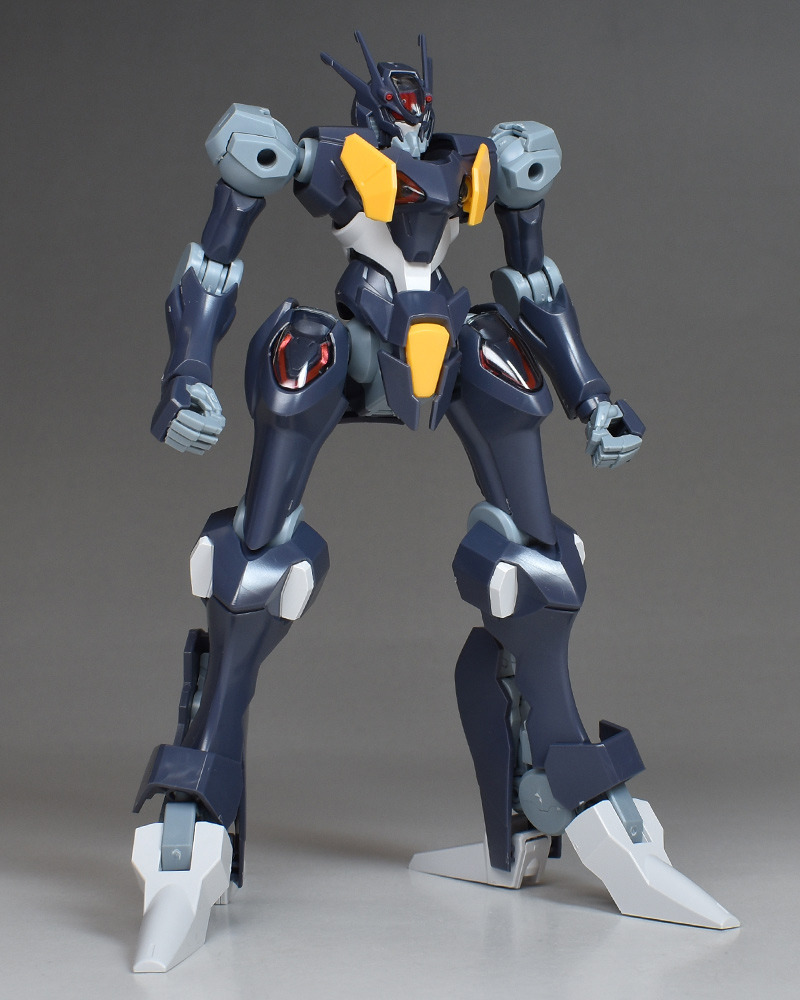
The molding color is a deep blue-gray base with white and orange-yellow accents on various parts of the body. In addition, the head is red, the shell units are clear black, and the joints and interior are gray, giving the figure a heel-like color scheme overall.
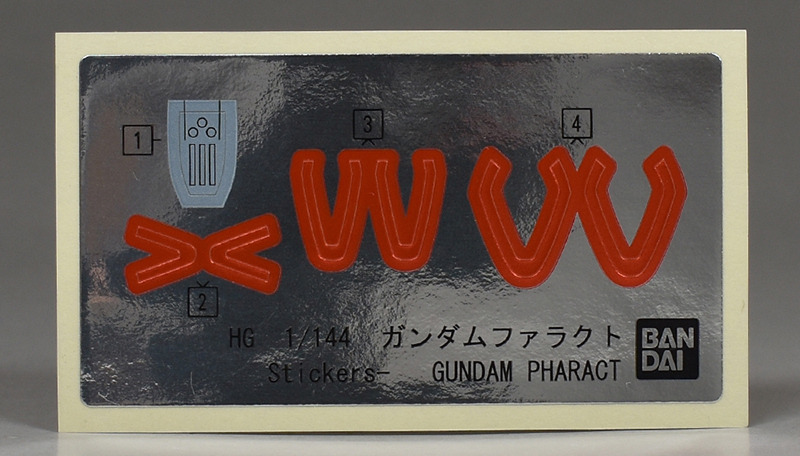
There are not many stickers, just enough to cover the shell units on the head and various parts of the body. The instructions say, “Use stickers as you like.” You can choose between a glowing or non-glowing state for the shell units depending on whether or not you use stickers. This time, I used stickers to make it glow.
The grey molded interior and joint parts are made of matte KPS. No ABS is used. There are many small parts in the head and shell unit, so be careful not to lose them.
No polycaps are used. It is made entirely of parts. The joints are strong, and there is no equipment that puts a special strain on the body, so it stands on its own stably.
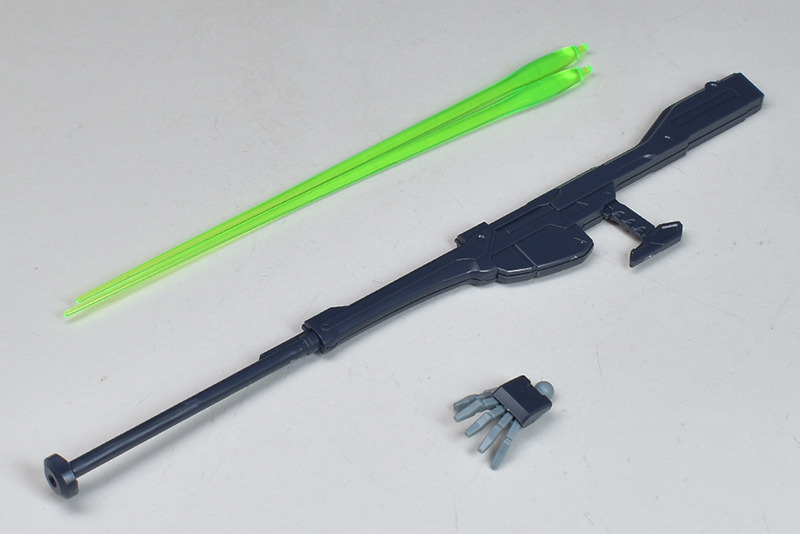
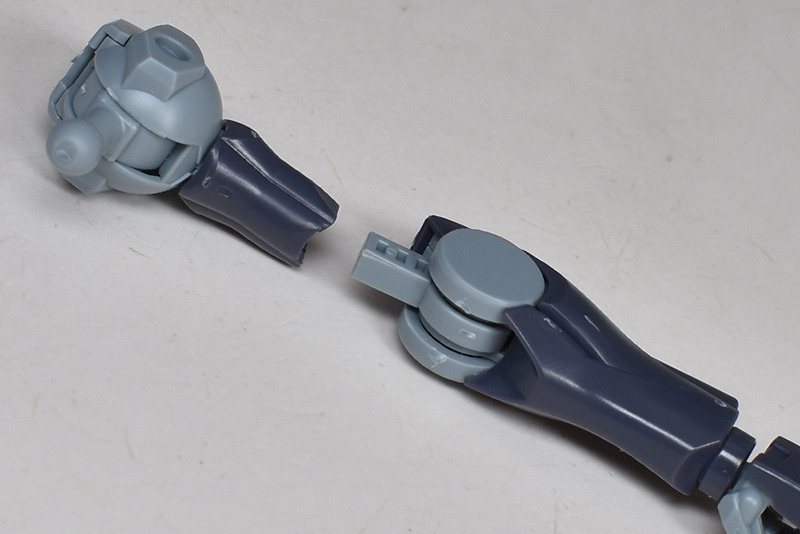
Includes Beam Arquebus, 2 Beam Sabers (beam blade, handle), and flat hand (left).
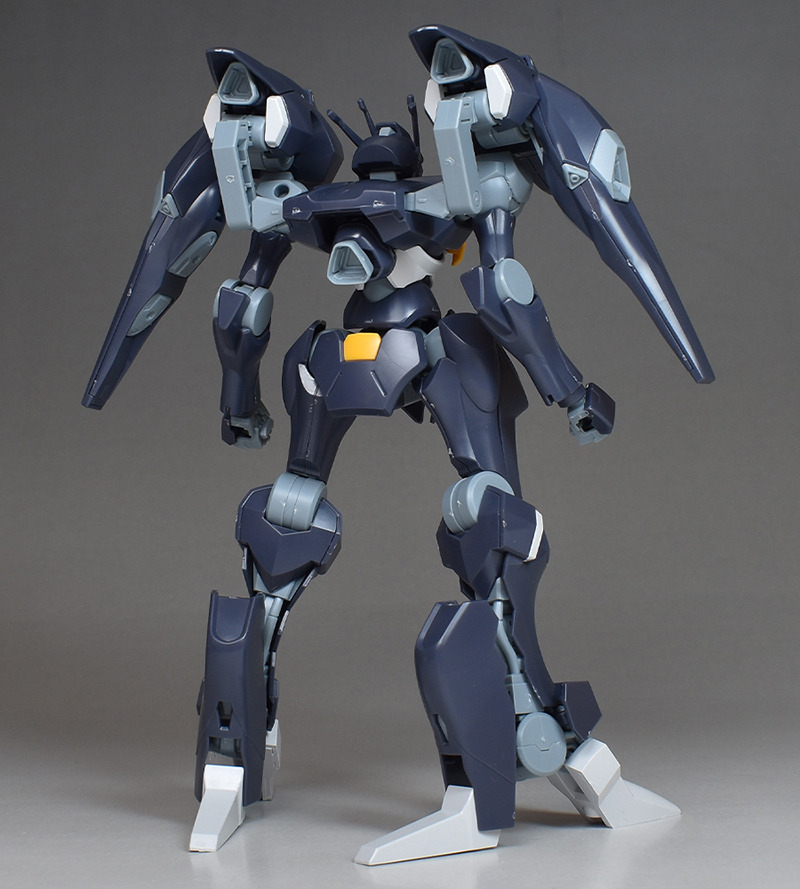
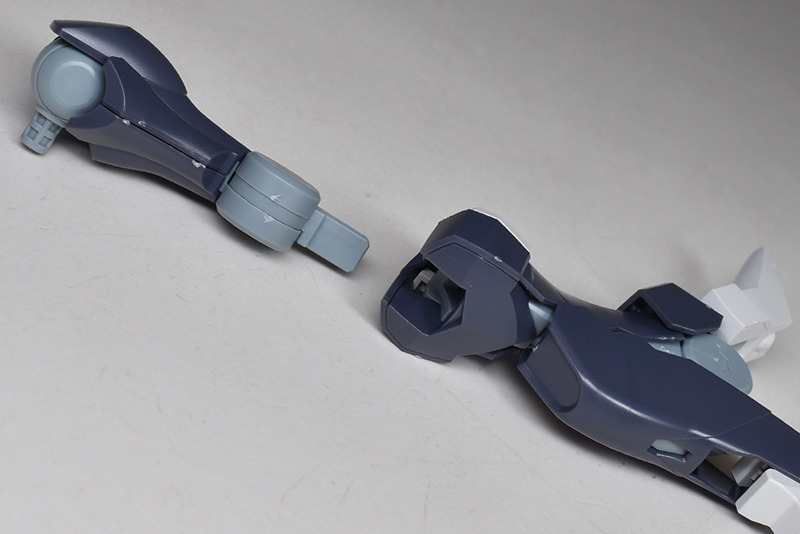
With the backpack (including the shoulder back boosters) removed. Not only is her whole body slim, but by removing the eye-catching back boosters, she appears even slimmer and more delicate.
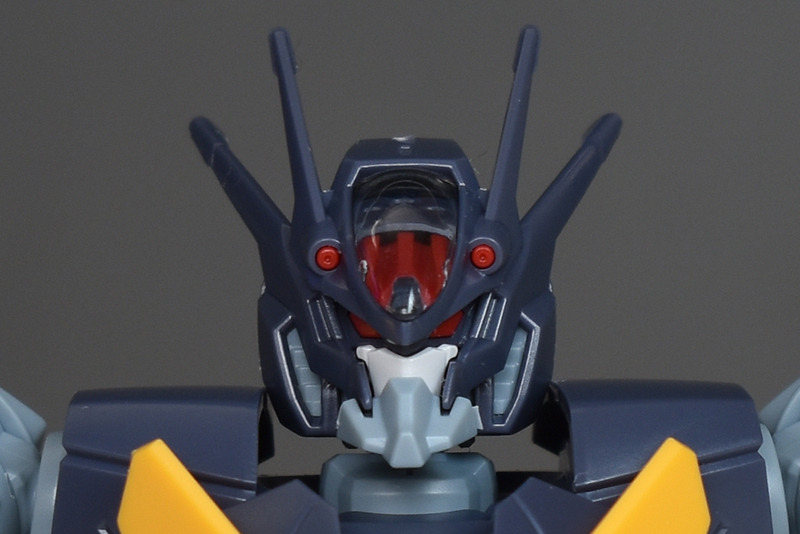
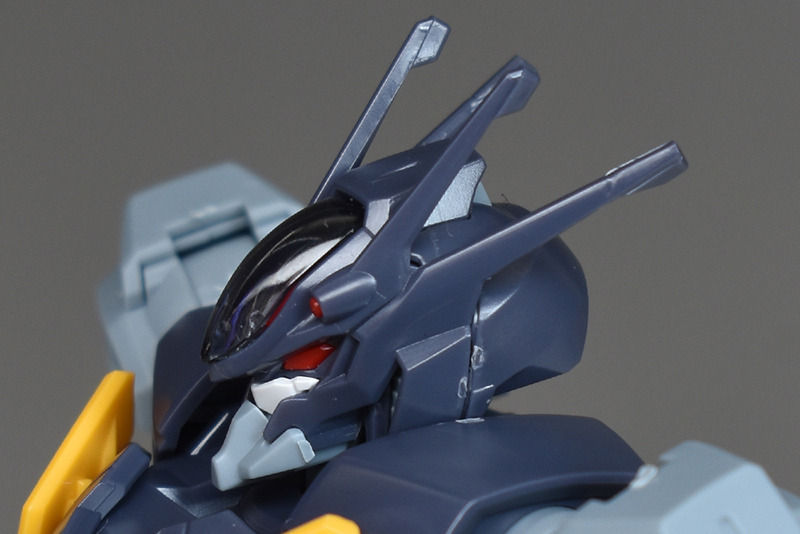
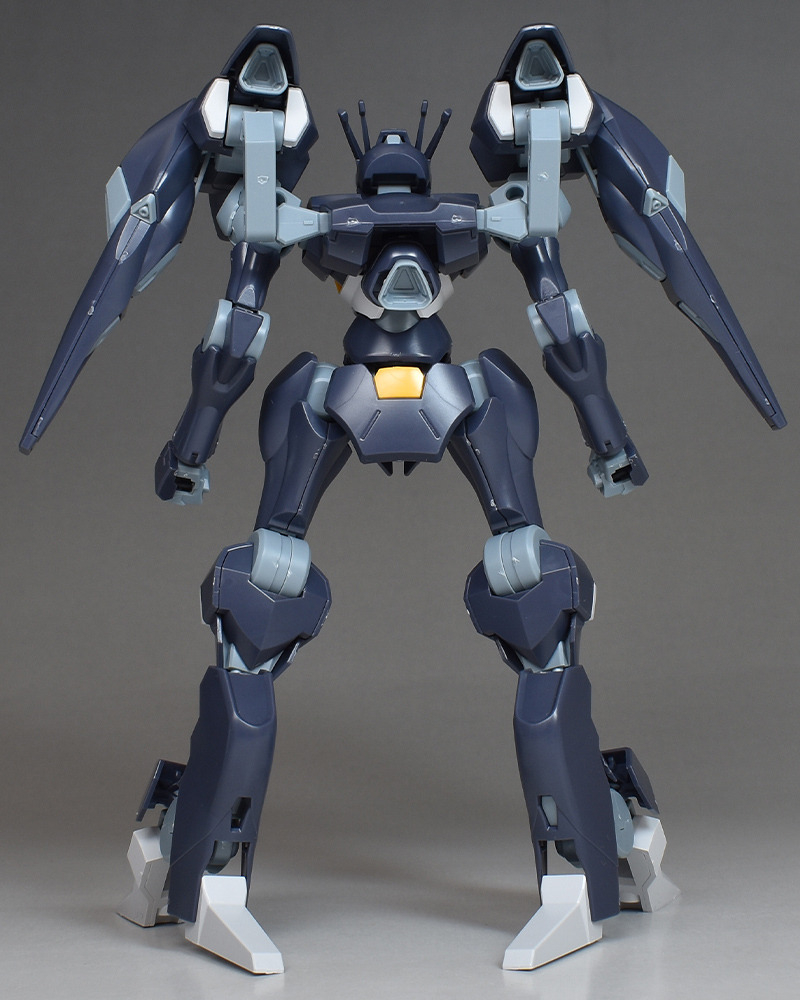
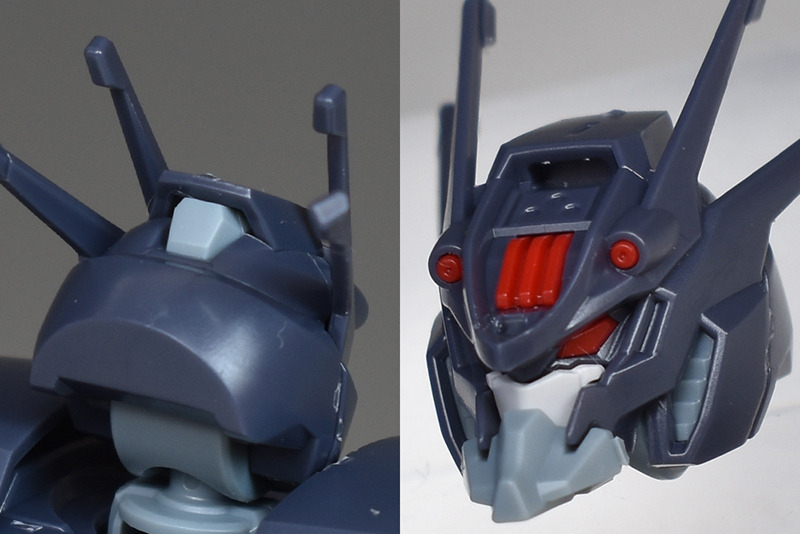
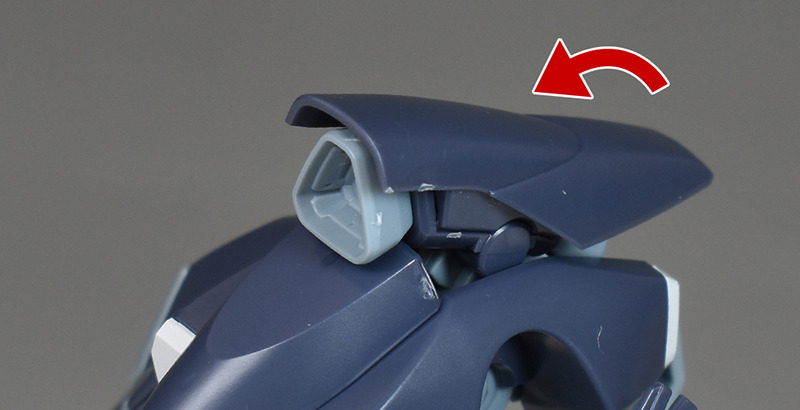
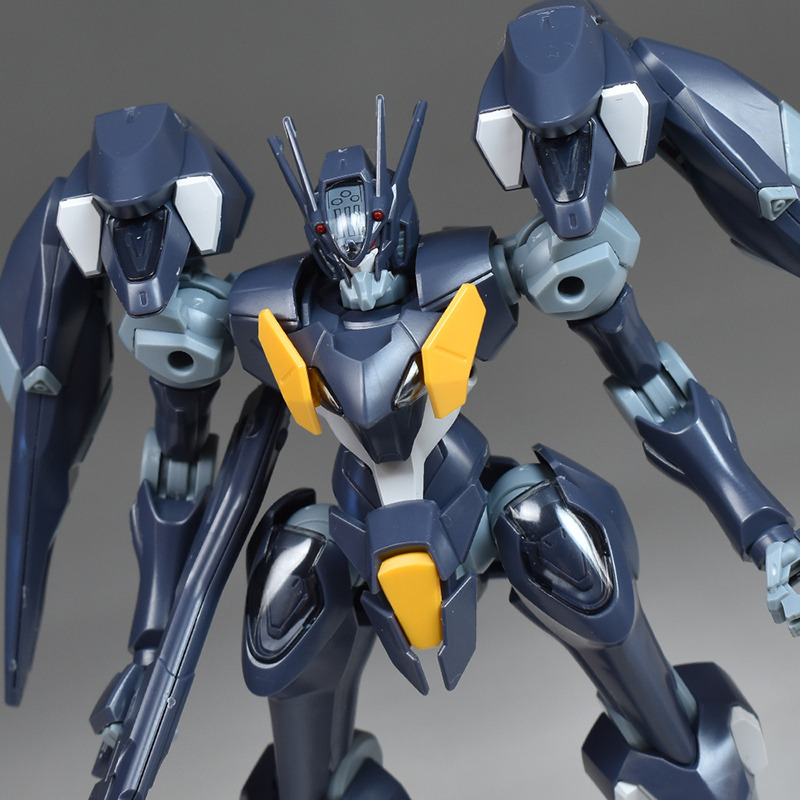
The head features four antennas and twin red eyes. The overall design is dark blue-gray, giving it a strong demonic feel. The shell unit on the forehead, the beam vulcans, and even the twin eyes are all color-coded in detail, which is impressive. There are many small parts, and many areas that require caution when cutting, so care should be taken.
The shell unit on the forehead is made by placing clear parts over the sticker, and the inside of the clear parts has a detailed mold.
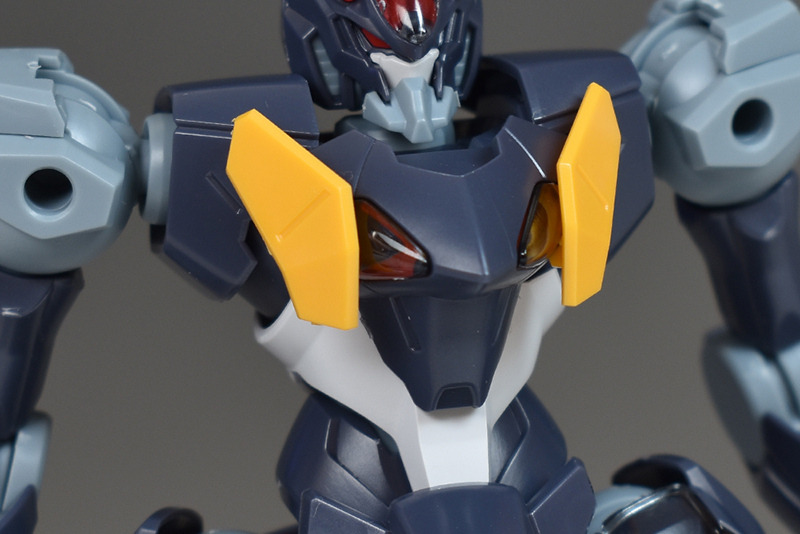
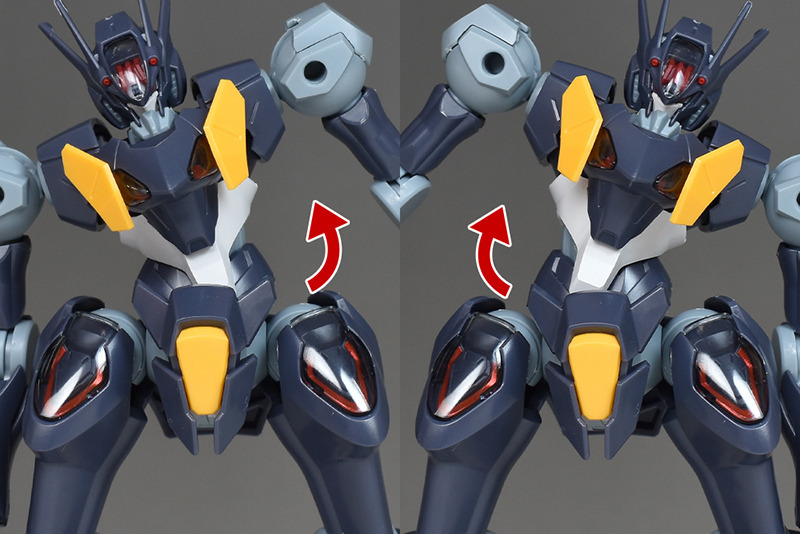
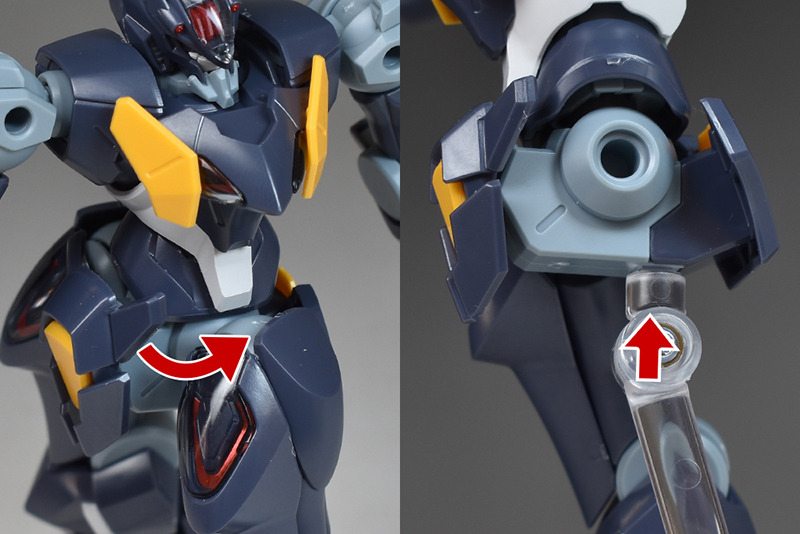
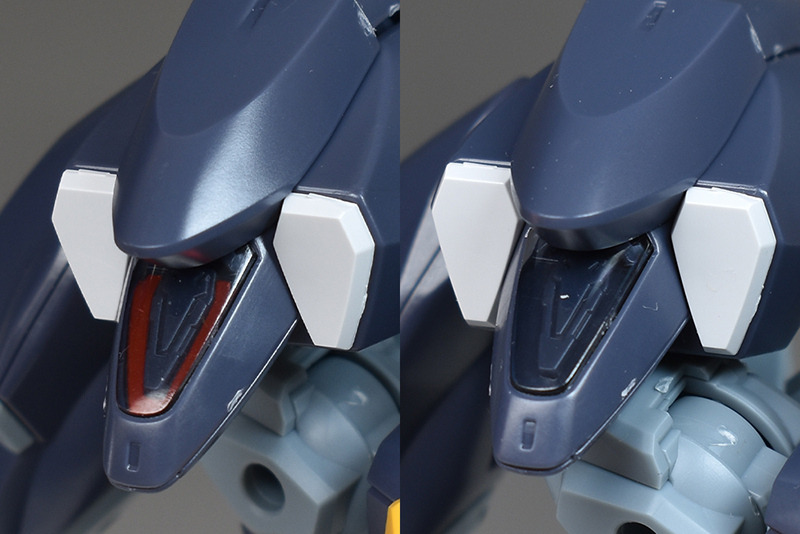
The chest is an inverted triangle. There are no slit air intakes, but the left and right sides are sculpted with shell units reminiscent of air intakes and yellow armor plates. The abdomen is also finished with white parts for an impactful look. The shell units are made with stickers attached, and then covered with clear parts.
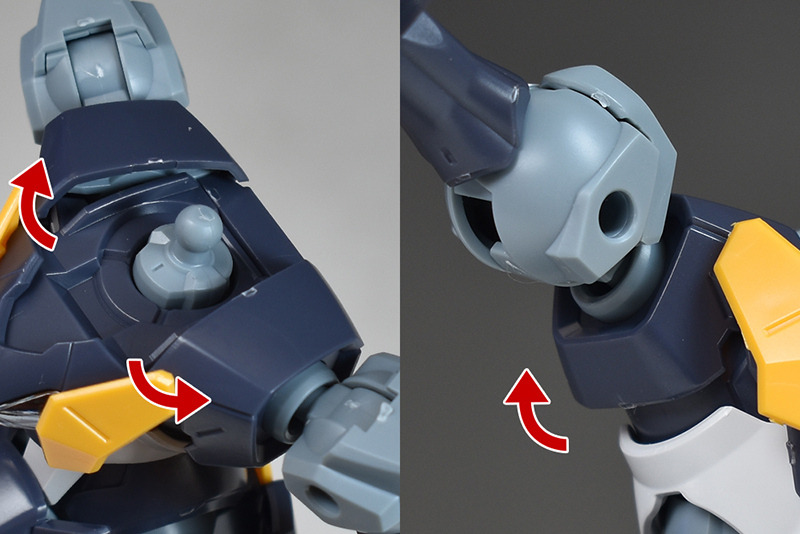
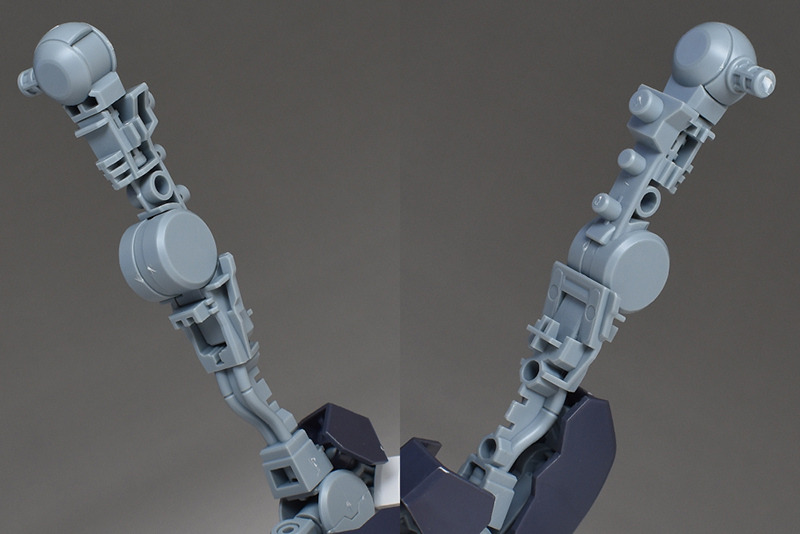
The shoulders are slightly different from the other HG Mercury Witch series in that the ball joints are attached downwards, allowing for flexible forward and backward swings, but vertical movement is somewhat limited.
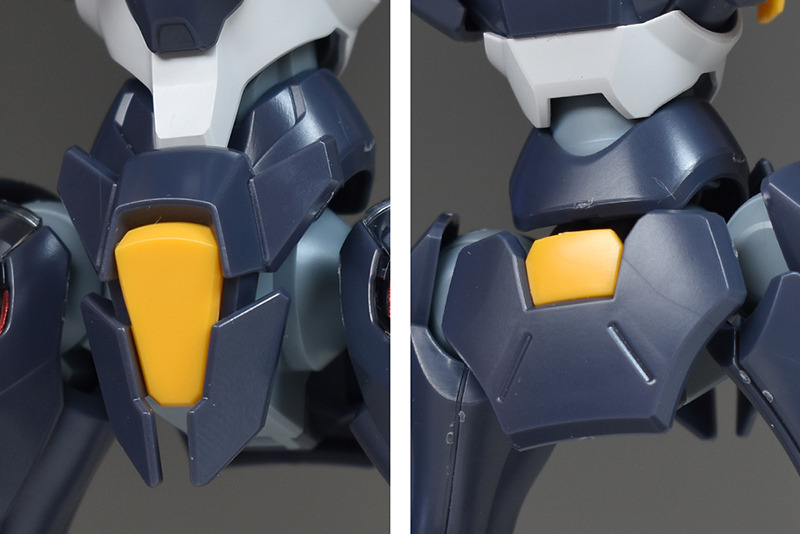
The waist is lightly armored and there is no large front or side armor on either side. There are white and yellow parts on the front and back for a stylish accent.
The back of the waist armor has a frame-shaped hole in the rear armor. The front armor does not have any molding. The front armor is connected with a hinge and moves up and down slightly.
The waist has a swing gimmick that allows the upper body to move back and forth over a wide range.

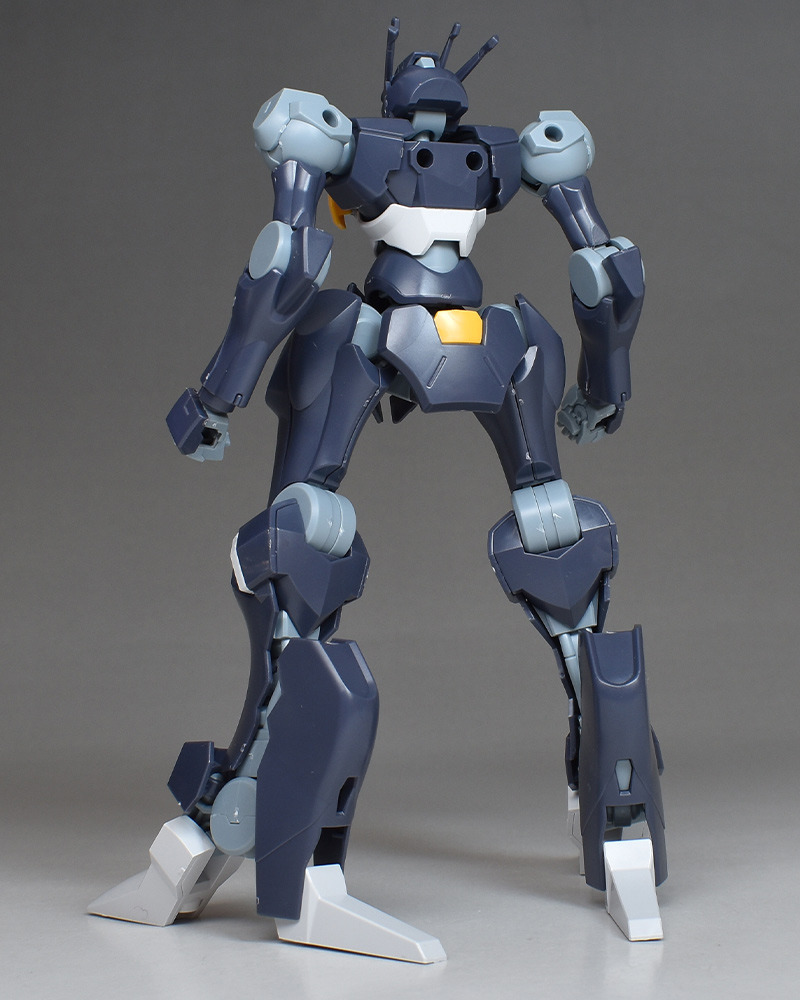
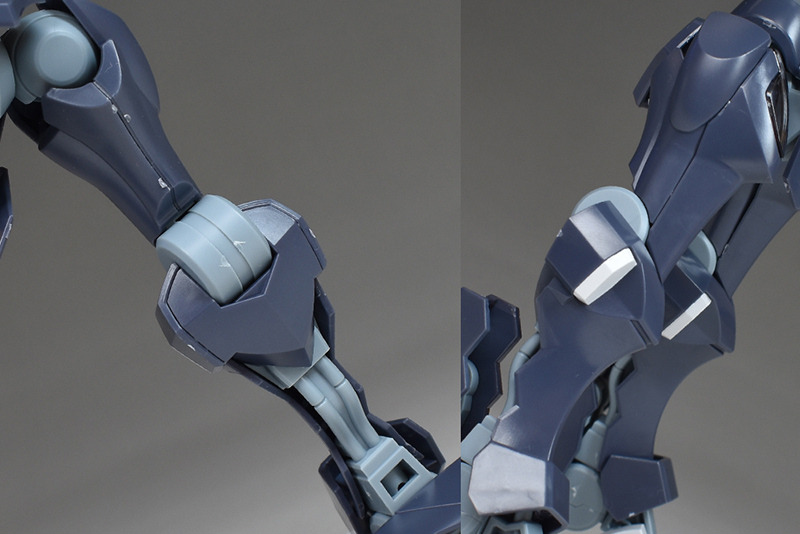
The arms. There is little molding, and they are slender and not flashy, but the design gives them a sense of strength.
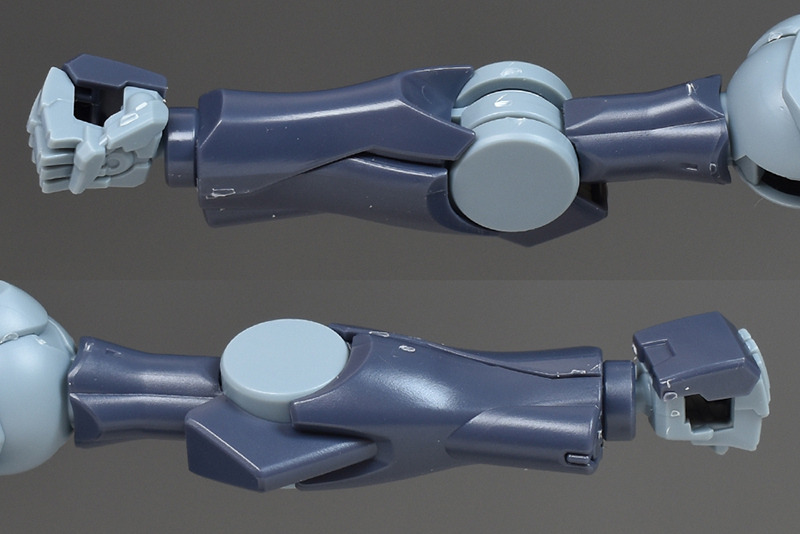
The upper arms are cylindrical with no seams. The forearms are constructed with an internal frame sandwiched between the front and back, but the seams on the sides are molded with a stepped edge.
The knee joint is a post-fit structure that is assembled after the upper arm and forearm are completed. There is no need to do any special work to remove the seams, but for some reason it gives me a sense of security.
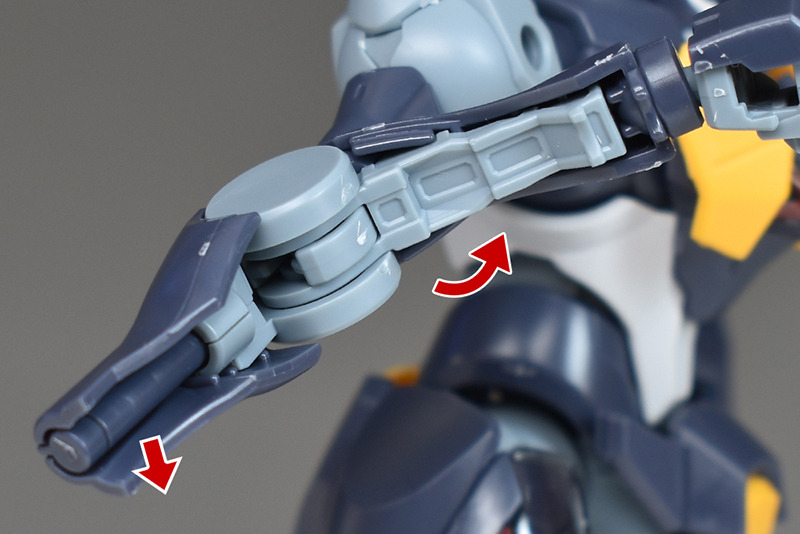
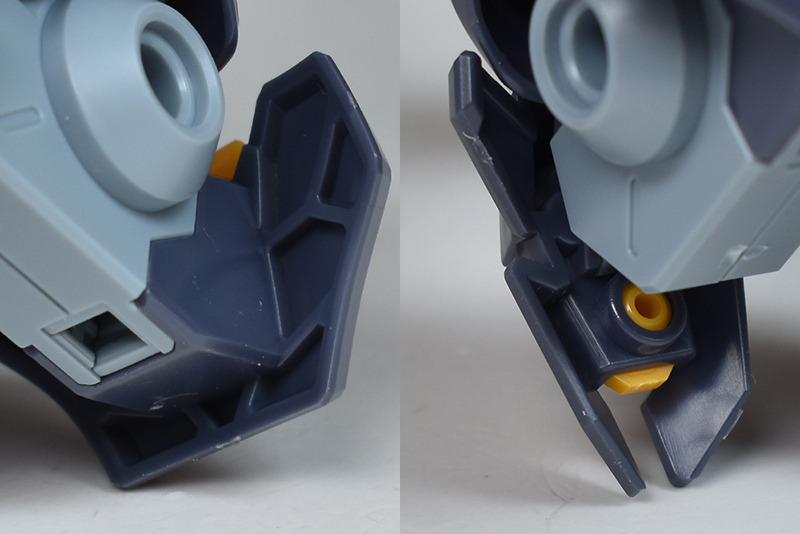
A saber handle is stored in the forearm, and the armor can be deployed to remove the saber handle.
The shoulders themselves are lightly armored. However, they are mechanically sculpted by combining multiple parts. There are no seams.

The legs are also slender, but thick at the joints, and the armor is color-coded by parts. The shell unit on the upper thighs is also impressively designed.
The legs are generally sculpted with a simple internal frame.
The thighs are constructed by combining parts from the front and left and right sides of the frame, with the seams molded in. There are no seams below the knees, either, making for an optimized parts configuration with a high degree of color reproduction despite the small number of parts.
Like the knee joint and elbow, the thigh and lower knee joints are assembled after they are completed, using a post-fit structure.

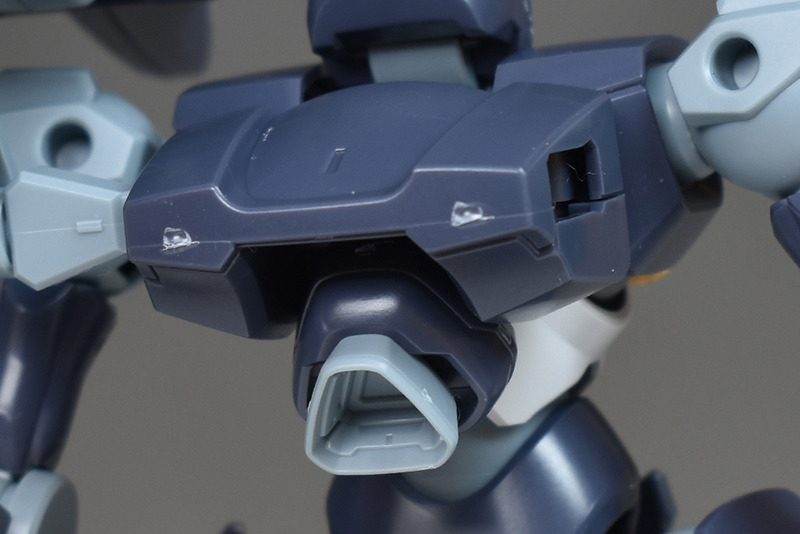
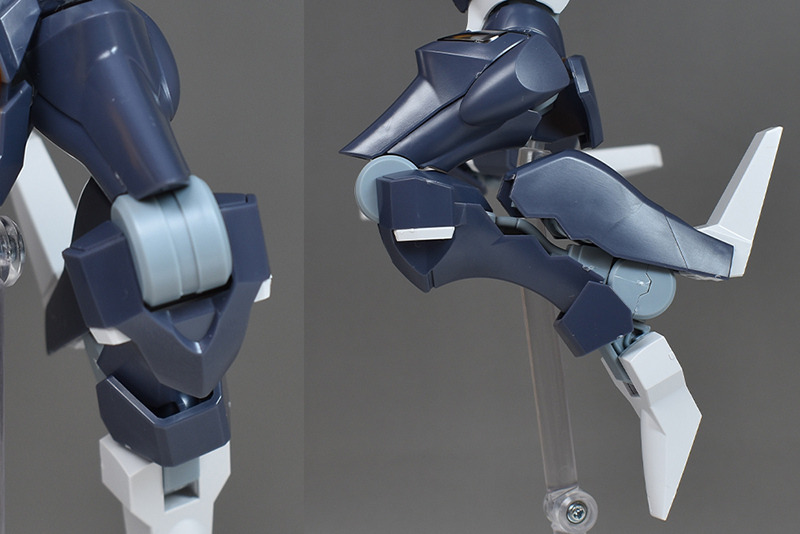
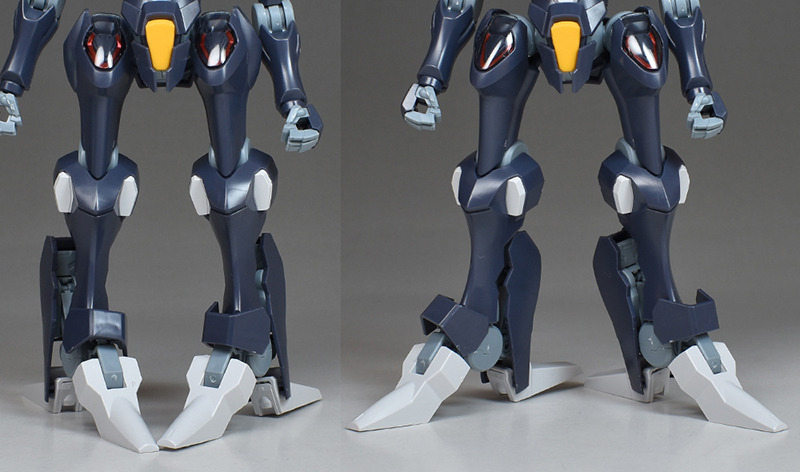
The sole has a two-pronged structure that spreads out from front to back. The rear armor adds a wild look and presence.

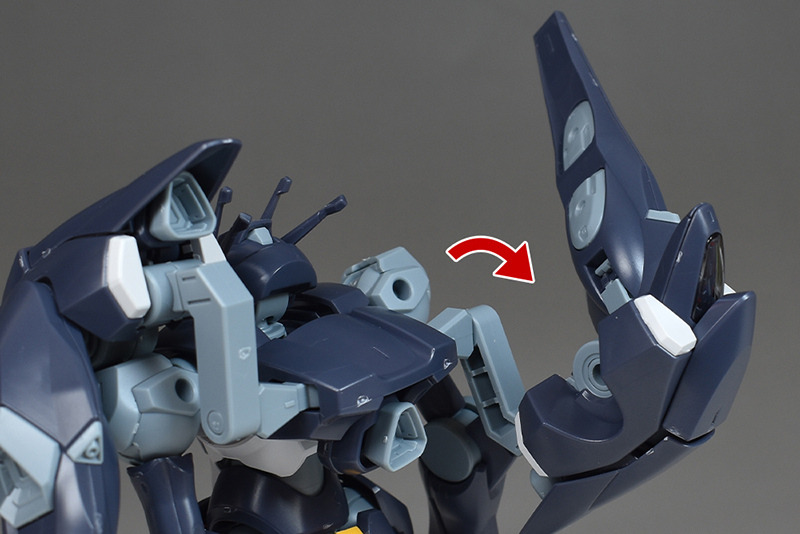
By storing the rear armor and folding the toes and heels, it can be used as a foot unit called “Beakfoot.” The Beakfoot is a foot unit reminiscent of a bird’s beak, and is said to be effective in airborne combat.

There are no flaws in the construction, such as the molded backing parts on both the toe and heel sides. The beam cannon in the center is also nicely sculpted.
The toes and heels can be rolled separately, and the heel side can be expanded widely with the arms. Since there are many movable parts, the ground contact is a little unstable, but it is flexible and easy to express.
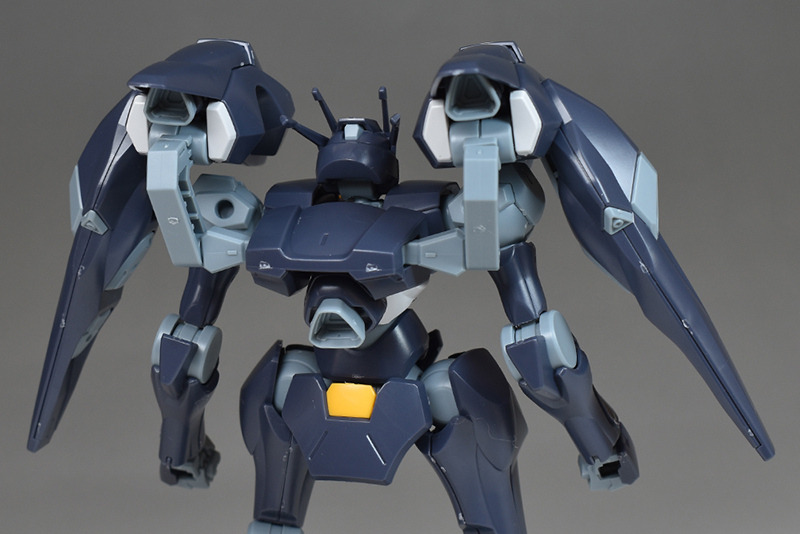
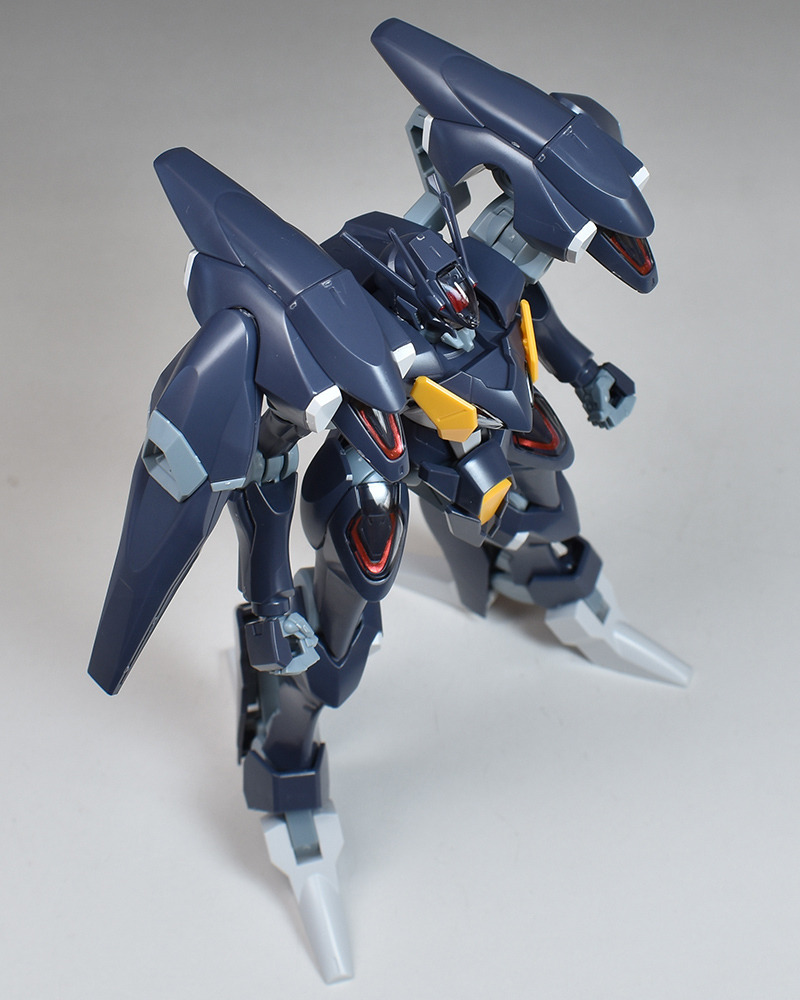
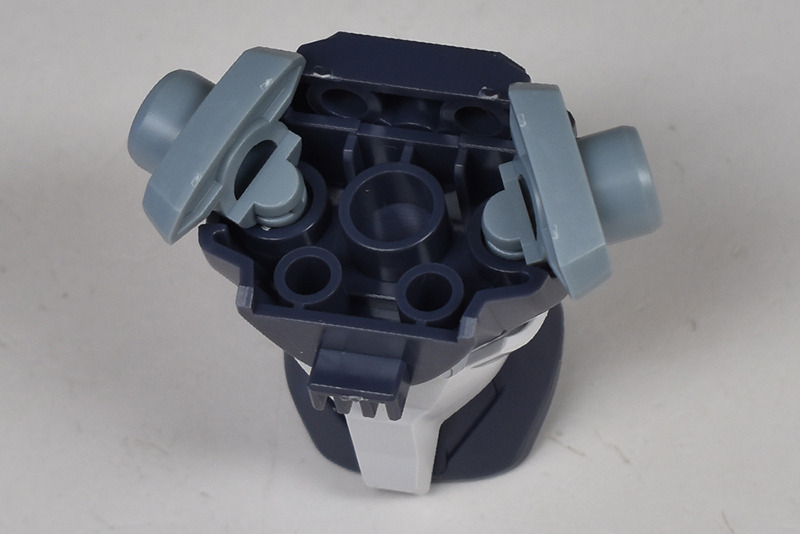
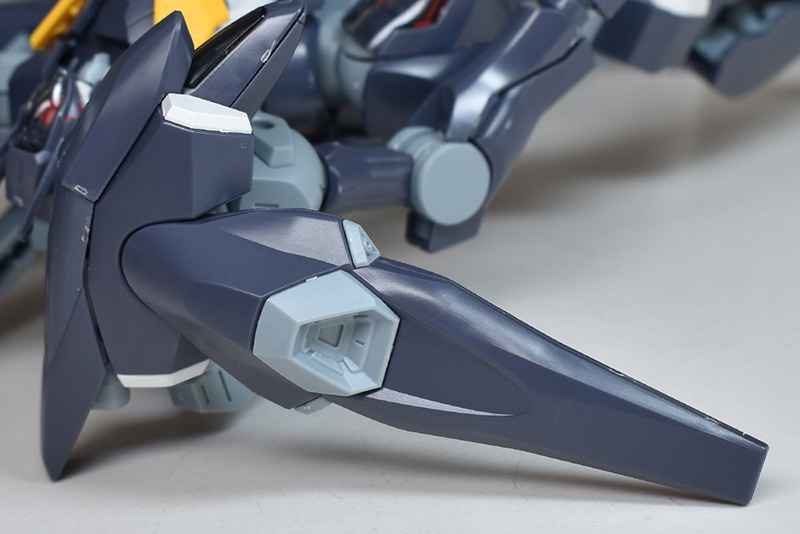
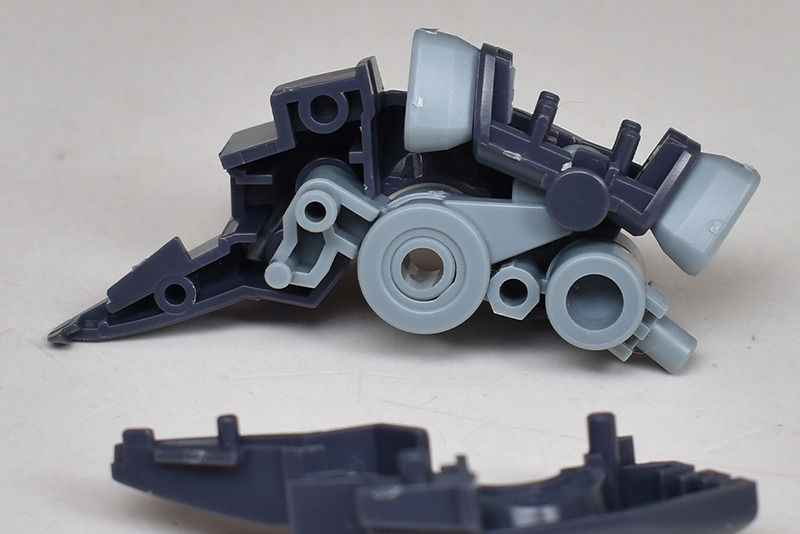
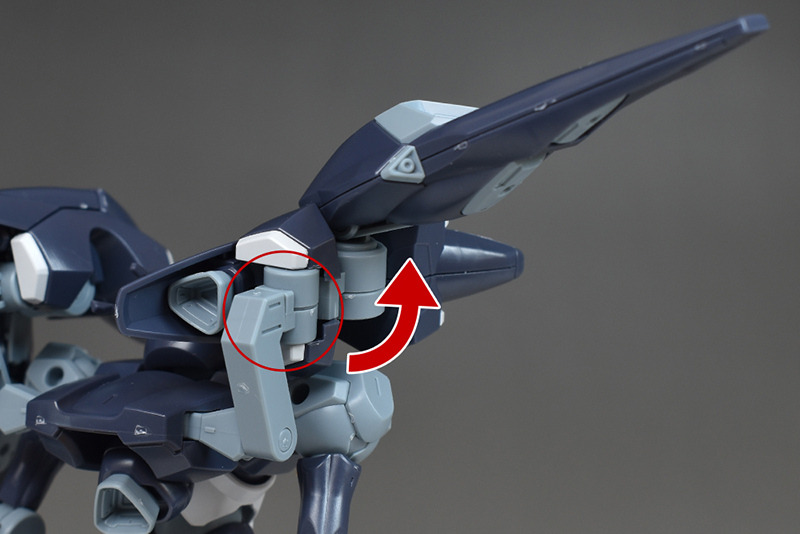
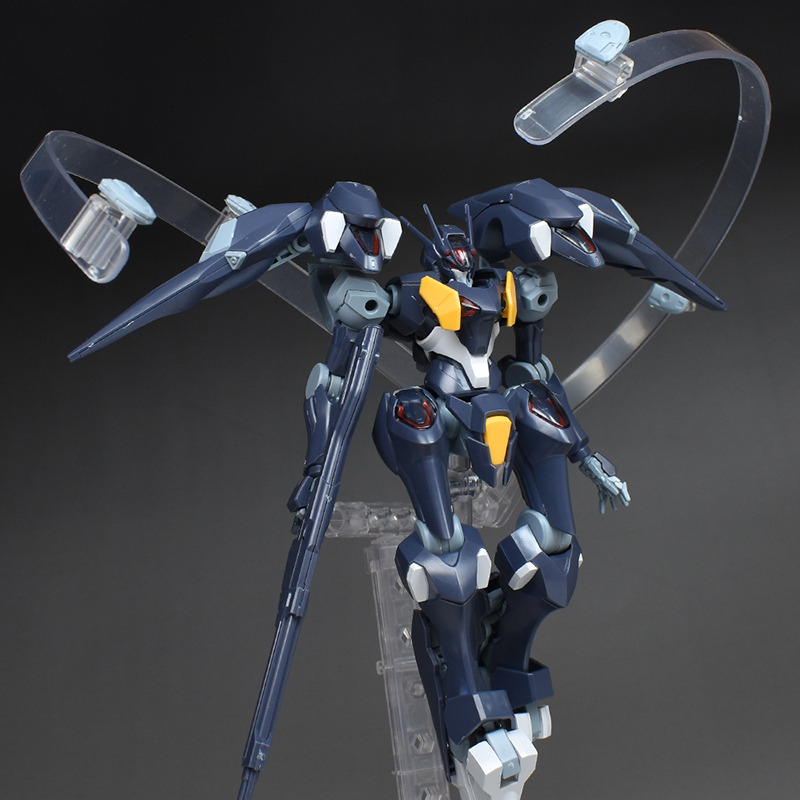
It is equipped with a backpack on its back, and large shoulder back boosters are sculpted on both sides by connecting them to arms.
The backpack itself is made up of two parts, an upper and lower, and is a lightweight type with only one thruster molded at the rear. The inside of the thruster is molded in detail as a separate part, and it can be rotated appropriately by connecting it to a ball joint.
The Falact body is connected with two standard width dowels, so it can be equipped with backpacks from other HG Witch of Mercury series and HGUC.
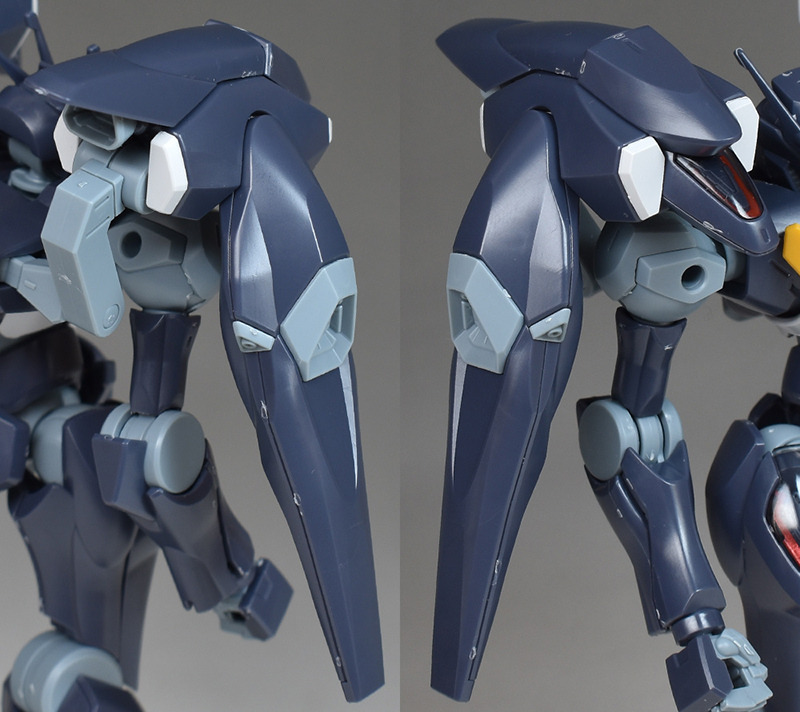
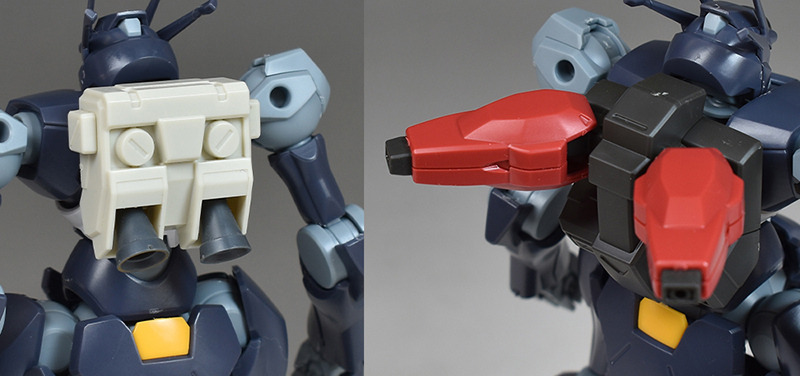
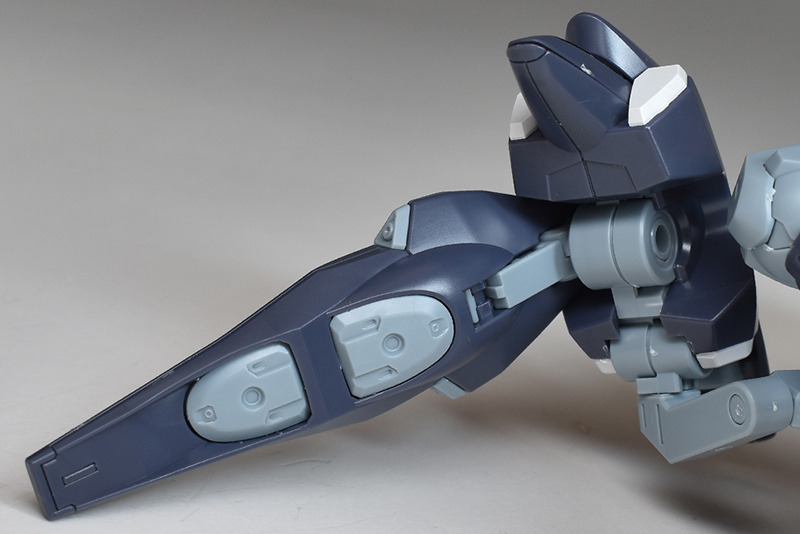
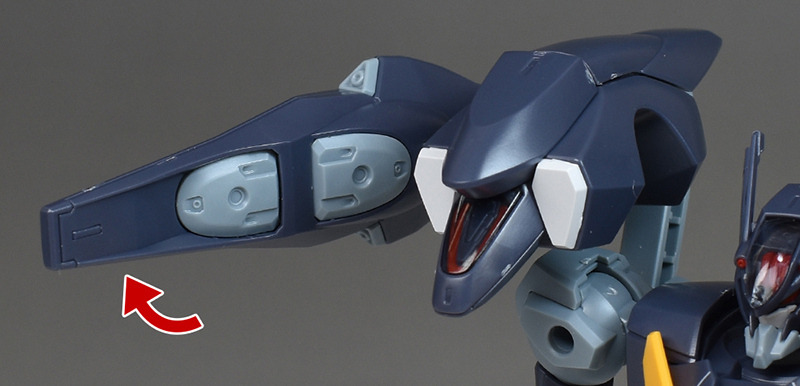
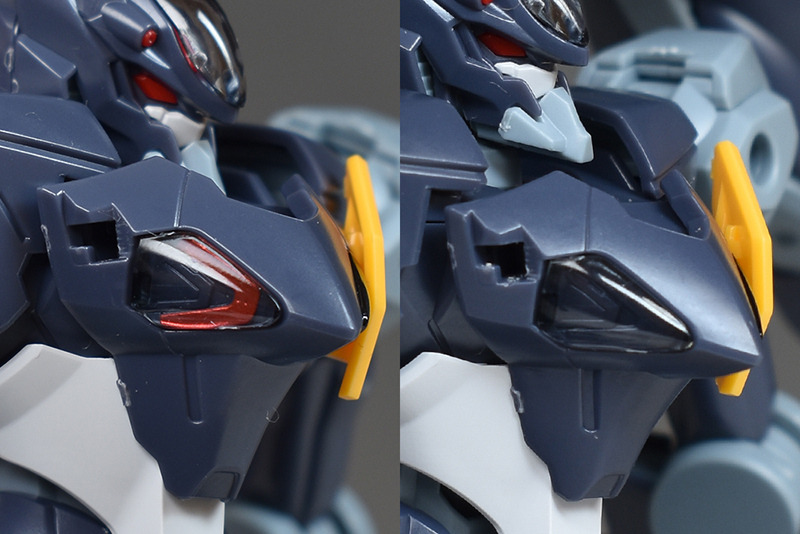
Back booster. This is the unit with the most presence in this kit. It is made up of small parts, and the shell unit on the front and the color-coded armor on each part are also separate parts. Each part is precisely reproduced.
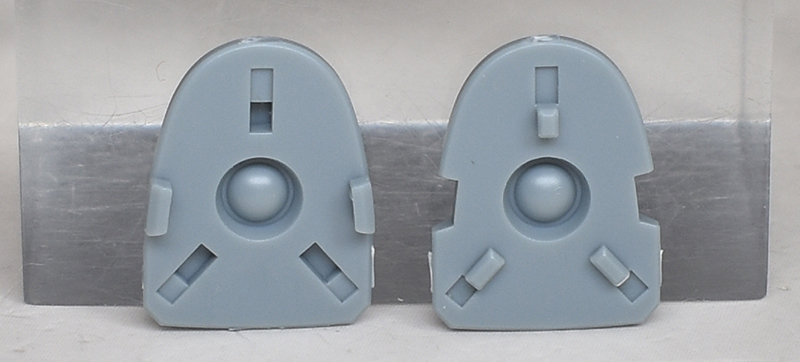
側面の装甲は薄型のウイングタイプ。外側のスラスター口は別パーツ化され、内側には2基のガンビット『コラキ』が格納されています。装甲は前後の組み合わせですが、側面の合わせ目は段落ちモールド化。
バックブースター基部には可動ギミックがあり、内部の造りも緻密。左右の組み合わせですが、合わせ目が露出しない構造になっています。
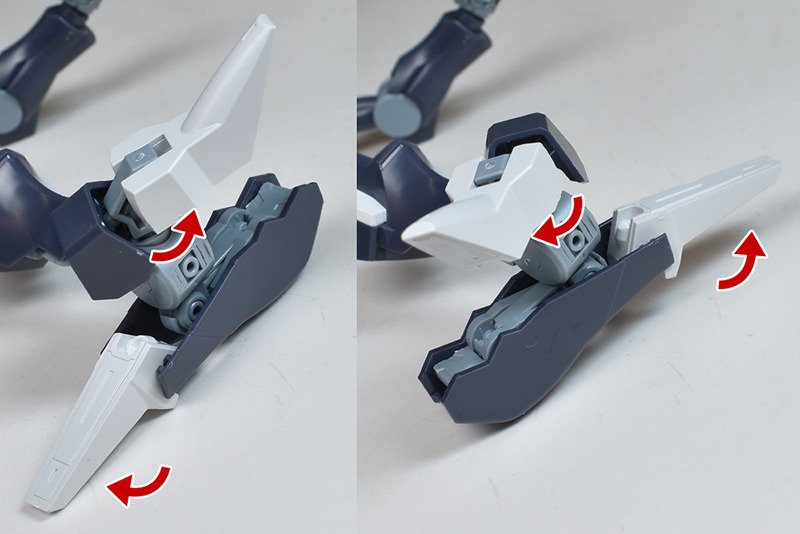
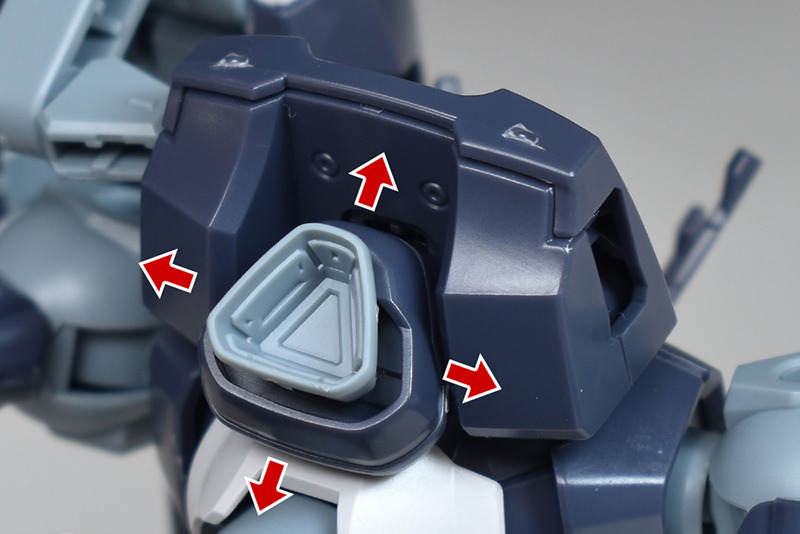
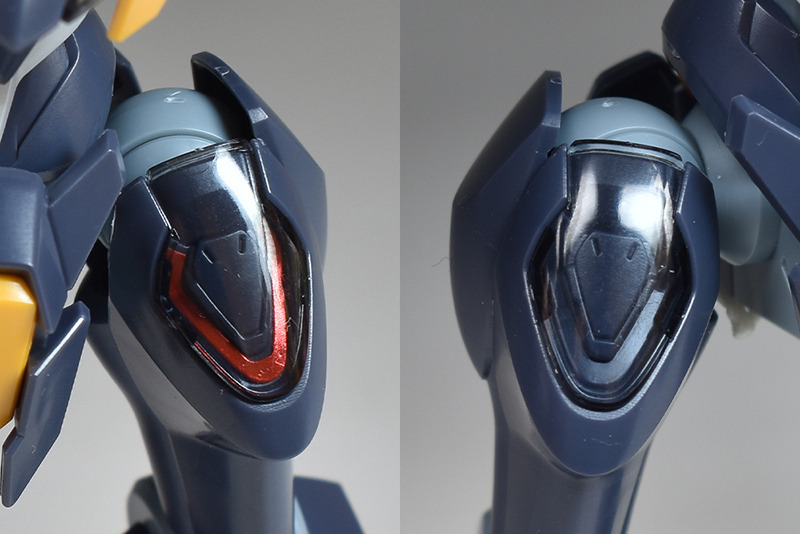
内部の可動ギミックによって上部装甲が展開。内部のスラスターが露出します。内部スラスターは前後とも別パーツによる色分けを再現。
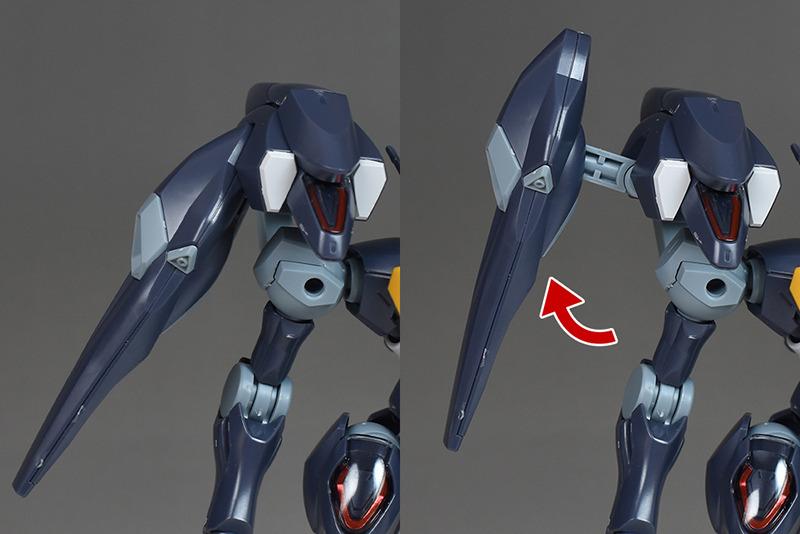
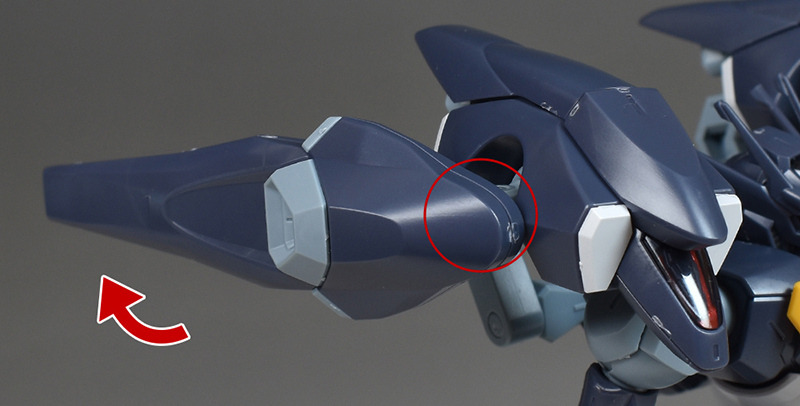
装甲は少し引き出しが可能で、接続基部(赤◯部分)によって前後などにロールさせることができます。
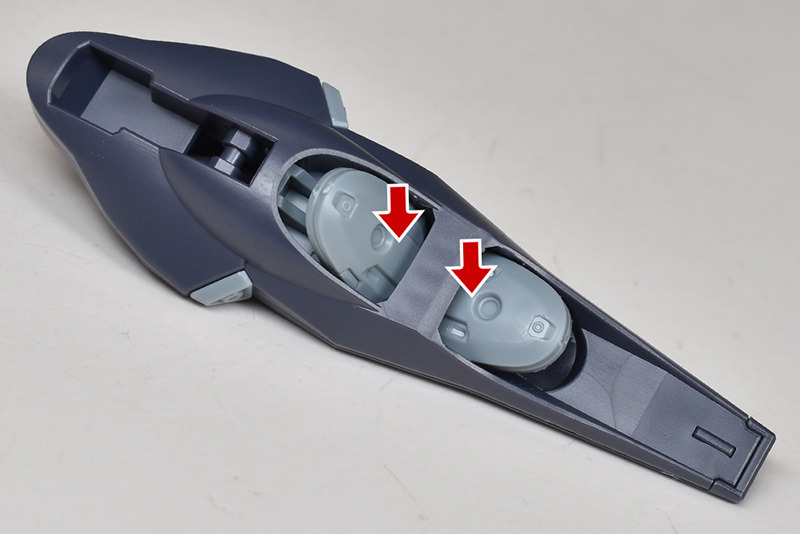
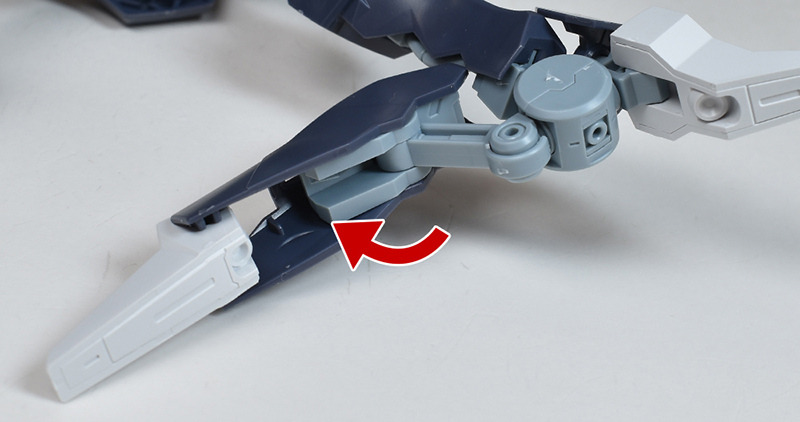
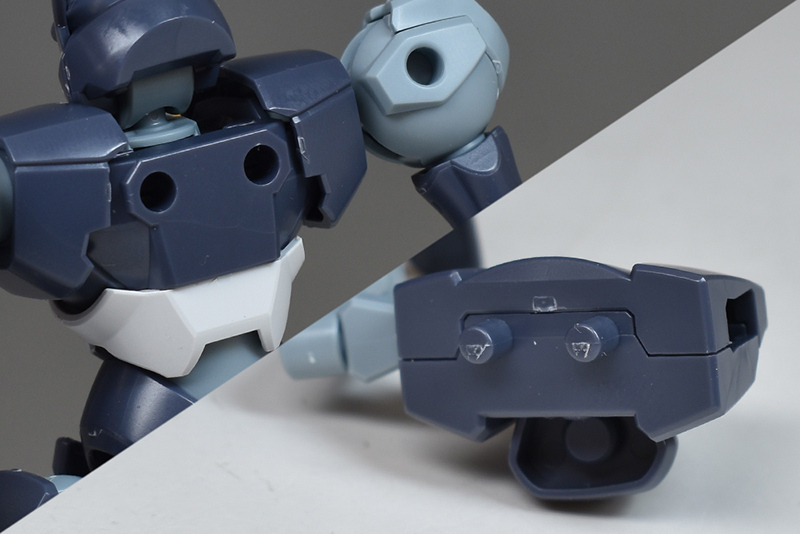
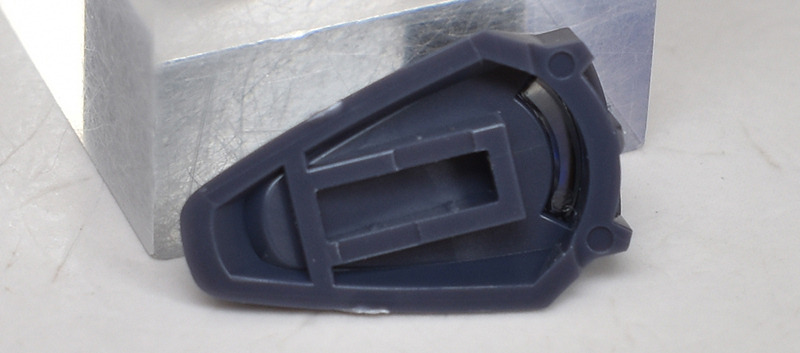
内側のガンビット『コラキ』は一部を押し込むことで容易に脱着が可能。ユーザーに対する細かな配慮がされていていいですね。
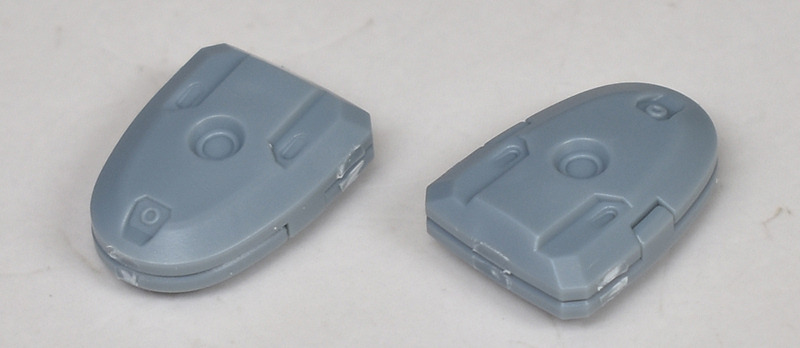
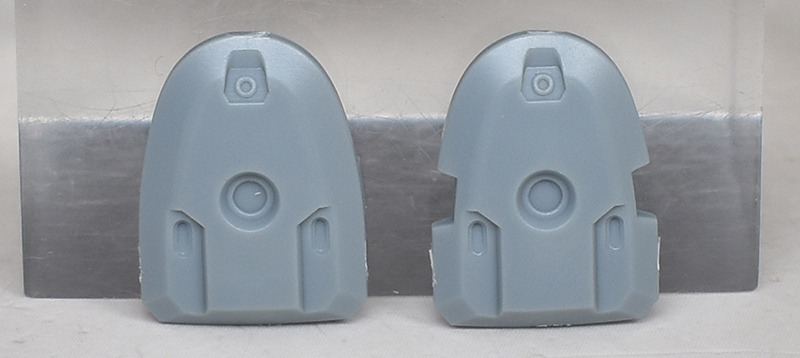
ガンビット『コラキ』は表裏で表面のモールド形状が異なり、分解することで2基(一対)のガンビットとして使用することができます。一部モールドやビーム口はグレーに塗り分けが必要。
3.0mm穴などはなく、アクションベースや通常のスタンドでディスプレイできるようにはなっていません。コラキを浮かせてディスプレイさせる場合は、後日発売のHG水星の魔女 ウェポンディスプレイベース(2023年1月発売予定)が必要です。

バックブースター接続用のアームは2個パーツ構成で簡易的。内側には肉抜き穴があります。
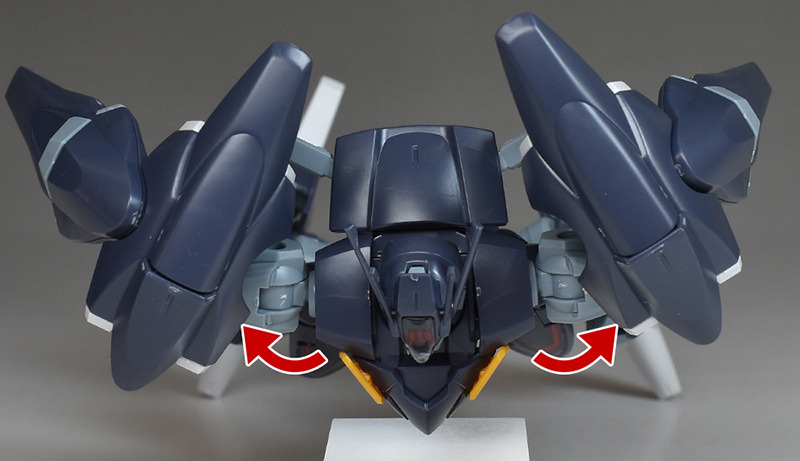
アームは2箇所に可動箇所があるので、バックブースターを前後や左右に可動させることができます。
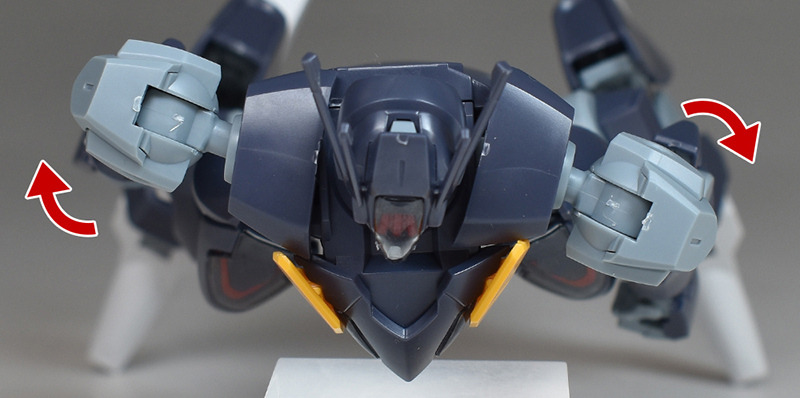
バックブースターへの接続側もロールや上下スイングなどが可能。バックブースターを幅広く柔軟に可動させることができます。
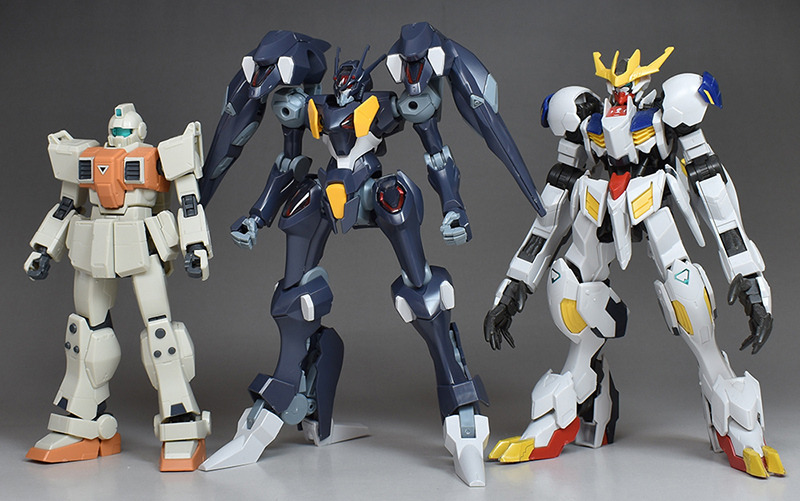
HG陸戦型ジム、HGルプスレクスと並べてサイズを比較。頭頂高自体はルプスレクスと同程度ですが、肩にバックブースターを装備していることでやや大柄になっています。ガンダムファラクトの全高は未定、頭頂高は19.1mです。
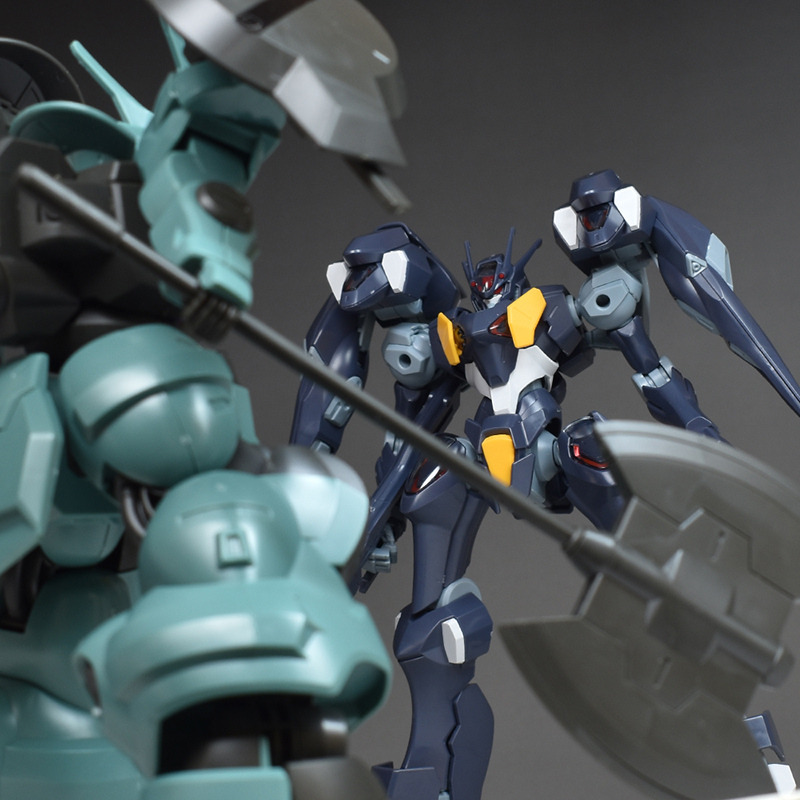
劇中で決闘を繰り広げたHGガンダムエアリアル、HGディランザ(一般機/ラウダ専用機)と並べて。※ディランザはラウダ専用機として組んでいます。スレッタとエランの強化人士4号との決闘やその後の展開は涙なしでは見られない印象的なシーンでした。
同シリーズのHGダリルバルデとも並べて。どちらも御三家各社の機体で、それぞれ形状が全く異なる個性的なデザインになっています。大きさはほぼ同じ。
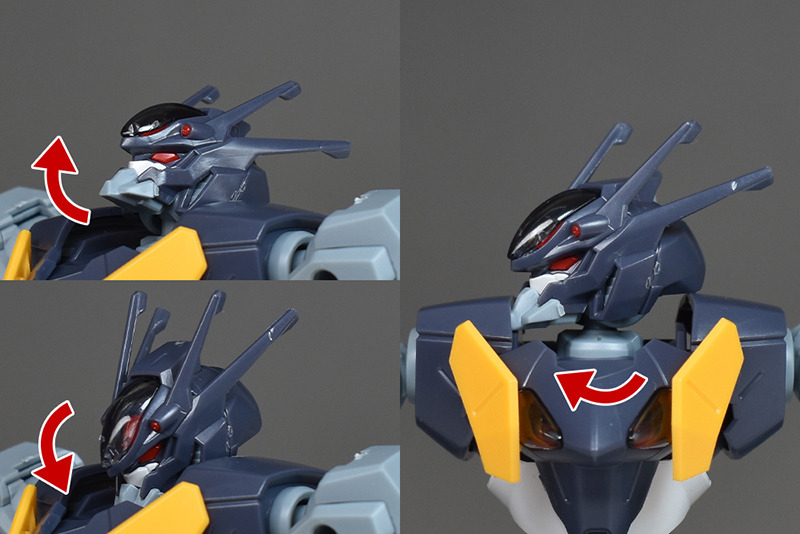
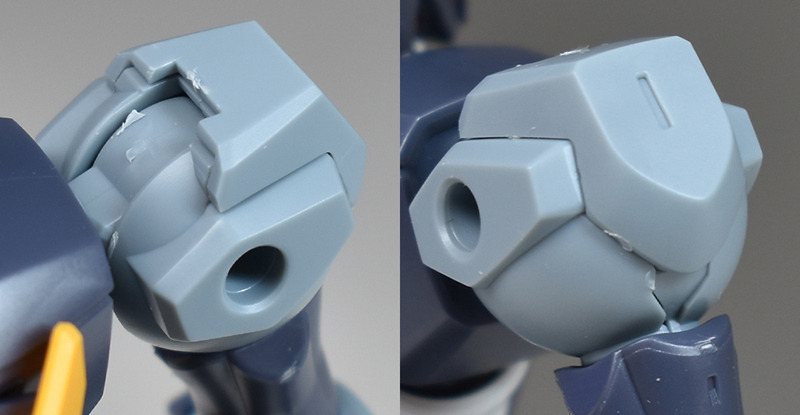
頭部の可動は、顎が長いですが、ある程度顎を引く動きもできますし、見上げる動きも適度に可能です。左右への可動は顎と肩が干渉するので45度程度まで。
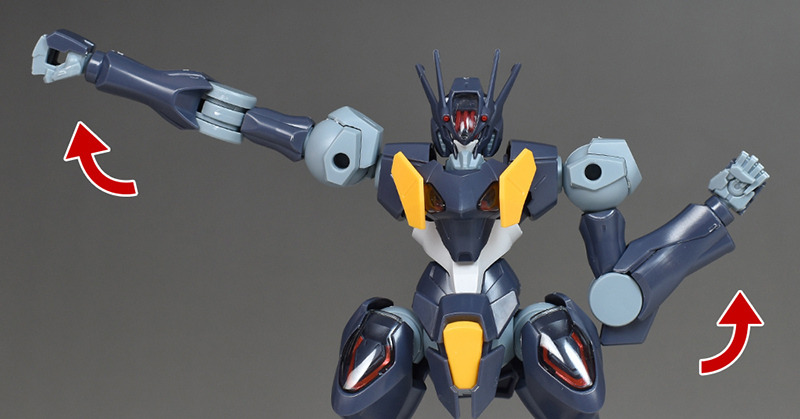
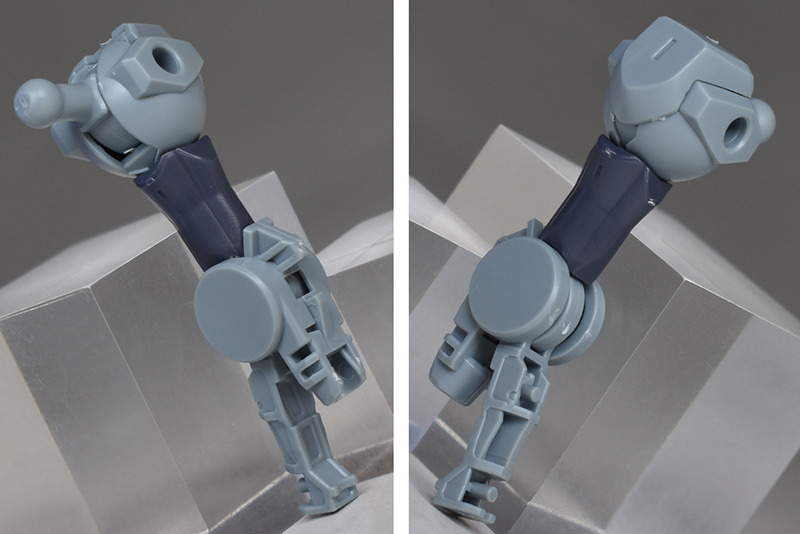
腕は水平よりも少し上まで上げることが可能。肘は1重関節でV字程度まで曲がります。
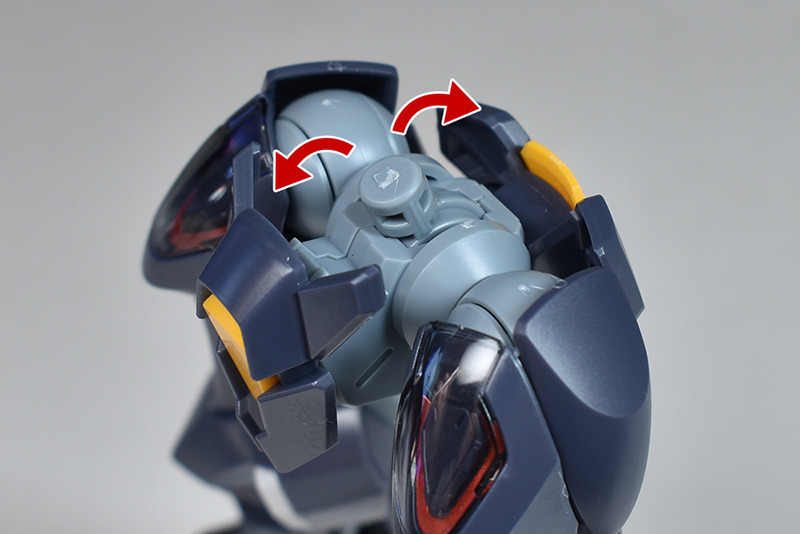
肩はボールジョイントと胸部側の可動によって適度に前後させることができます。
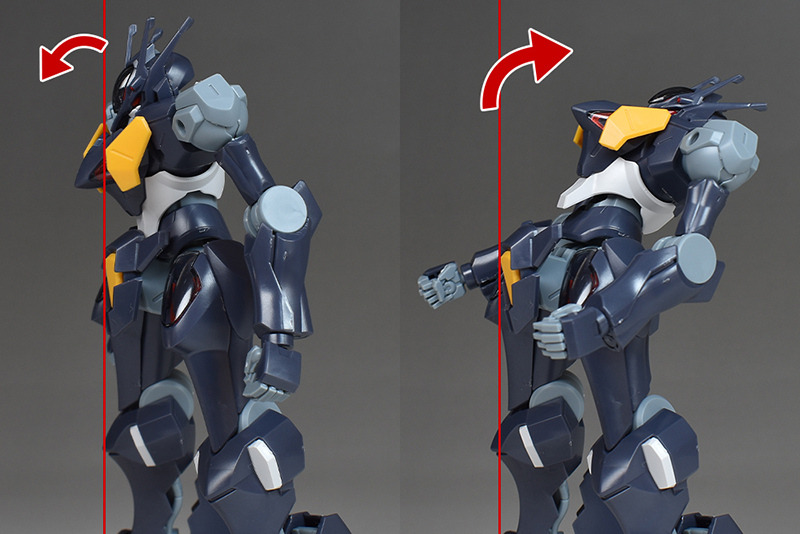
腰の可動ギミックや腹部のボールジョイント接続によって上半身を幅広く反らすことができます。
左右へも適度にスイング可能。
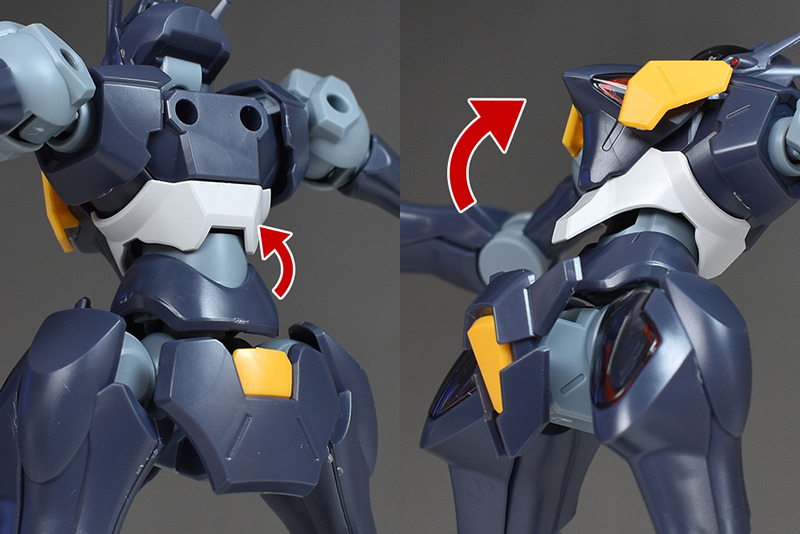
腰は干渉することなく360度回転させることができます。アクションベースやスタンドへは、股間部に3.0mm軸を差し込んでのディスプレイです。ジョイント穴が角型ですが、固定強度が適度にあるのでディスプレイはし易いかと。
前後開脚は、フロントアーマーが小型なので前方へは幅広く展開させることができます。後方はリアアーマーを避けるようにすればある程度展開可能。
膝は1重関節ですが深くまで曲げることができます。
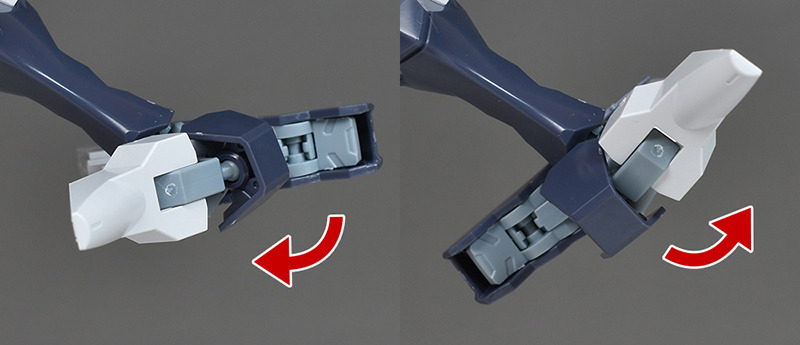
足首の前後可動はないので画像は省きました。左右へはつま先と踵がロールするのでどんな角度でも表現することができます。

左右への開脚は水平まで幅広く展開させることができます。
内股は大腿部と股間部が干渉するので殆ど可動せず、がに股も少し開く程度。ですが足首がロールするのである程度表情を付けることはできます。
大腿部と膝下の比率に差があるぶん立膝は深くなりますが、きれいな姿勢で再現することは可能でした。
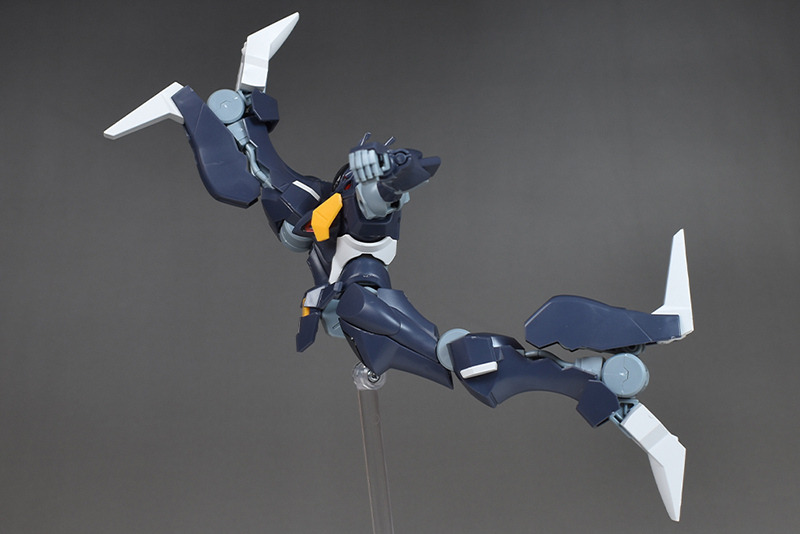
可動域の総括としては、一般的なキットとは少し構造が違っているため、可動も特殊な動きを見せる箇所があります。ですが各部とも幅広く可動するので、どんなポーズにも柔軟に対応してくれそうです。
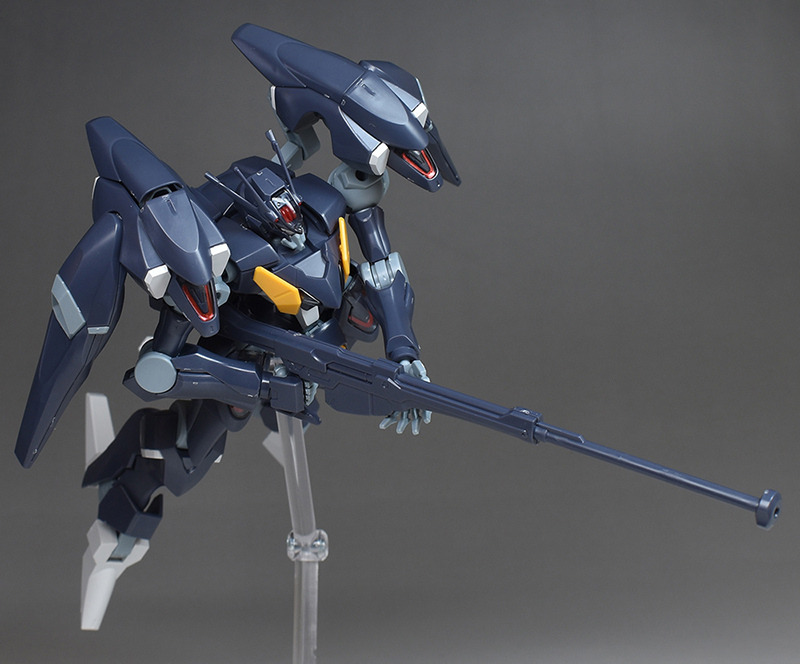
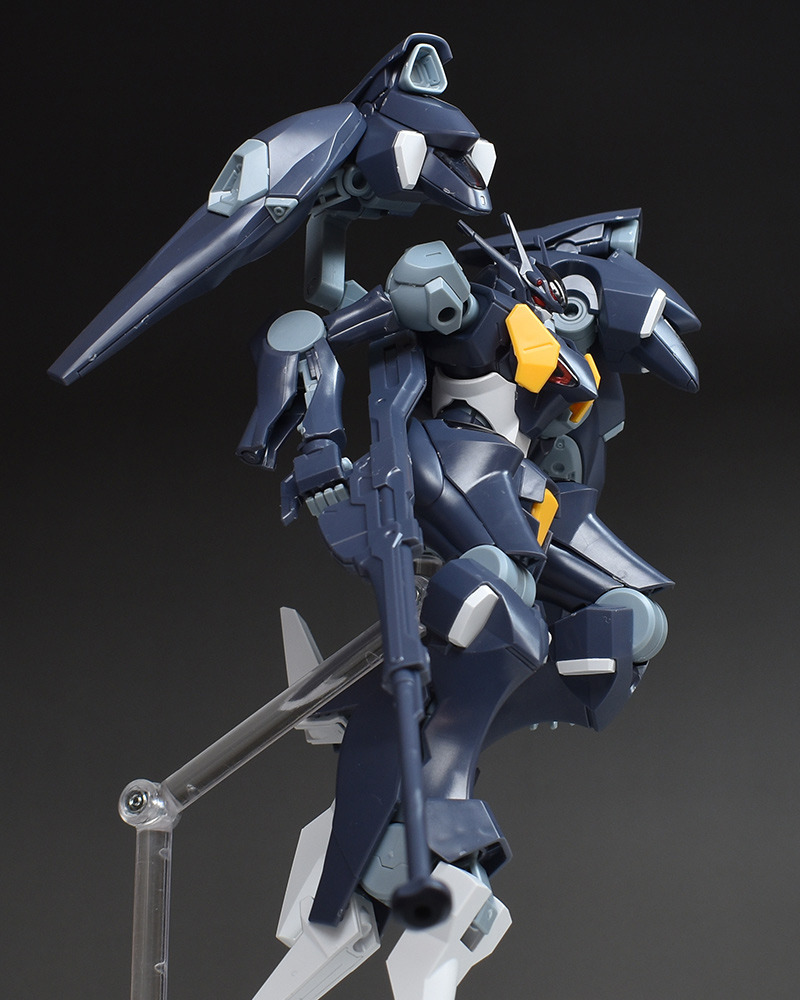
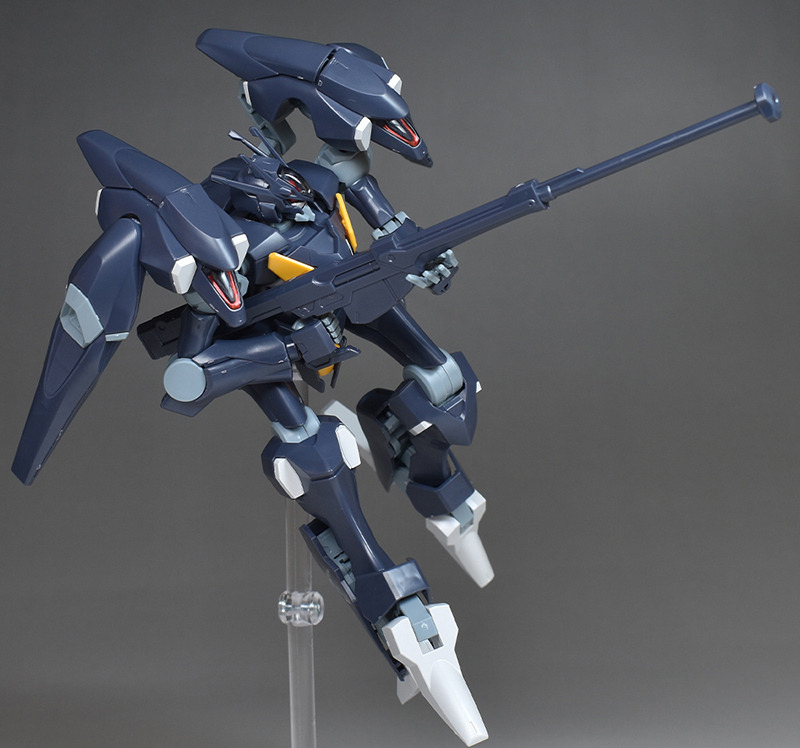
ビームアルケビュース。ファラクト専用の携行火器になります。本銃を用いたGUNDフォーマットによる近くリンクは、狙撃戦術の成功確率を著しく上昇させるとのこと。ただしその分、パイロットへの負担は相当なものとなりそうです。
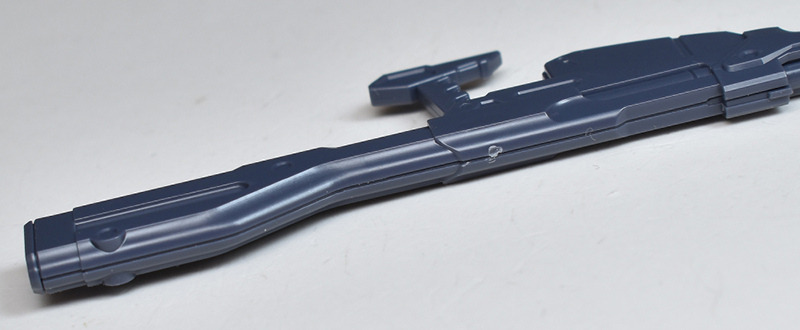
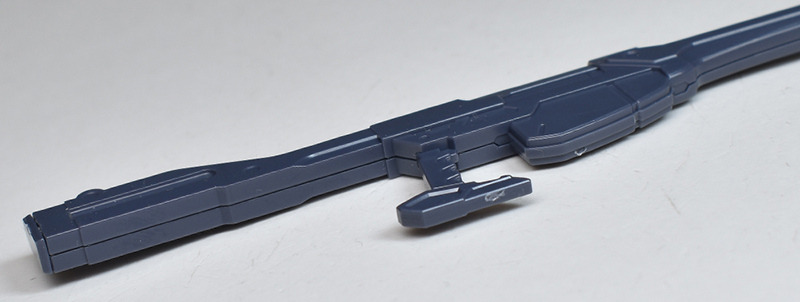
ロングサイズの武装ですが、本体は左右の組み合わせで構造自体は簡易的。ですが上下の合わせ目は段落ちモールド化されるなど抜かりはありません。
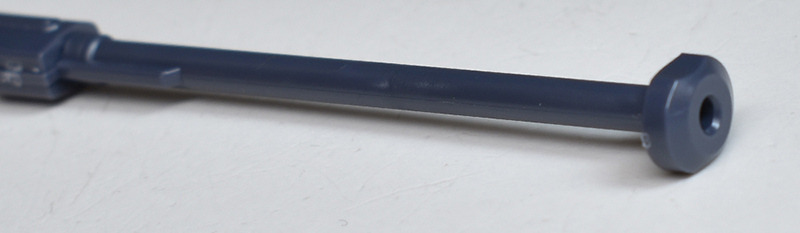
銃口は別パーツ化。
表面にも細かなモールドが入っているので見栄えがします。
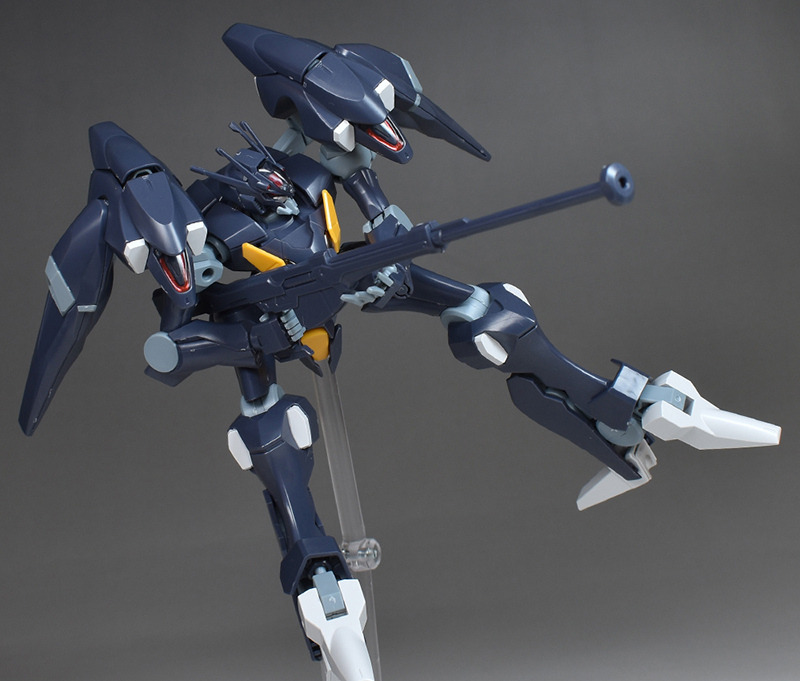
ビームアルケビュースを装備して。
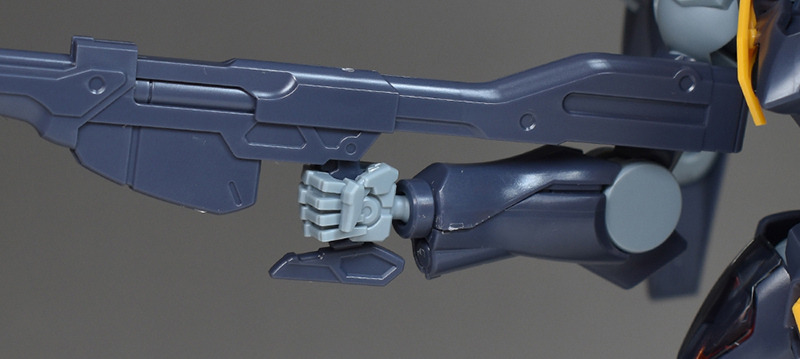
ビームアルケビュースは通常のハンドパーツでグリップを挟んで保持します。グリップとハンドパーツとの幅が合っているので、隙間なくしっかりと保持させることが可能。
後部のストックが長いですが、脇に抱えるようにすれば問題なく保持させることができます。
機体形状はヒール調ですが、機体デザインか成型色の関係からか、割りと上品さも併せ持っているなという印象。見れば見るほどかっこよさが強く感じられるようになっていきます。背面のバックブースターにも存在感がありますね。
バックブースターを展開しての飛行ポーズも様になります。平手が付属するので、銃身に手を添えて支えるようなポーズも再現することができます。
ガンビット『コラキ』は通常のスタンドなどでディスプレイできるようになっていないので、どのようにディスプレイさせるかが悩みどころではありますね。今回は両面テープを使ってスタンドに貼り付けてみました。
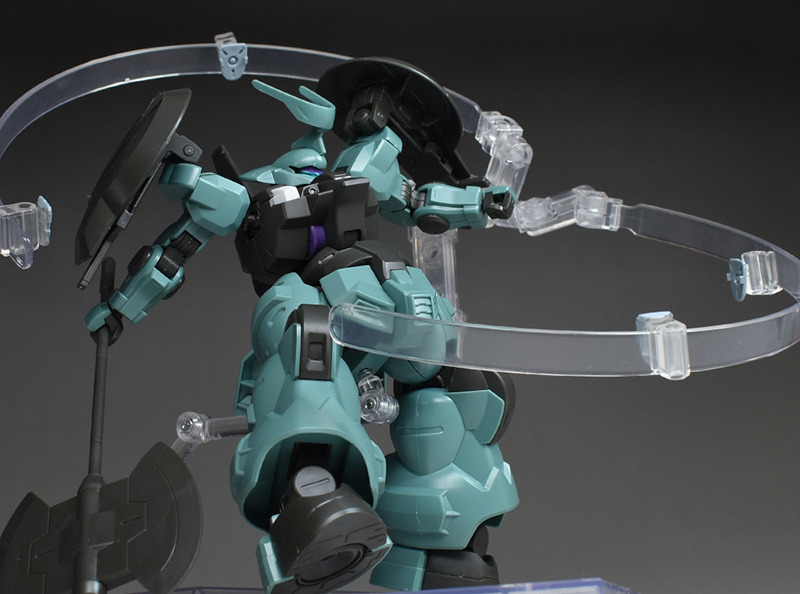
コラキを分解して、ディランザをスタン攻撃するイメージでディスプレイ。演出の良し悪しは別にして、コトブキヤのプレイングベースAを使うことで、コラキが素早く移動するような演出ができるのはいいですね。
ビームサーベル刃は蛍光クリアグリーン成型色での再現。グリップにサーベル柄を差し込んで保持します。サーベル柄の一部にリブがあるので、うまくリブの干渉を避けるようにして差し込みます。多少ハンドパーツと柄との間に隙間がありますが、抜け落ちることなく保持させることができます。
ビームサーベル刃はブラックライトで照らすと鮮やかに発光します。
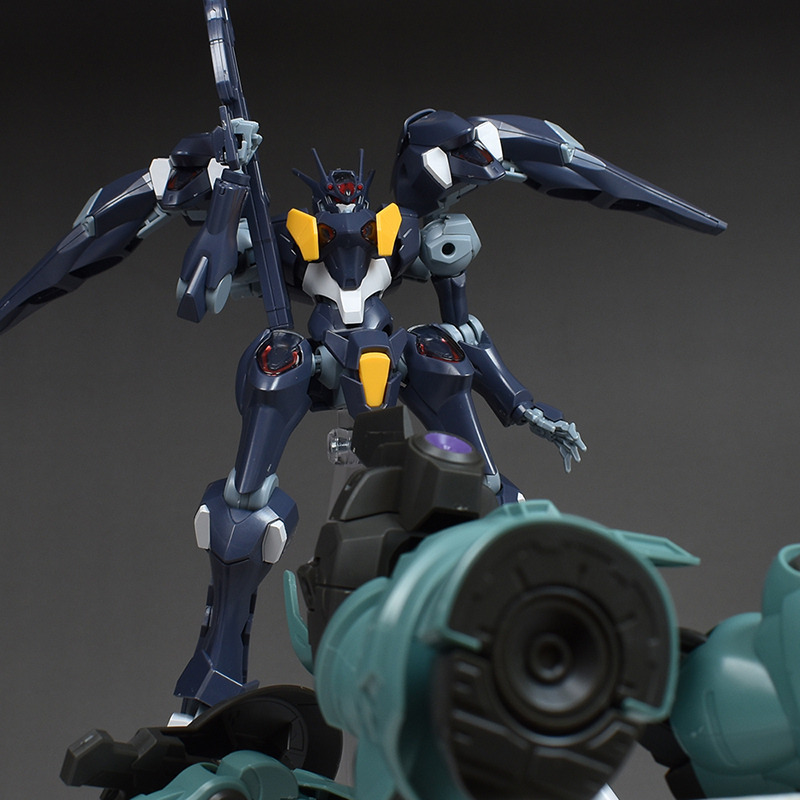
足部ユニット『ビークフット』を展開して攻撃シーンを演出。脚の付け根が幅広く可動するので、脚を上げてビーム射撃するようなポーズも再現し易いです。
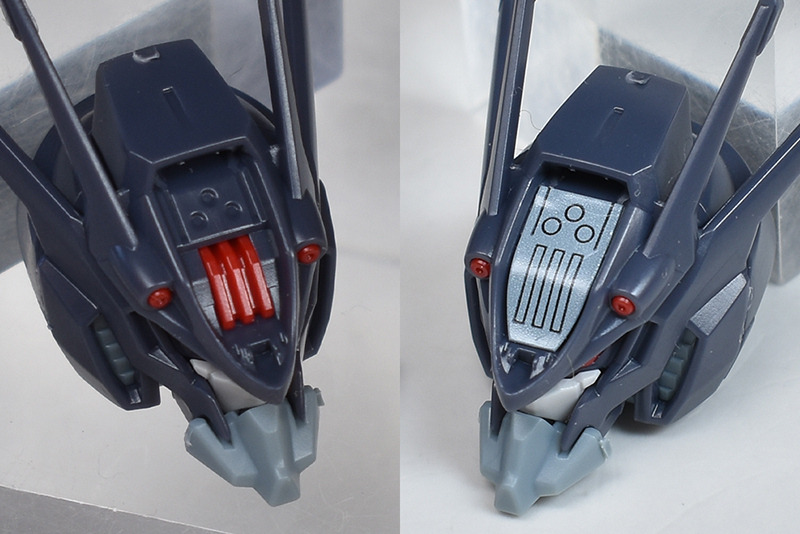
各部のシェルユニットを非発光状態にしていきます。頭部のシェルユニットはパーツで色分けされているため、非発光を再現する場合はシールを貼り付けて色味を統一します。
胸部、バックブースターの前面、大腿部のシェルユニットは一旦クリアパーツを外して赤いシールを剥がします。
クリアパーツは各部とも裏面から押し出すと簡単に外れるようになっているので、発光から非発光状態に変更したい場合もラクに処理ができます。
In a non-illuminated state. The shell units on each part are now non-illuminated, which makes the overall active feel less pronounced. The shell unit on the forehead has a grey sticker on it, which makes it look a bit cheap…
Please feel free to take a few.
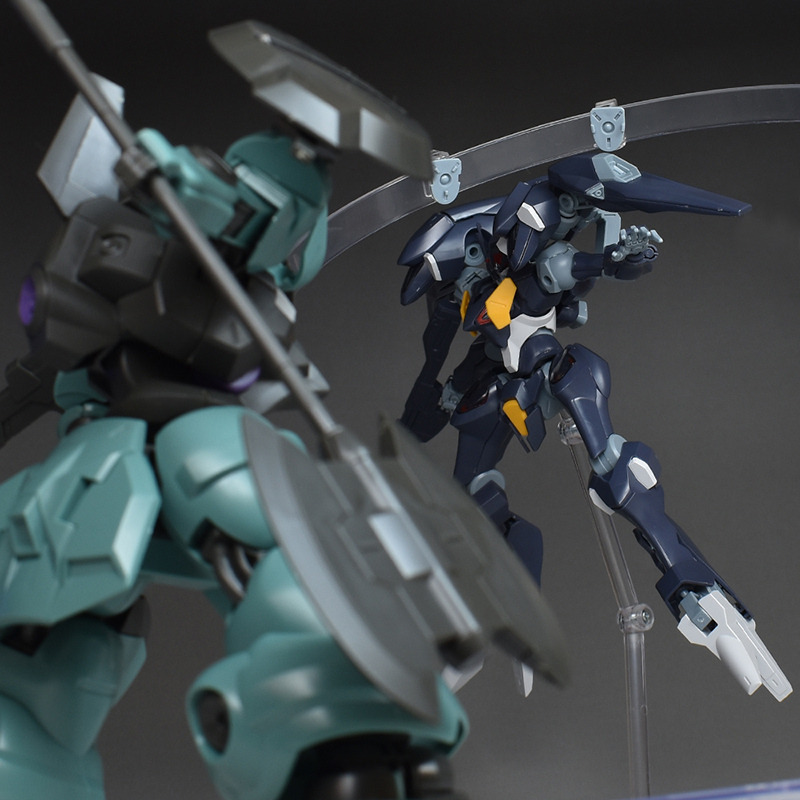

This recreates the scene in the movie where he overwhelms Dilanza.
Although it has a strongly heeled fuselage shape and coloring, there is a sense of elegance to it, and the more you look at it in terms of modeling, the more flavorful and cool the kit becomes. The appeal of the Falakto is that it has an atmosphere that is very different from that of the Gundam Aerial. The kit structure itself is solid and highly complete, and the wide range of motion makes it easy to pose.
There is not much to be concerned about, but if I had to say, I would say that the armor on the sides of the shoulder back booster is a little easy to pull off, and the base of the legs and ankles are a little awkward. The shell unit on the forehead looks uncomfortable when stickers are applied, so it would be better to choose only the luminous state.
The beam arquebuse is molded in a stepped mold, and every detail is well done. The shooting pose is quite poseable, and the back booster can be flexibly moved so that it is easy to add facial expressions. Koraki can also be deployed as per the settings with the detailed parts configuration. It can be combined with the Weapon Display Base (to be released at a later date) to create a display that more closely resembles the scene in the movie.

Leave a comment