


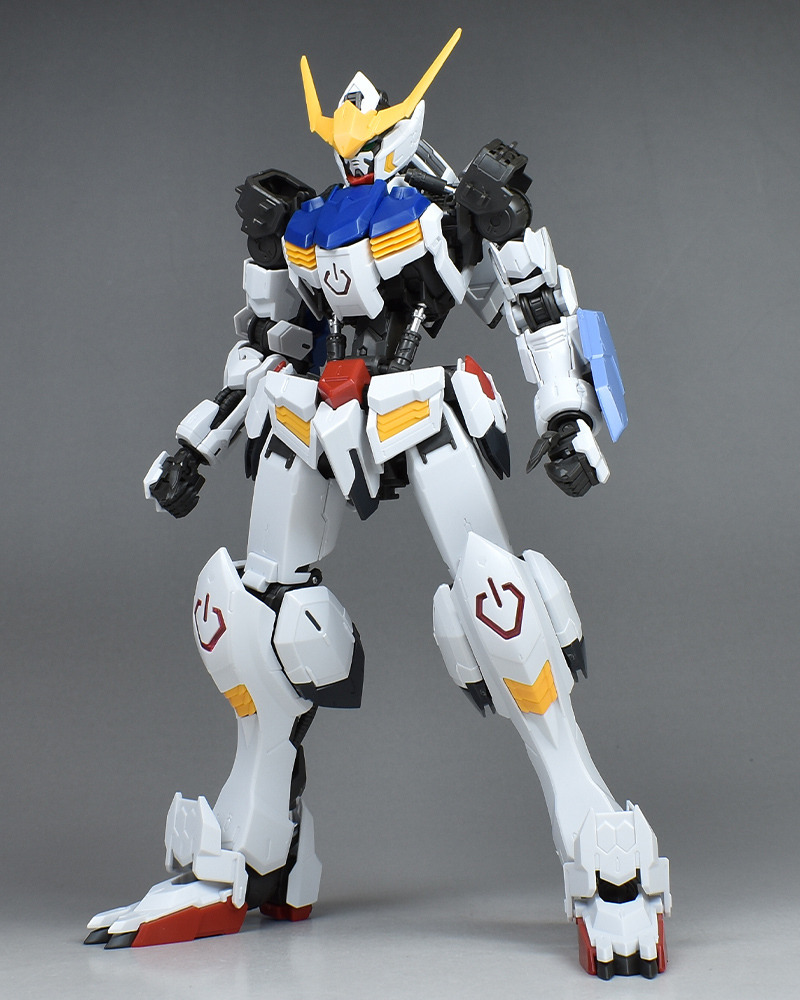
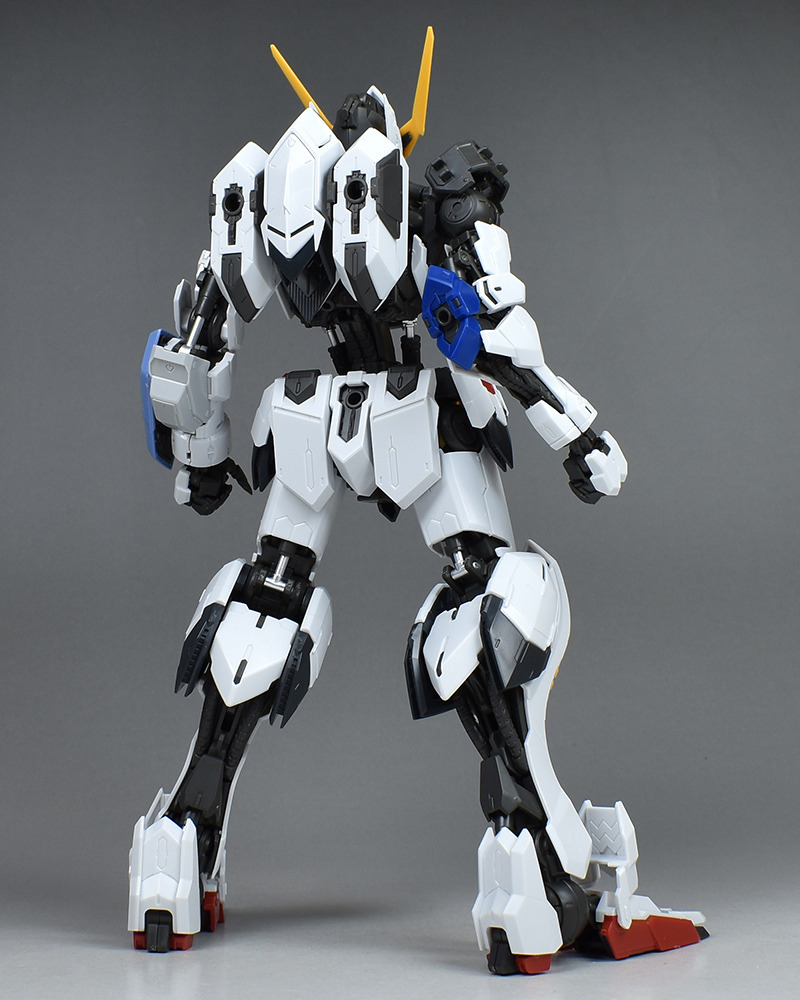
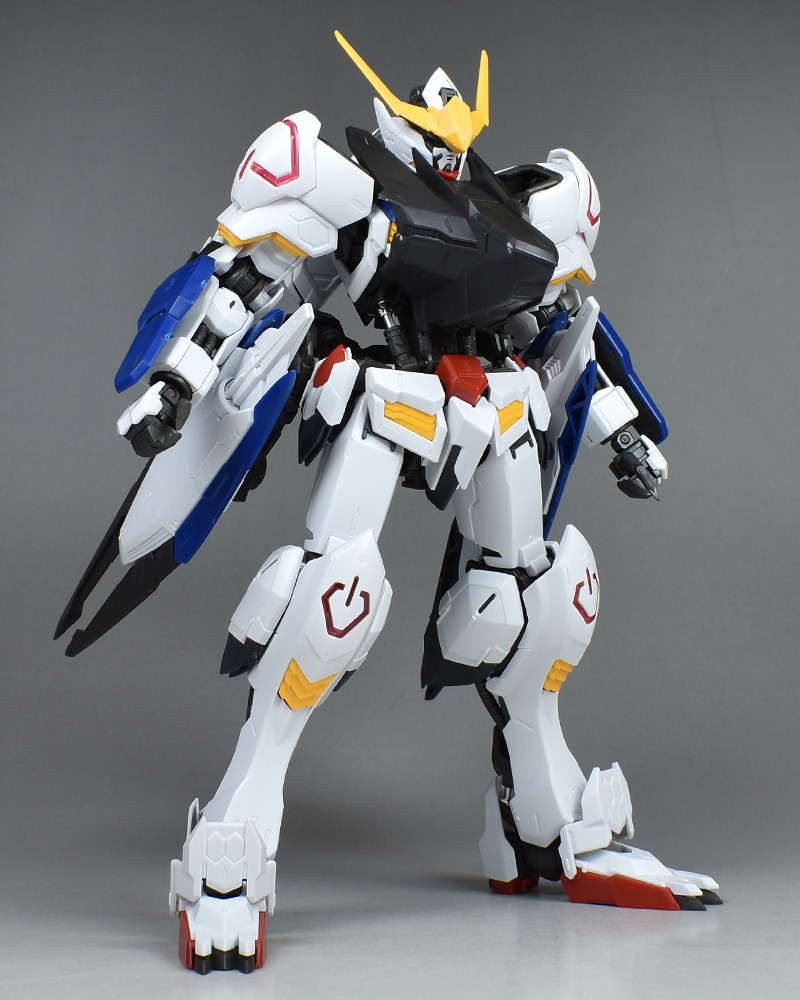
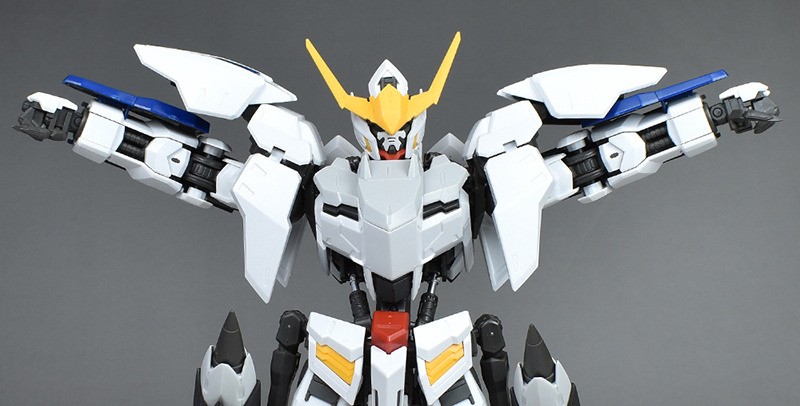
This time, we will be reviewing the expansion parts set for the MG 1/100 Gundam Barbatos !
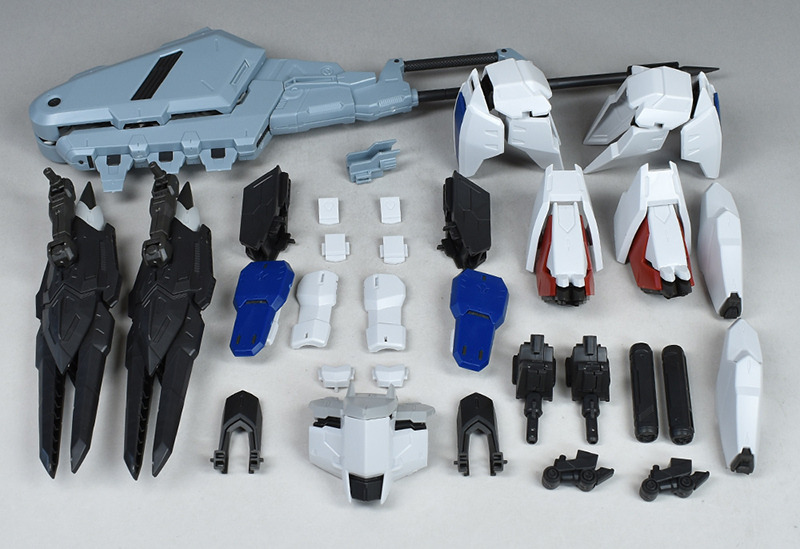
The MG Gundam Barbatos Expansion Parts Set is a 1/100 scale model expansion set of weapons and optional parts that can be combined with the MG Gundam Barbatos (sold separately) to recreate the 1st, 2nd, 3rd, 5th forms, 5th form ground combat specification, and 6th form. In addition to the armor and weapons for each form reproduced with new molding, it comes with a 1/100 mobile worker and newly designed water transfer decals. The price is 3,410 yen (tax included). This product is limited to Premium Bandai.
Gundam Barbatos was equipped with various weapons as the story progressed. The parts required for each form, the “Gundam Barbatos Expansion Parts Set”, have been made into an MG kit. By combining it with the MG Gundam Barbatos, it is possible to recreate each form from 1st to 6th (excluding 4th form).
The instructions state that “an unassembled MG Gundam Barbatos (sold separately) is required” and “it cannot be attached to a completed model.” Once assembled, it is difficult to disassemble, so an unassembled model is recommended. I reviewed it by reassembling a completed model, but if you are replacing each part, you need to be careful not to damage the parts when separating them.
All parts from form 1 to form 6 (excluding form 4) are included.
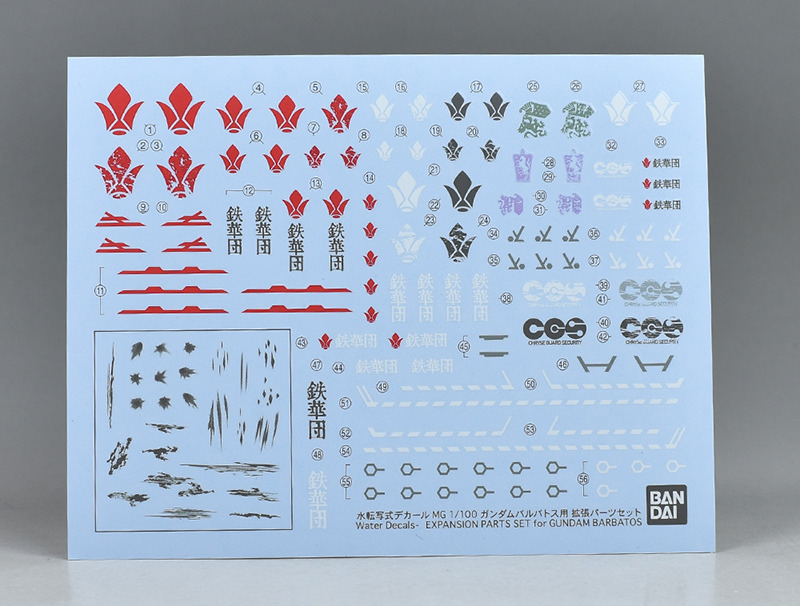
Dedicated water transfer decals are included, including the Tekkadan and CGS logos as well as the Gjallarhorn and Bauduin family emblems, bullet holes, and more, making it a versatile decal that can be used for 1/100 and 1/144 scale models.
Rubber stickers are included. By sticking them to the bottom of the high-heeled sole, the kit will not slip even when standing upright.
If you want to check out each version, please click on the link below.
・1st form
・2nd form
・3rd form
・5th form
・5th form (Ground Combat Specification)
・6th form
・Mobile Worker
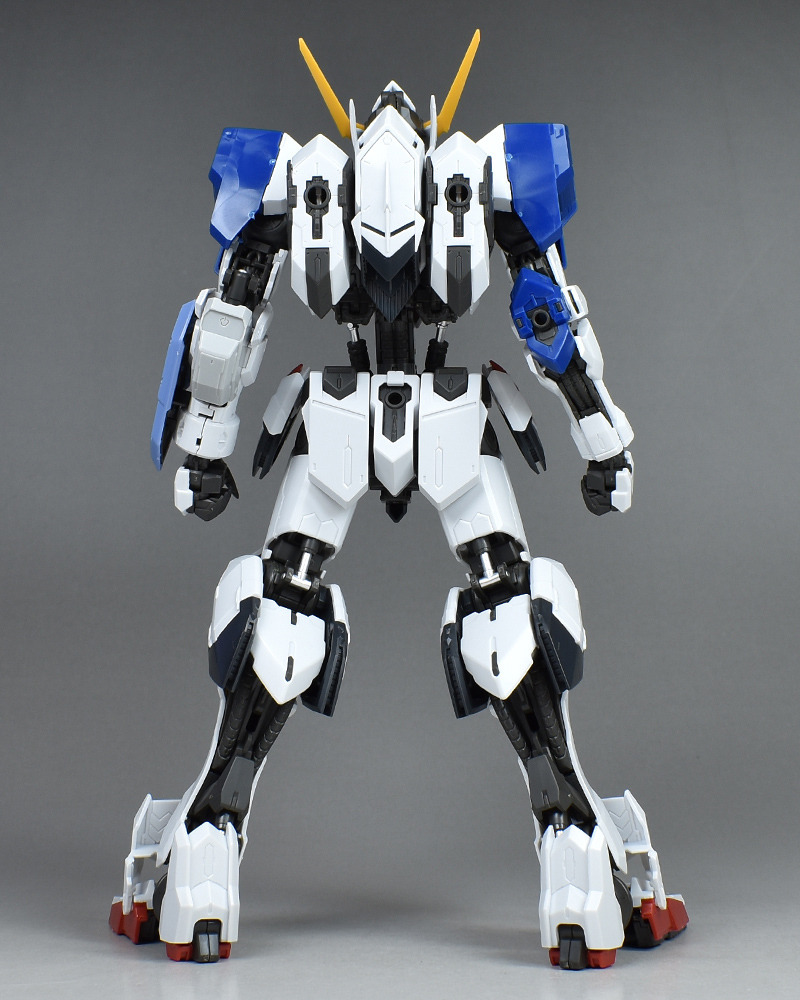
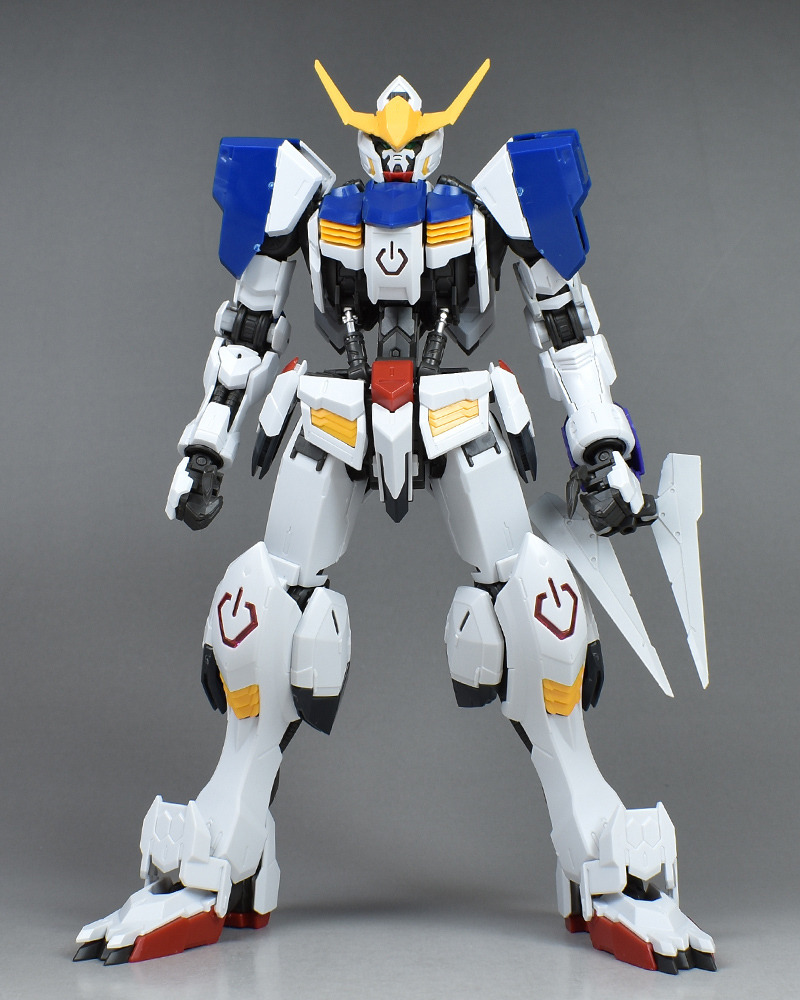
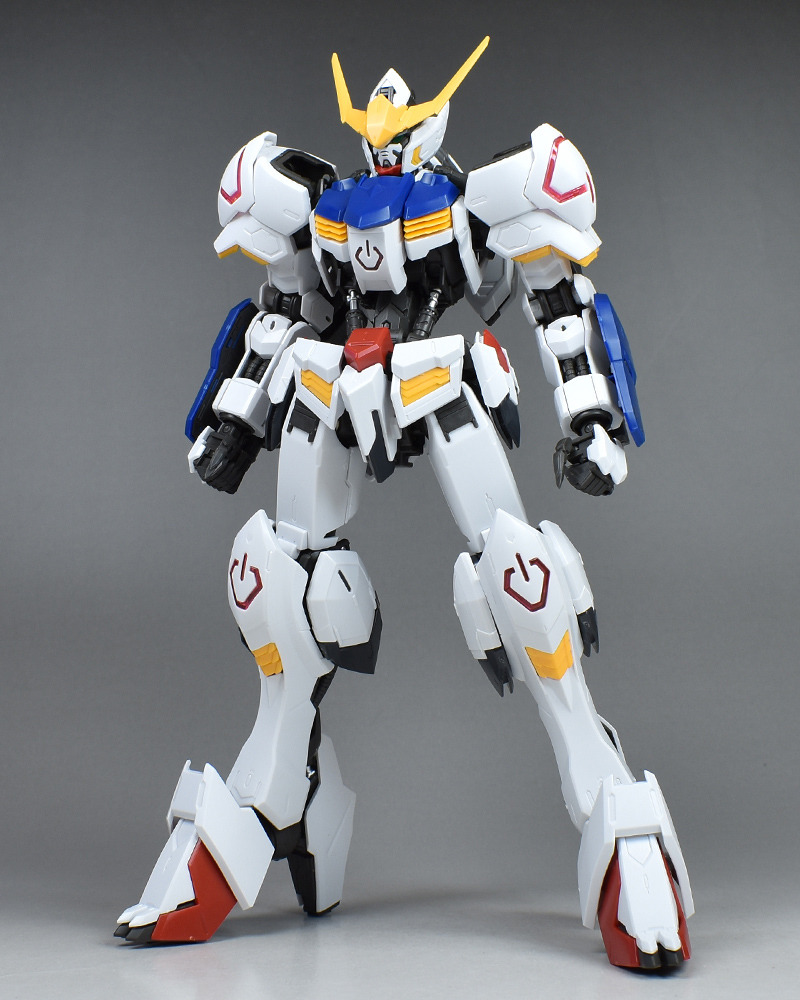
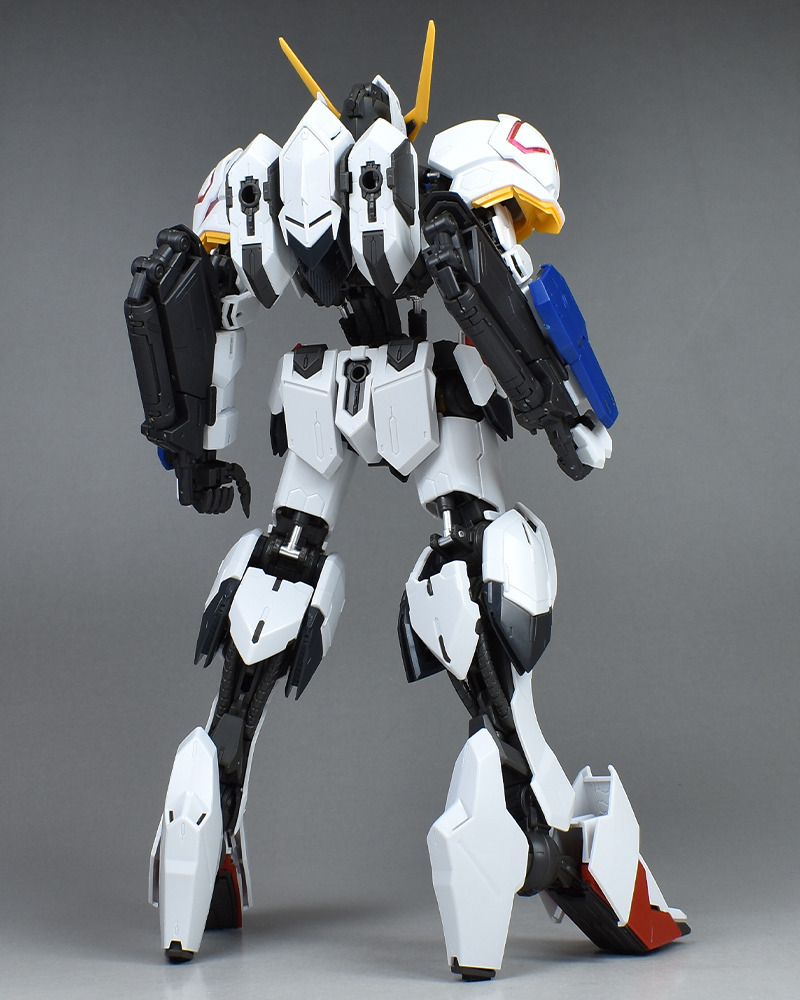
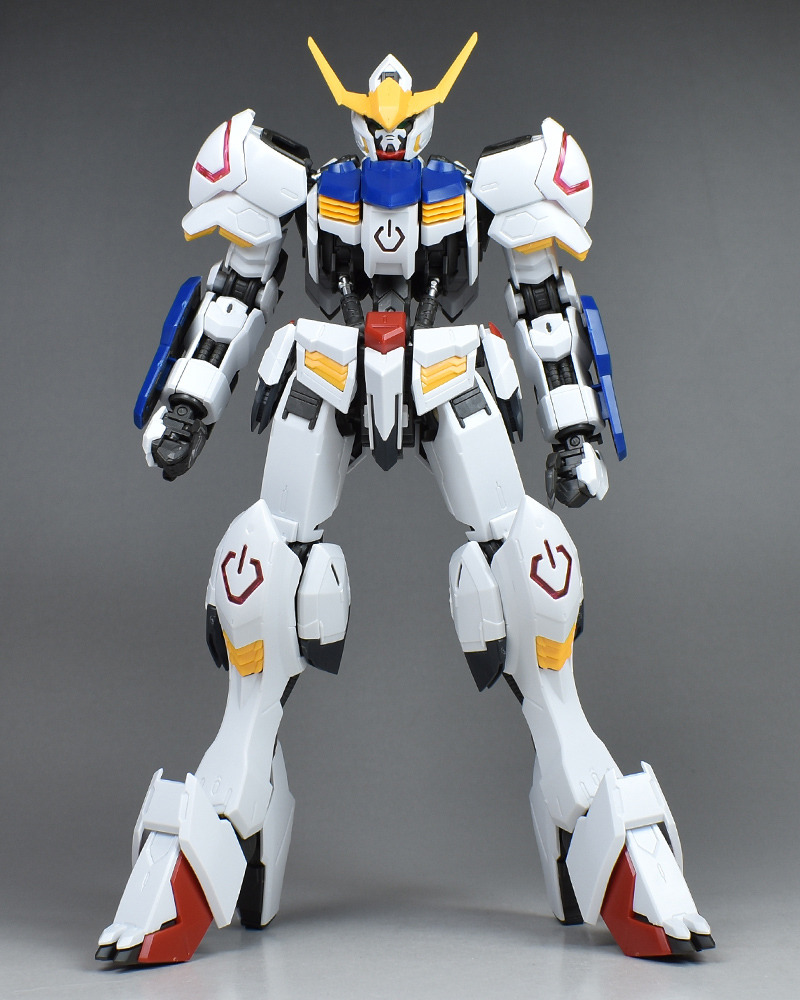
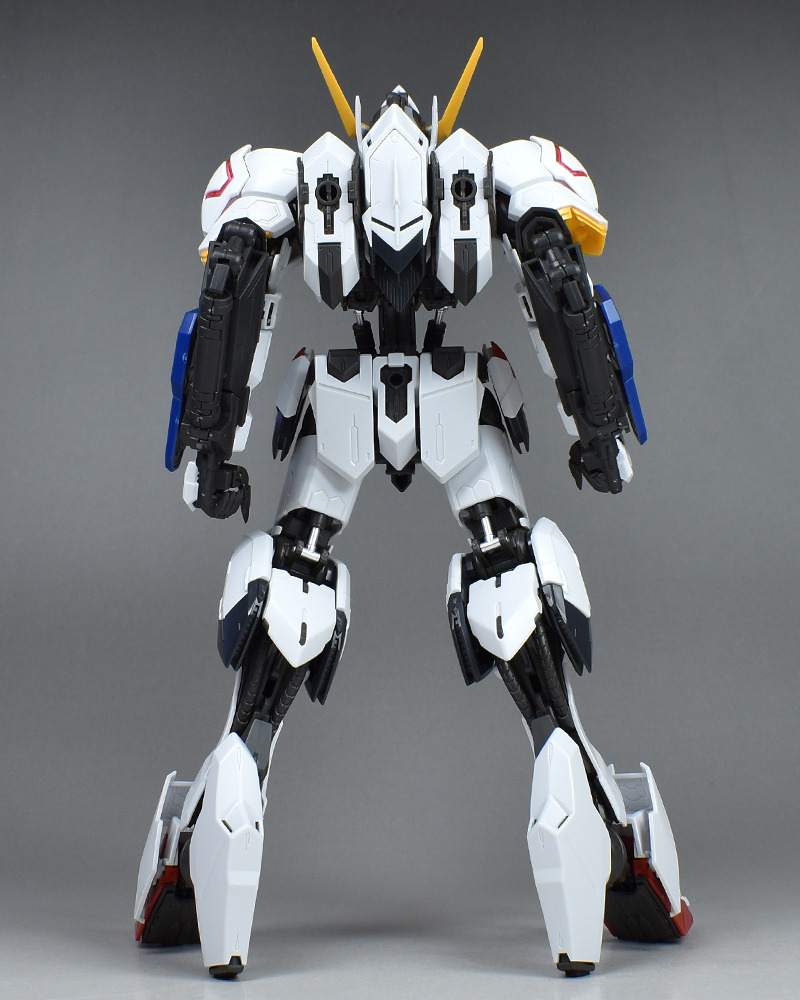
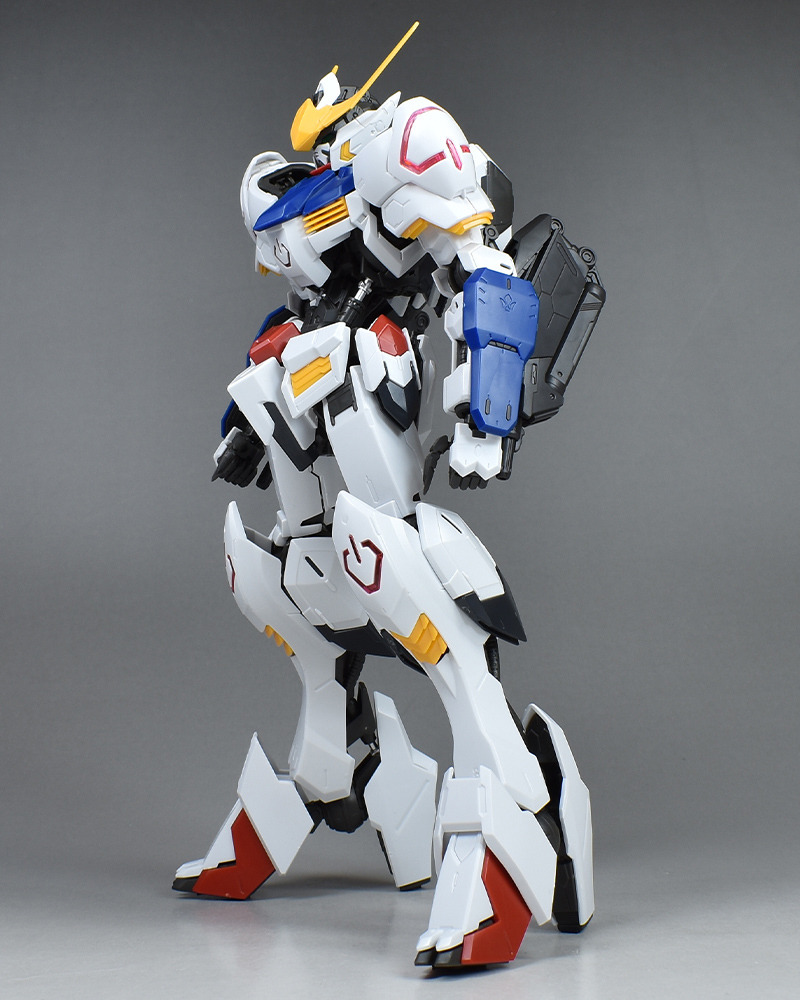
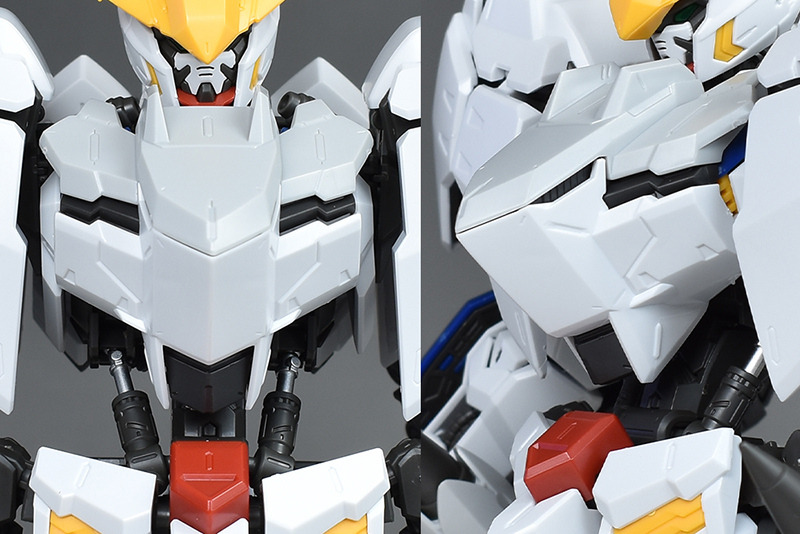
■ First Form
First, let’s start with changing the first form.
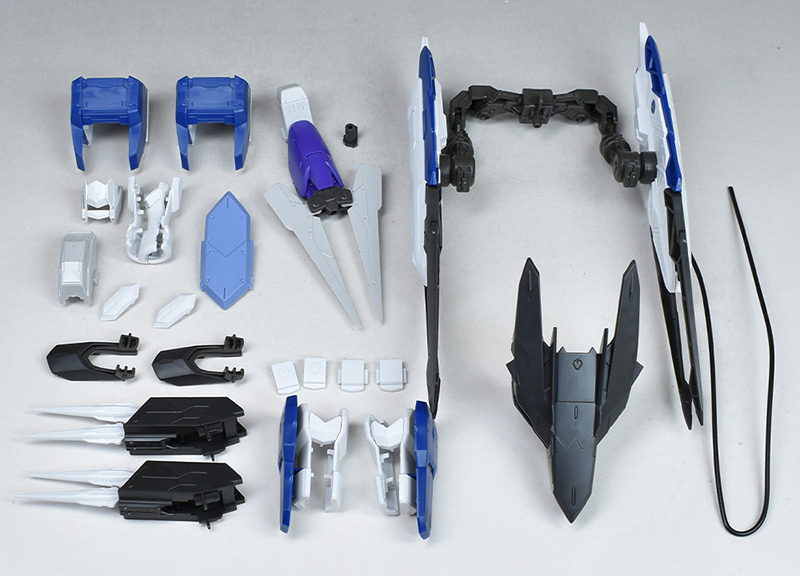
Replacement parts for the first form. Includes a left arm gauntlet and armor parts.
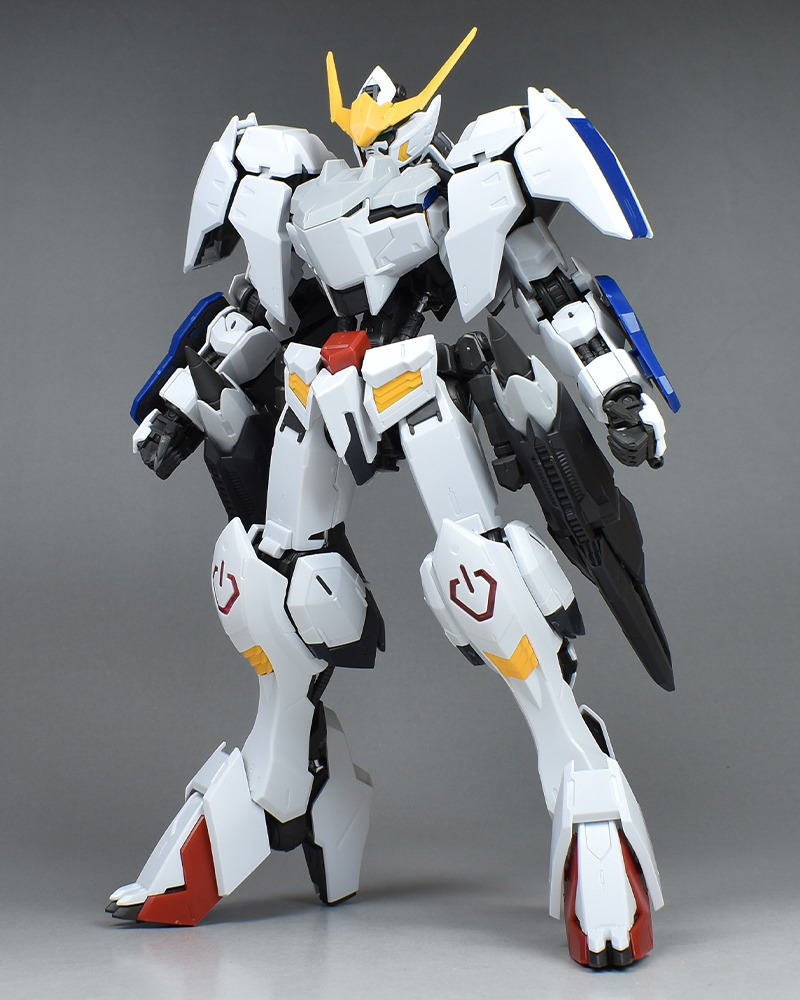
The MG Gundam Barbatos (hereinafter referred to as the regular version) can be rearranged to create the first form. This can be recreated by removing the shoulder armor and replacing the left arm with the included first form part. For the range of motion of each part of the MG Gundam Barbatos, please refer to the review of the MG Gundam Barbatos at the link below.
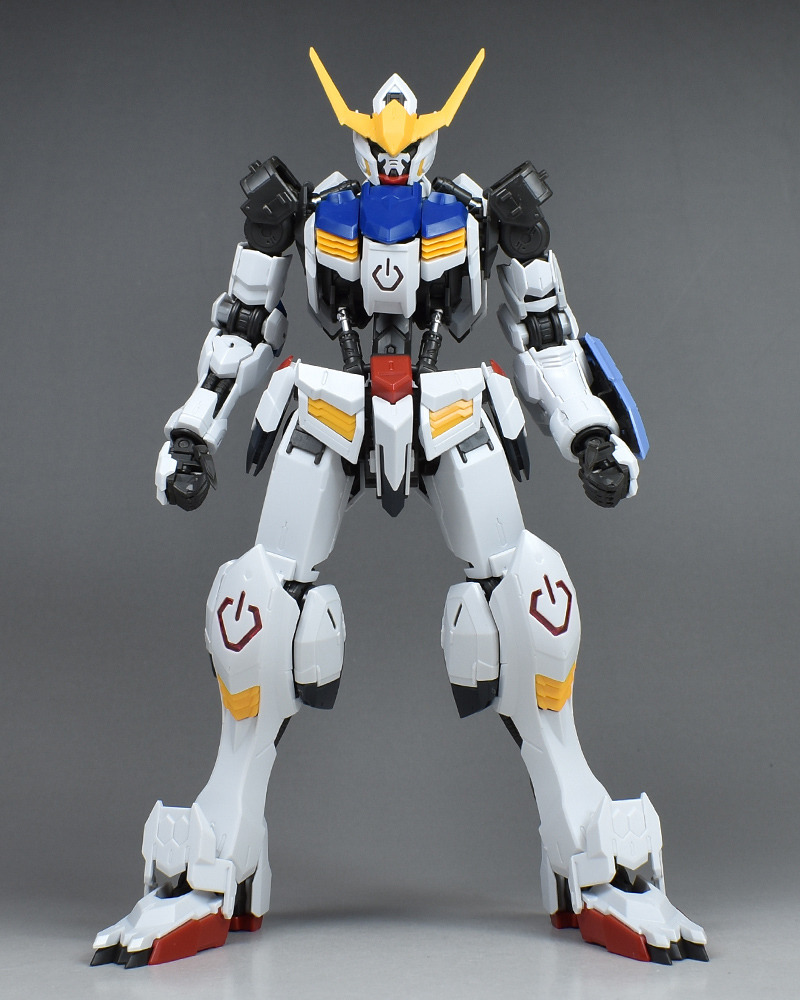
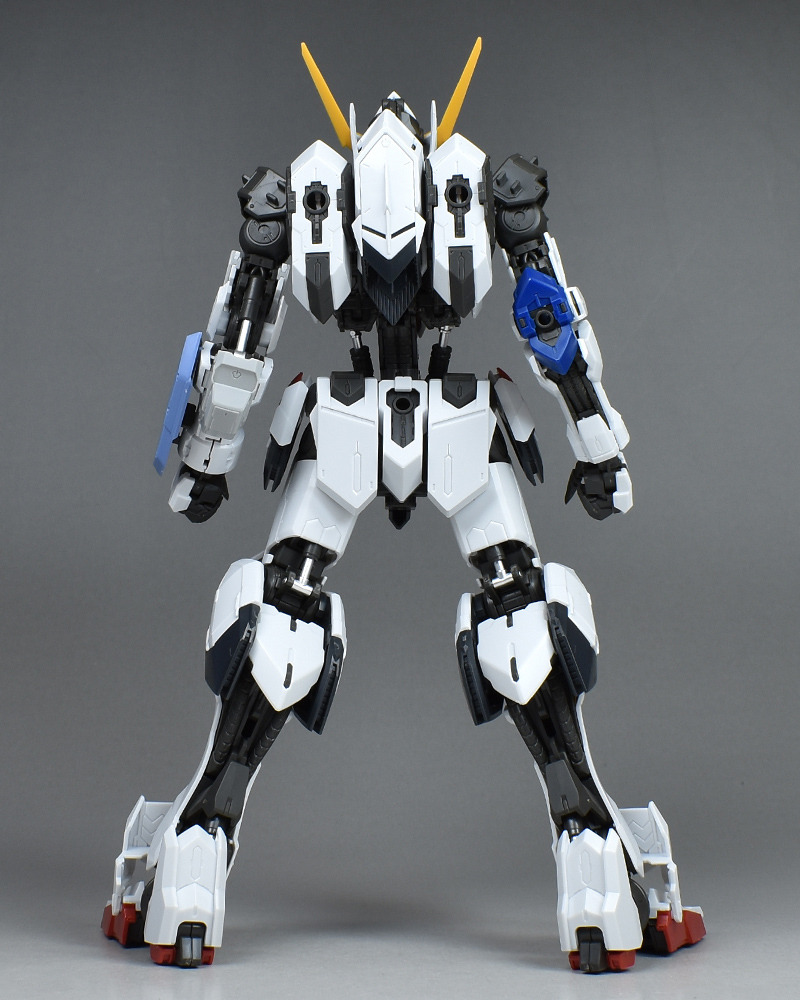

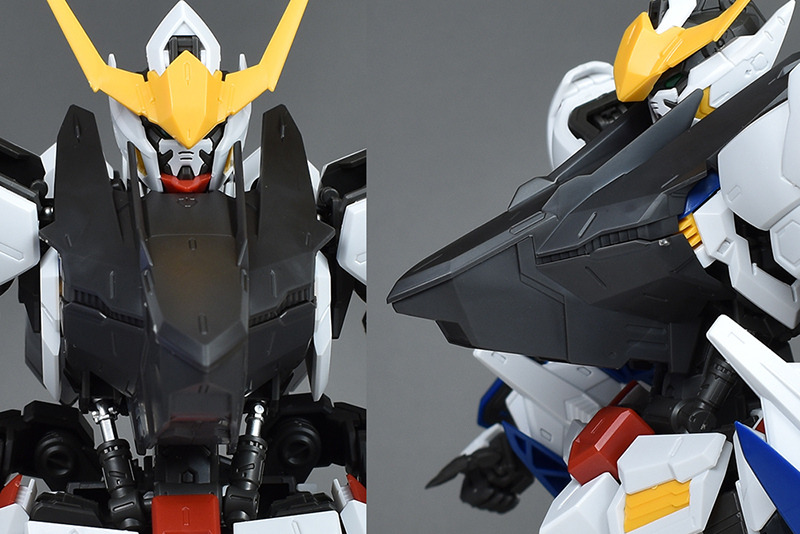
This is its original form when it was discovered in the desert on Mars, equipped with a gauntlet on its left arm and armor from another machine.
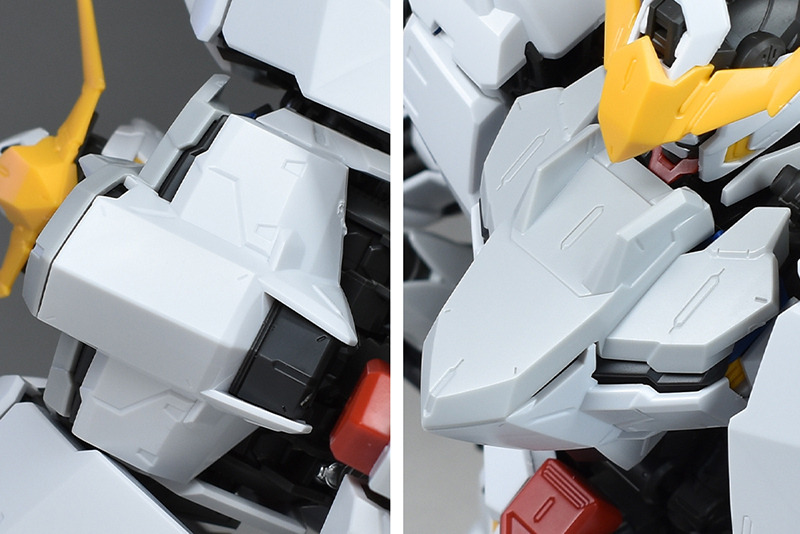
The left arm. It is divided into parts in minute detail, and the seams of each part are molded by combining multiple parts. The color reproduction of each part is also high, and the molding is also finely done.
The back of the gauntlet is also molded with a backing part. The gauntlet’s connecting dowels are shallow, so it is relatively easy to break off, so care must be taken.
The entire forearm of the left arm is covered in armor, but there is no particular interference, and the range of motion of the elbow is almost the same as in the regular version (fourth form).

However, since the armor covering the elbow moves along with the forearm, the cylinder shaft is exposed when the elbow is bent.

It recreates the storage and maintenance scenes seen in episode 1.

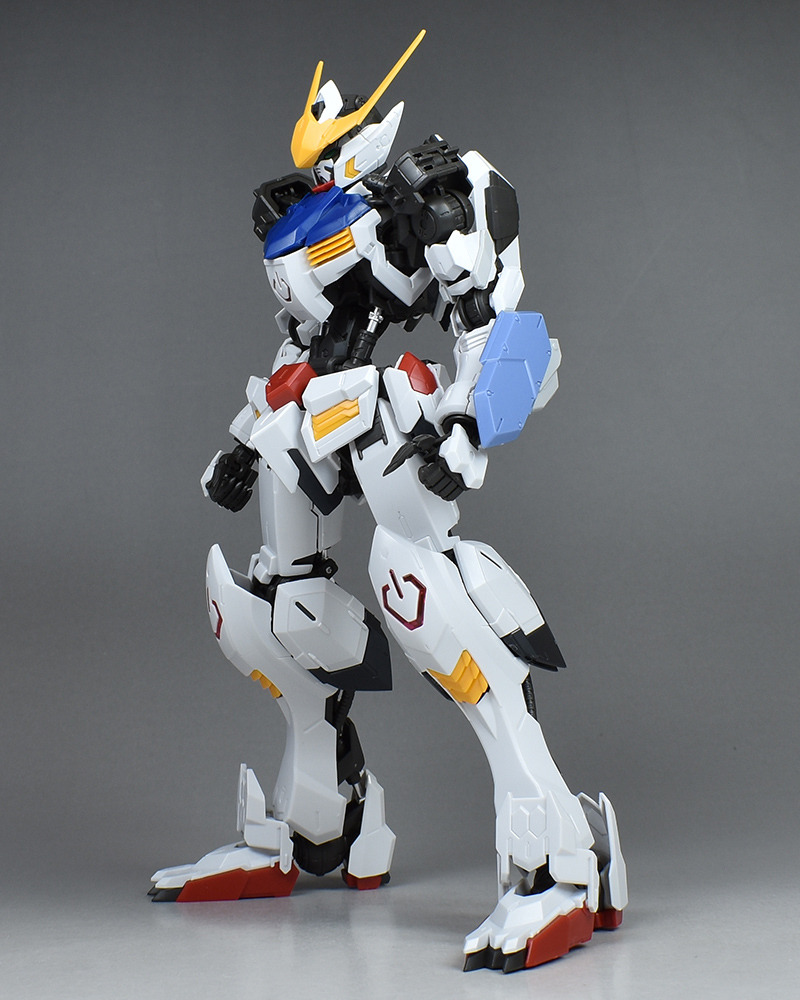
Since there is no shoulder armor, there is plenty of room for shoulder movement. The finger parts of the MG Gundam Barbatos were slightly deteriorated and easily came off, making it a little difficult to hold the weapons.
■ Second Form
Next is the second form.
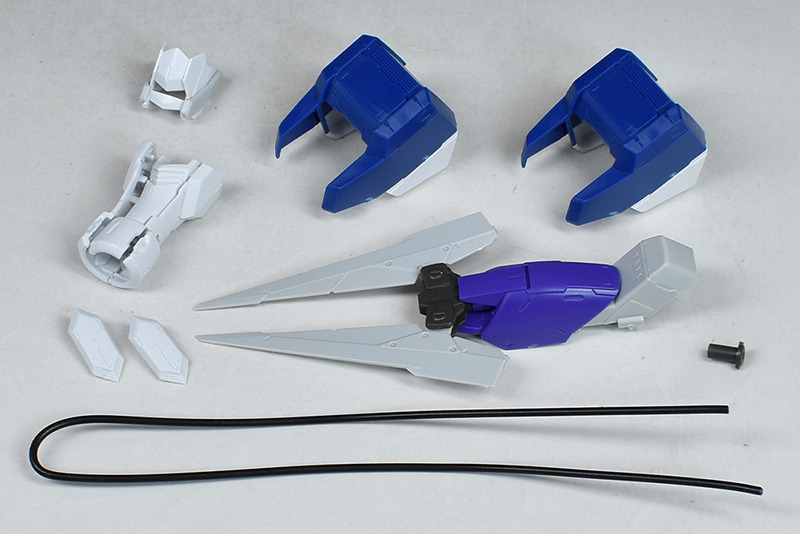
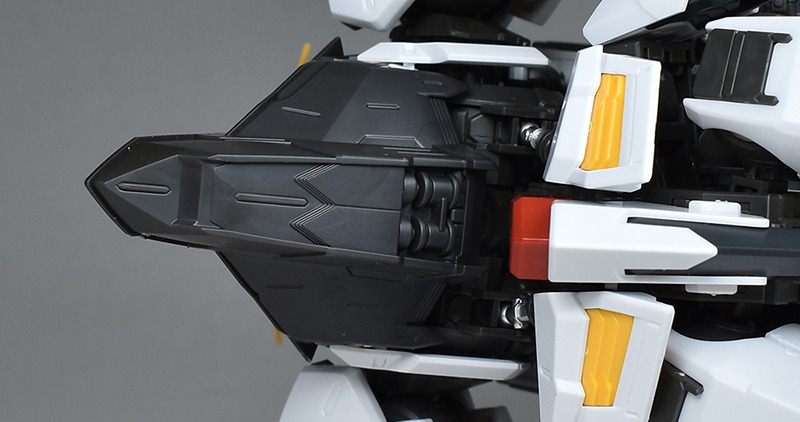
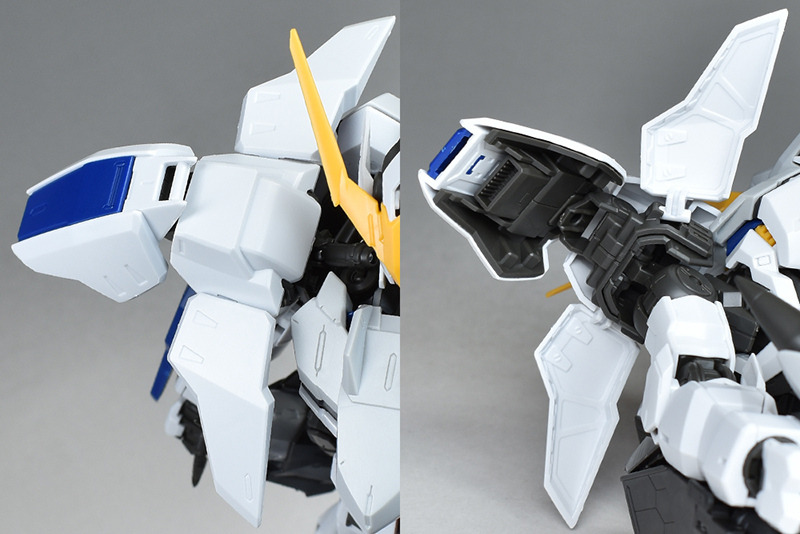
This is a replacement part for the 2nd form. In addition to the left arm armor part that is the same as the 1st form, it comes with the blue-colored Graze shoulder armor.
The MG Gundam Barbatos can be rearranged to create the second form, and the first form can be recreated by attaching the shoulder armor.

This is the form that Tekkadan took when they went into space, and with the addition of blue armor on the shoulders, it appears more heroic and durable than the first form.
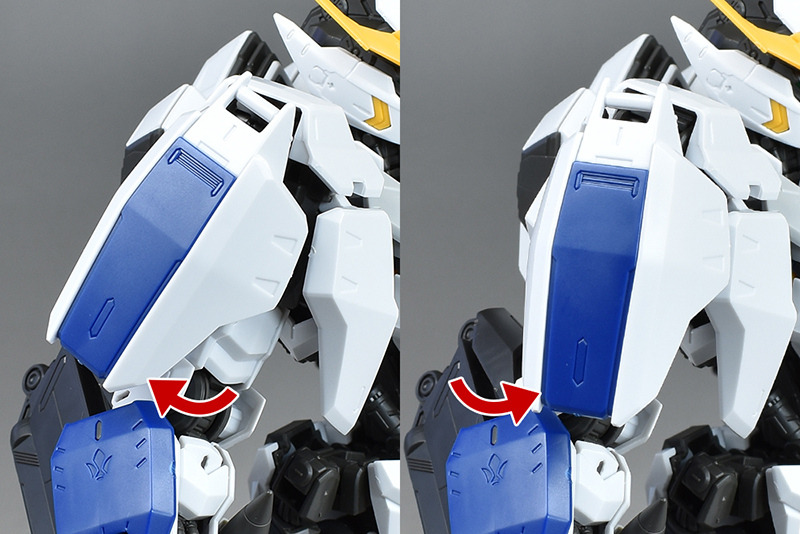
The shoulder armor has a molded surface. The seams are aligned with the borders of the color-coded parts. The assembly method is the same as the regular version (fourth form), and it is fixed by pinching it in from the front and back, so there is no risk of it falling off.
The arms can only move horizontally, which seems to limit the range of movement a little more than without the shoulder armor. However, I don’t think it’s a big deal. If you raise it any further, the shoulder armor may come off, so be careful.

The movement itself isn’t that different from the first form, so there’s no problem with posing it. You can easily recreate poses.
There were many scenes in the movie where the characters were blasting through space equipped with smoothbore cannons, but the arms of the backpack were showing signs of wear and tear, and the finger parts of the grip were prone to coming off, so holding the smoothbore cannon was a bit stressful.
■Third Form
Next is the third form.
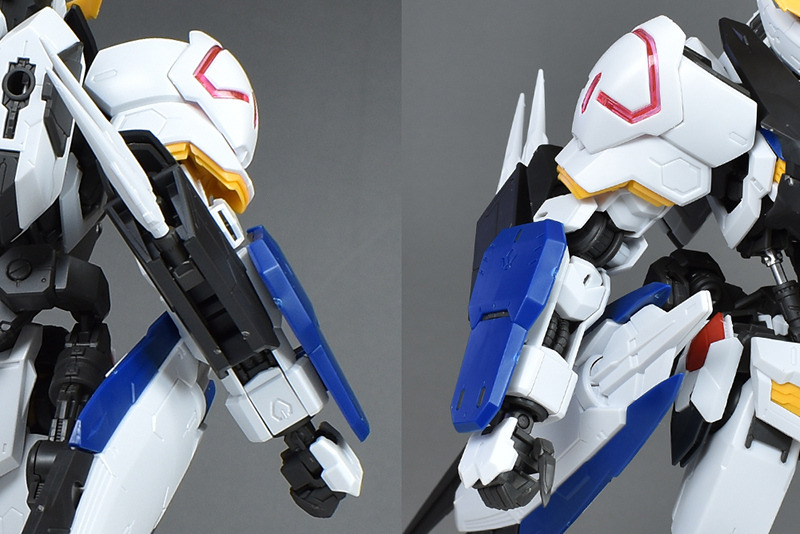
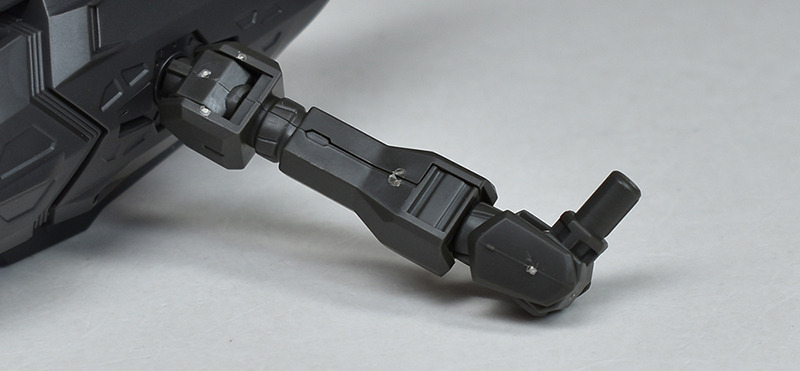
Replacement parts for the 3rd form. The left arm parts and shoulder armor are the same as the 1st and 2nd forms. A wire claw is included for the 3rd form. Lead wires and joint parts for firing the wire claw are also included.

The MG Gundam Barbatos can be rearranged to create its third form. This can be recreated by removing some of the forearm parts from the second form and attaching the wire claws.
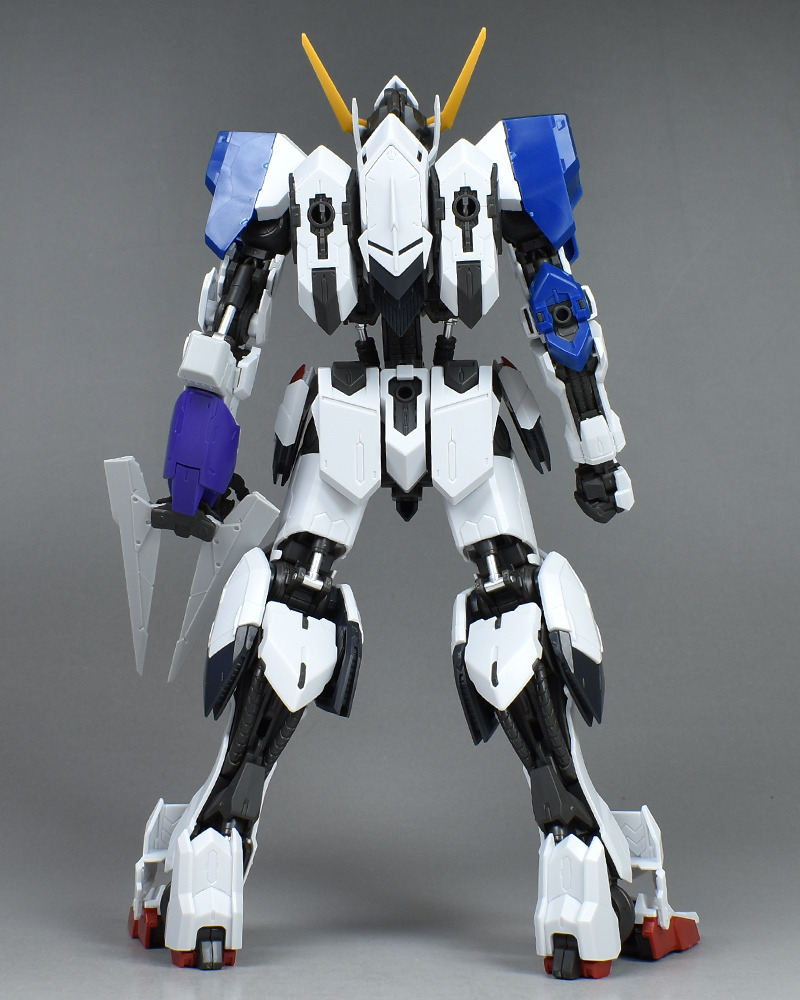
This is the appearance it has during its battle with Turbines Hyakuren, with a wire claw captured from the Schwalbe Graze equipped on its left arm.
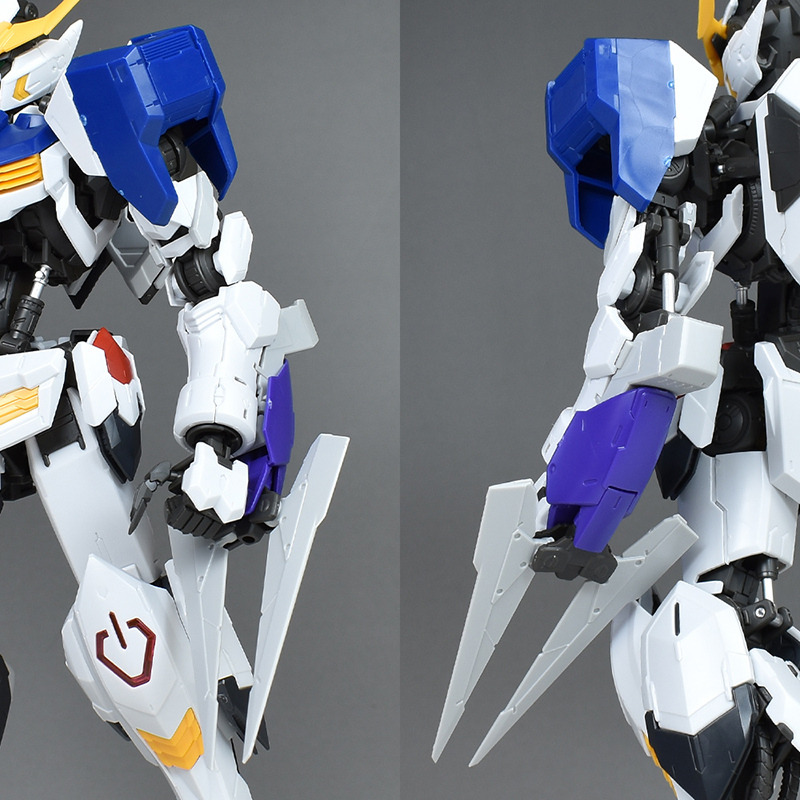
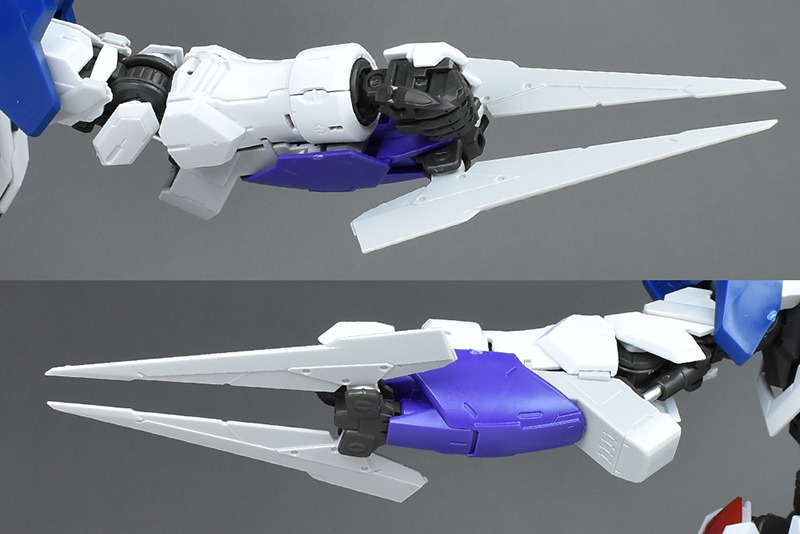
Left arm. The armor on the upper arm and forearm remains the same as in the first form. A wire claw has been added to the outside.
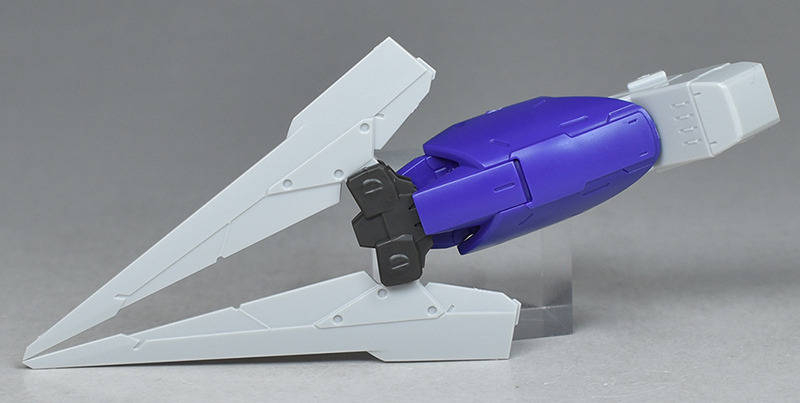
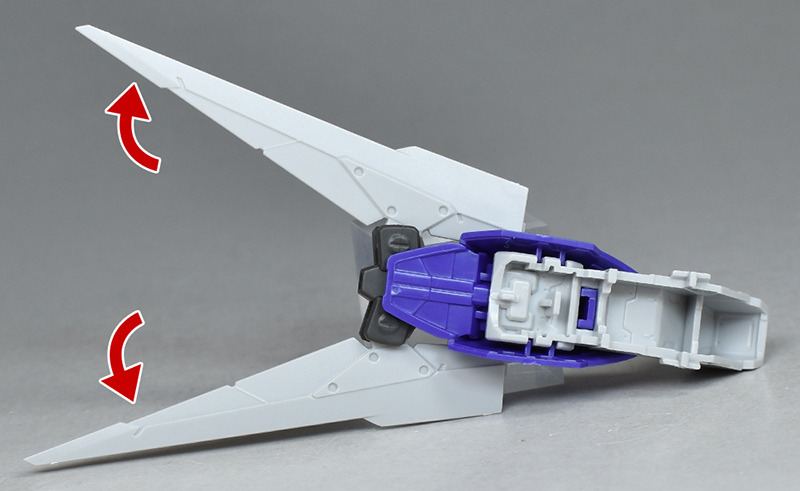
The wire claw has an openable blade. Unlike the 1/100 Schwalbe Graze, it is slightly sharper and more densely constructed.
It is slightly more heavily armed than the second form, but there is no problem with mobility, and it is easy to pose, just like the second form.
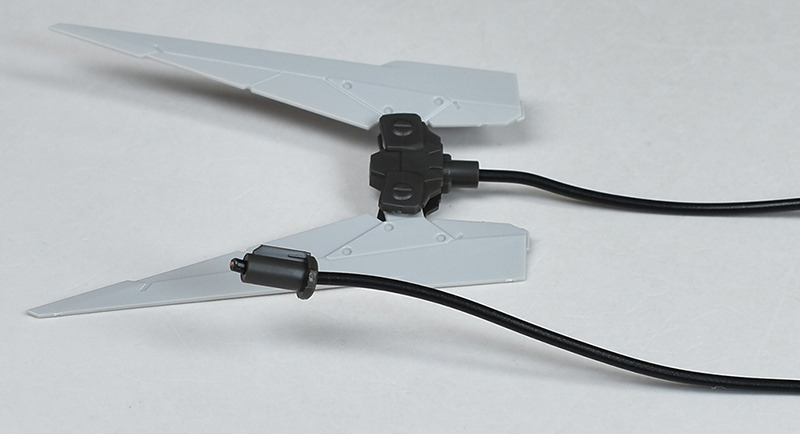
When firing the wire claw, a joint part is attached to the base and the lead wire is inserted to recreate the action.
The lead wire is fairly thick and strong, so you can pose it without the tip drooping too much.
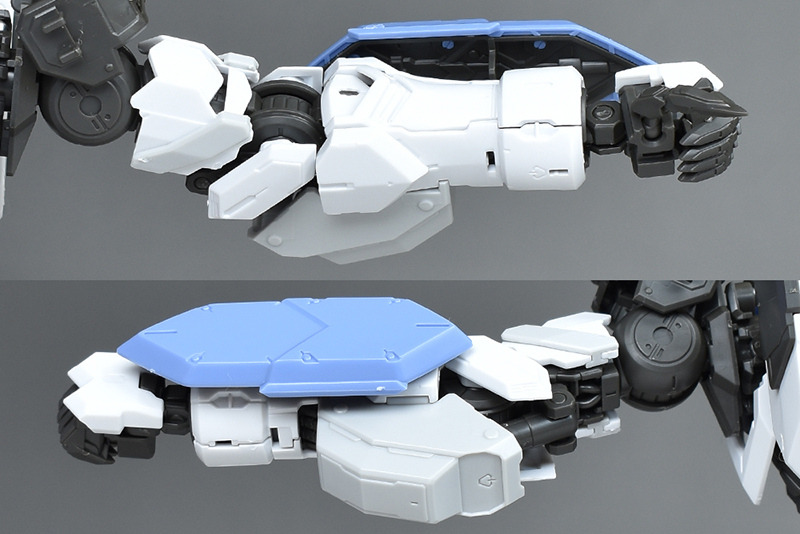
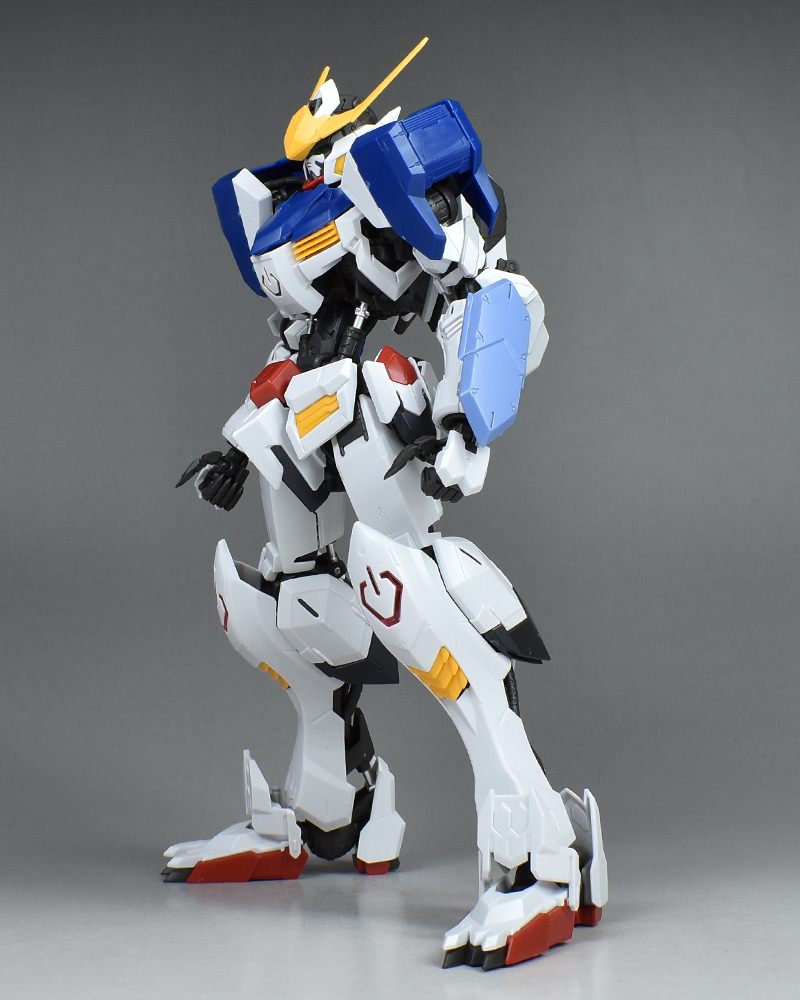
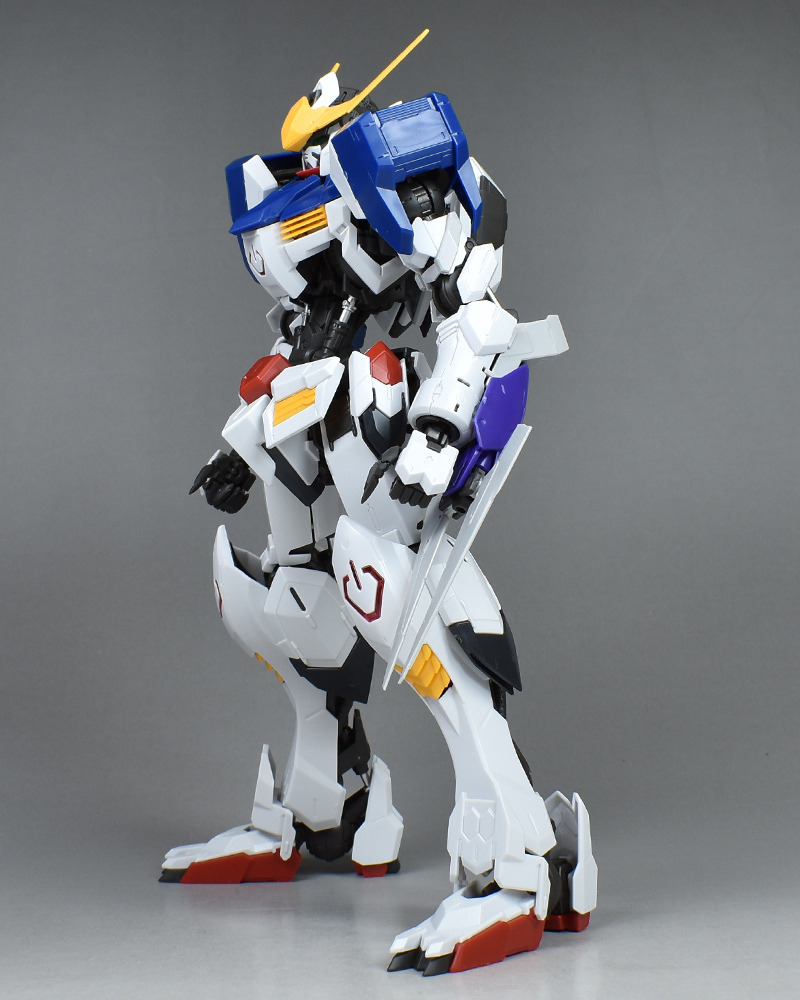
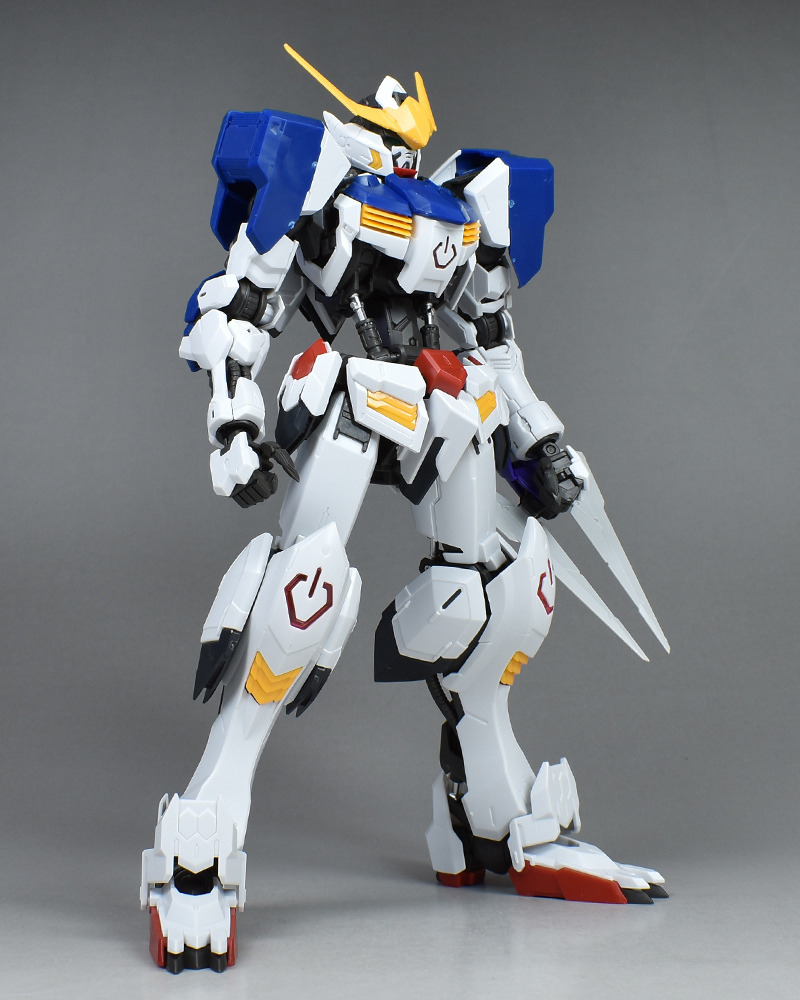
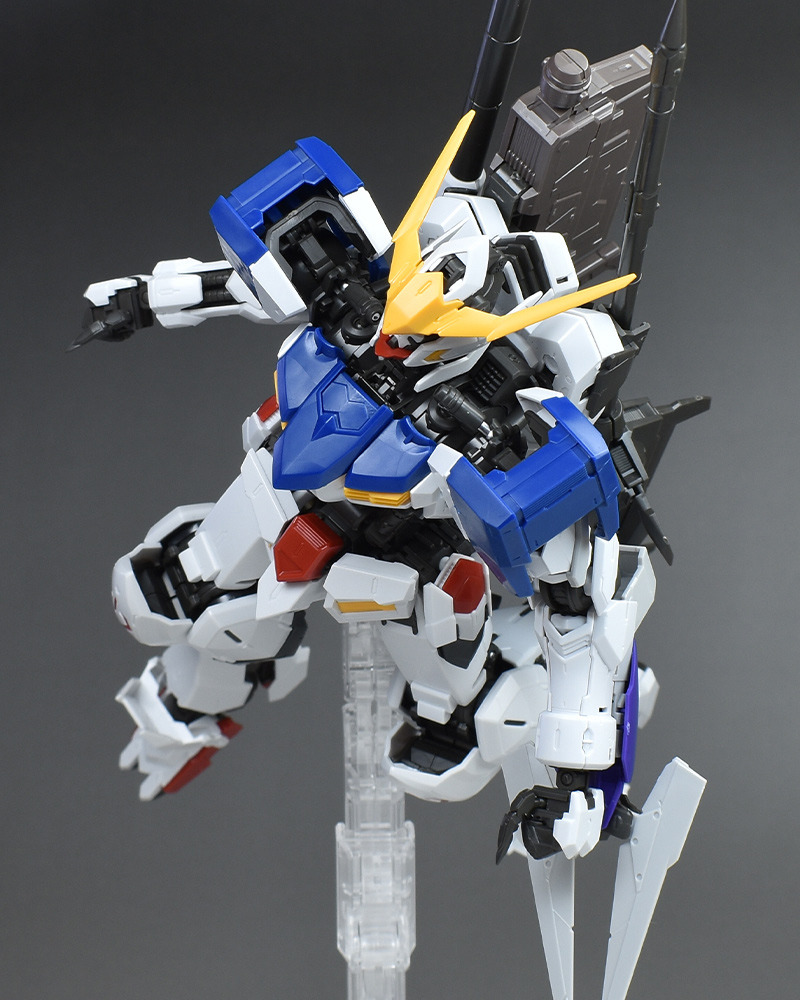
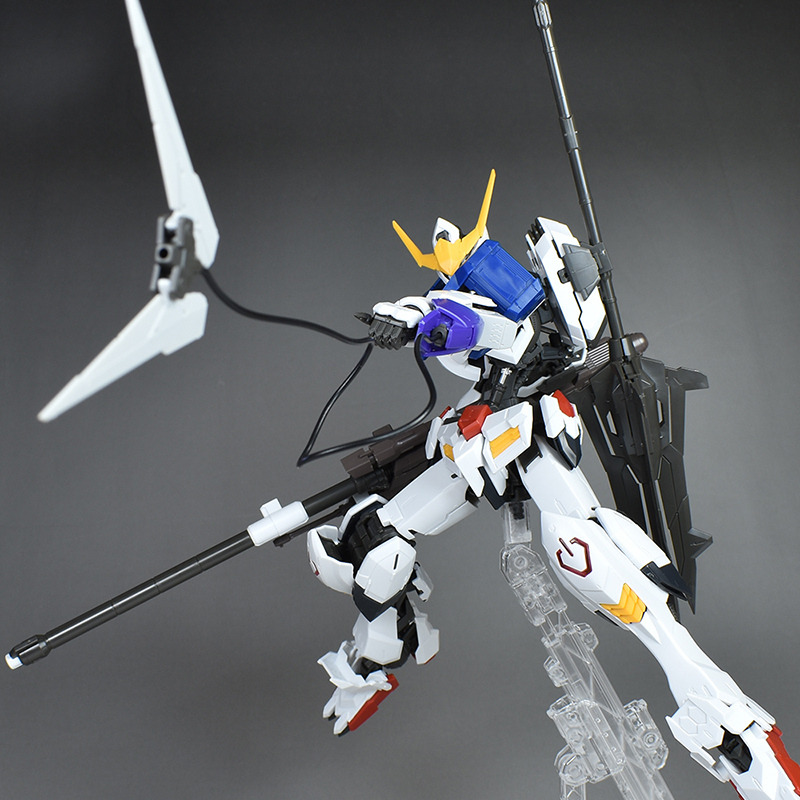
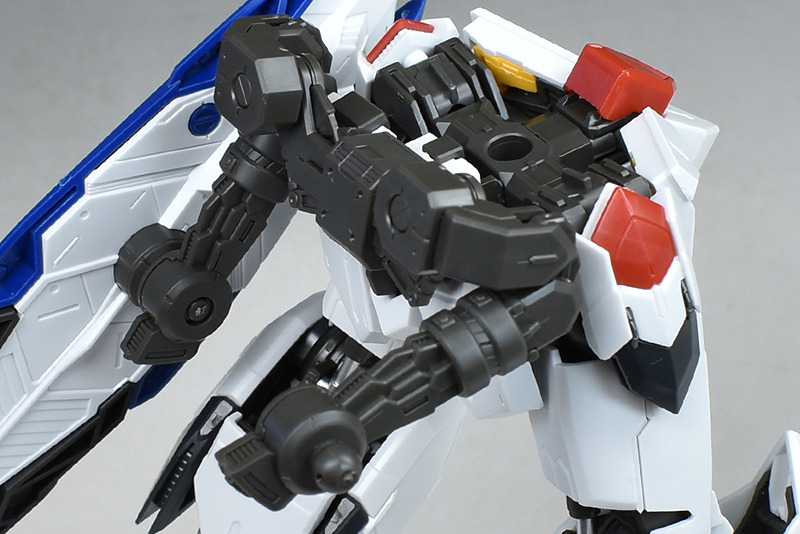
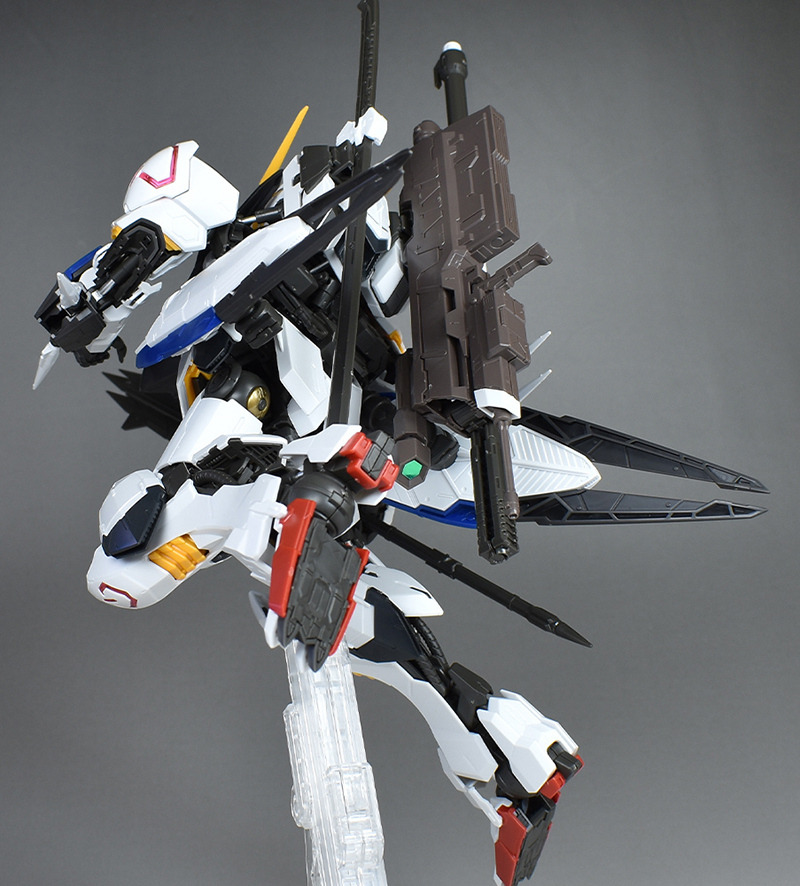
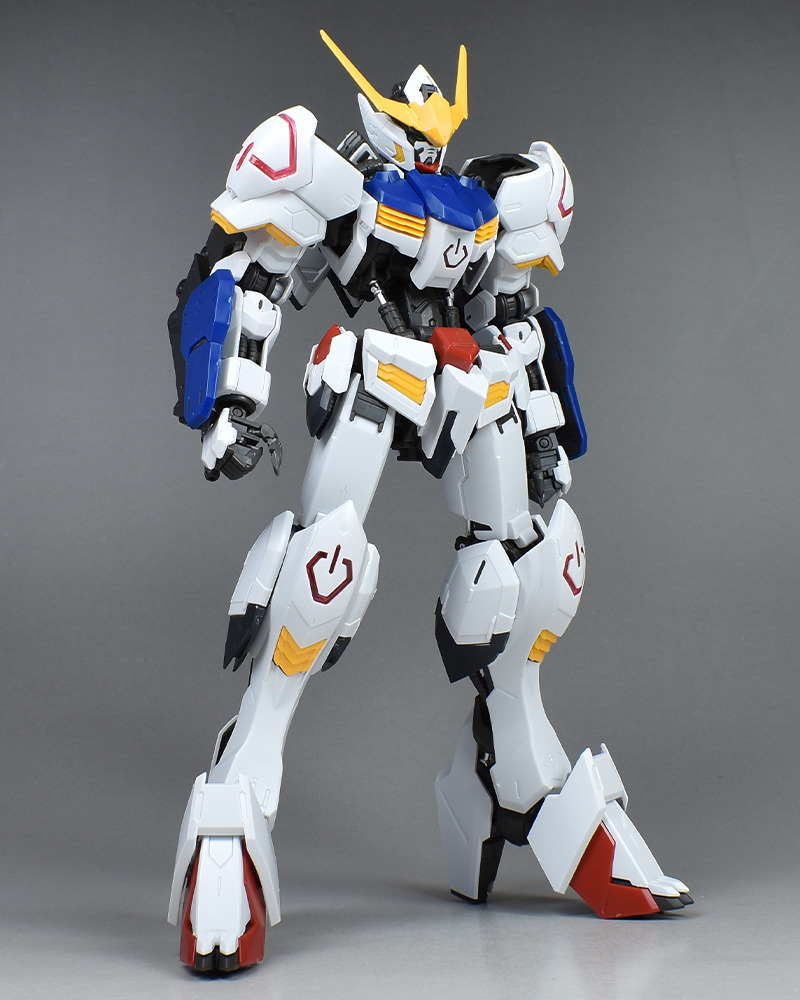
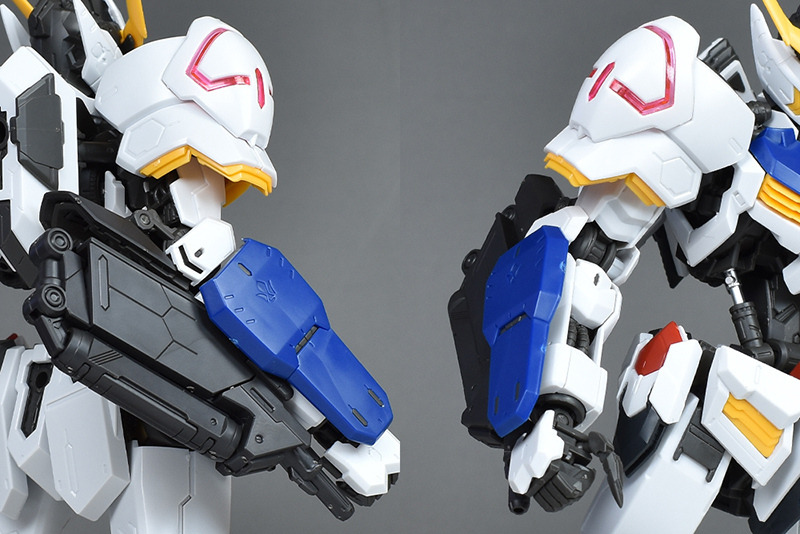
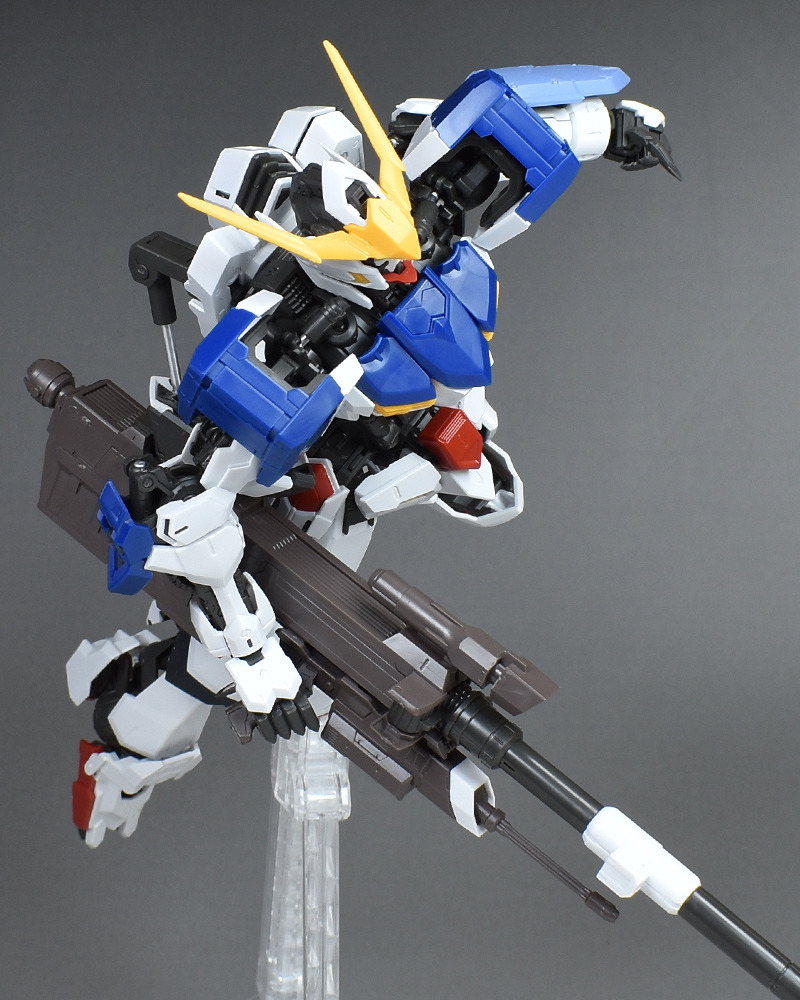
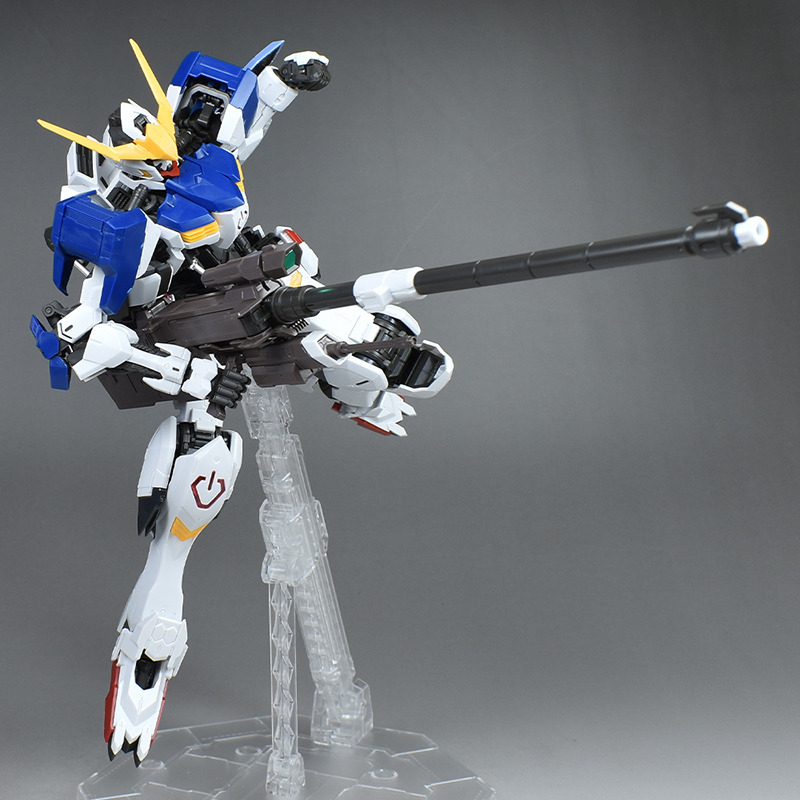
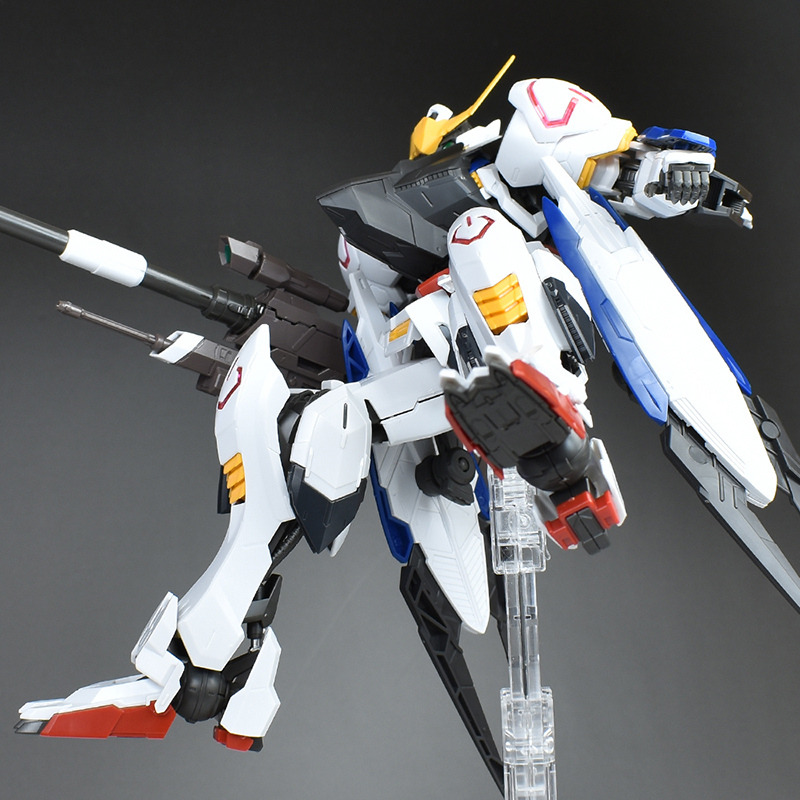
■ Fifth Form
This is the fifth form.
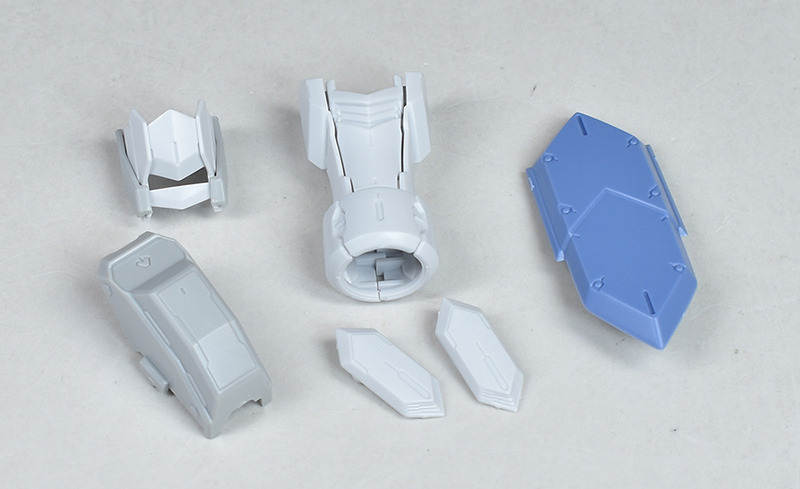
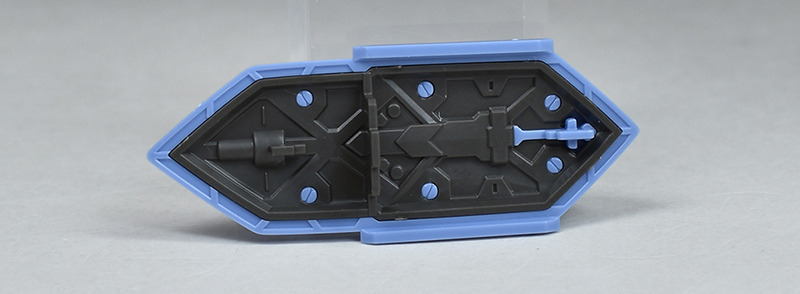
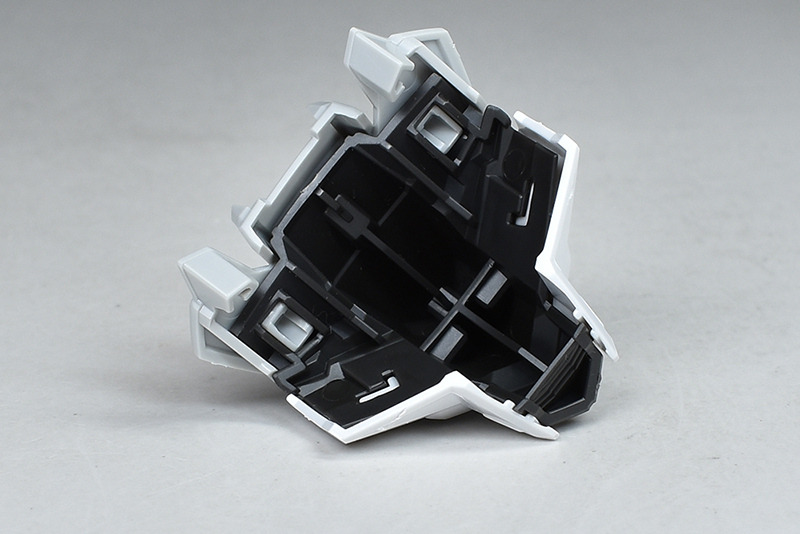
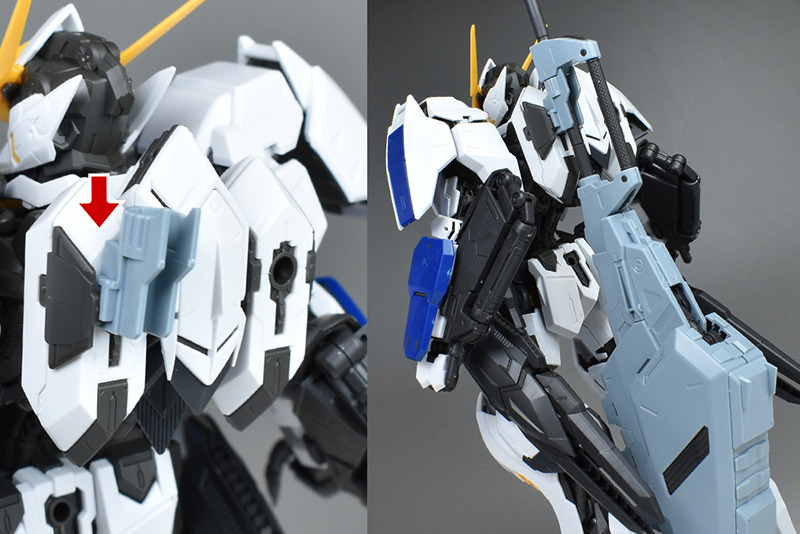
Replacement parts for the 5th form. Includes chest reactive armor, additional arm armor, and waist flight unit.
MG Gundam Barbatos can be rearranged to form 5. Since the weapons are different from the 3rd form, it may be easier to rearrange from the regular version (4th form) than from the 3rd form.
地上への降下作戦前、ガンダムキマリスとの戦闘用に換装した姿になります。シュヴァルベ・グレイズから鹵獲した腰部フライトユニットやモンターク商会から提供された対キマリス用のリアクティブアーマー、前腕の増加装甲を装備。第3形態からスタイルが大幅に変化し、胸部や腰部などに存在感のある武装が備わっています。
胸部のリアクティブアーマーは上下挟み込みタイプ。色分けはなくシンプルなカラーリングで、適度にモールドが造形されています。

上下2枚パーツ構成で、通常版の胸部に挟み込むだけで装備が可能です。
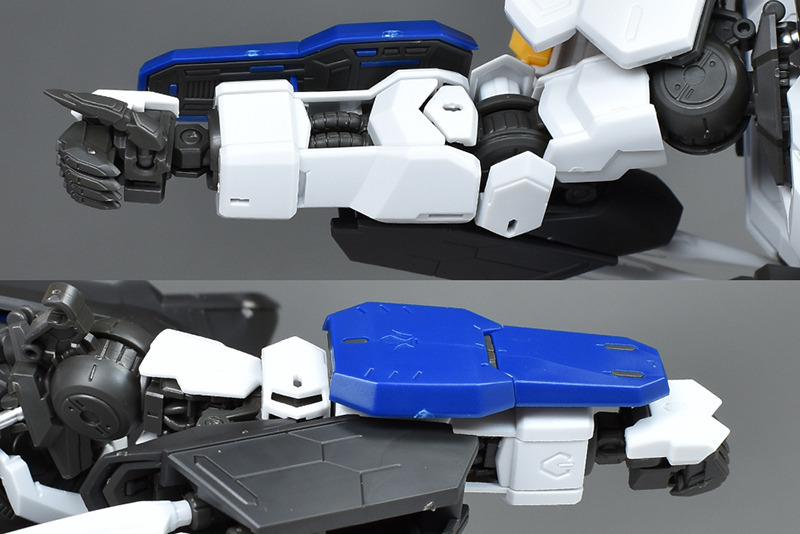
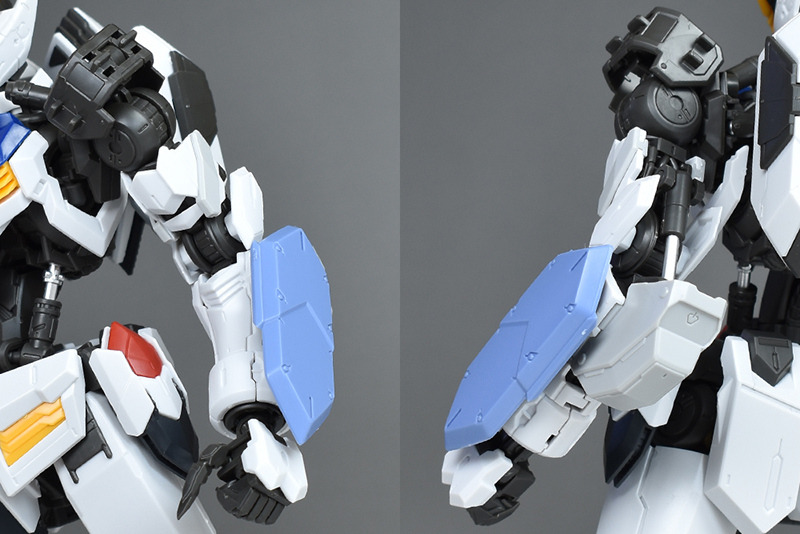
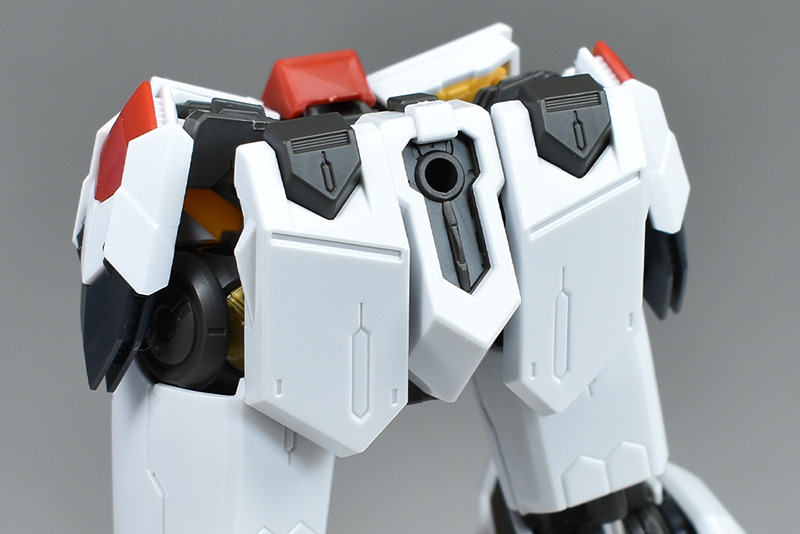
腕部には増加装甲を装備。第1形態の装甲とは異なり、二の腕や肘左右の装甲などは第4形態のものが使用されています。青いガントレット(シールド?)も形状が変化し、全体的に厚みのある作りに仕上がっています。

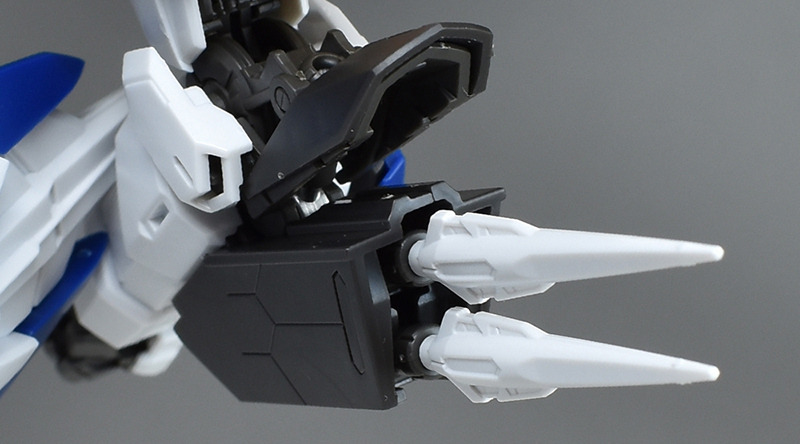
肘には特徴的な迫撃砲を装備。
追撃砲は前方に向け、スライド展開させることができます。
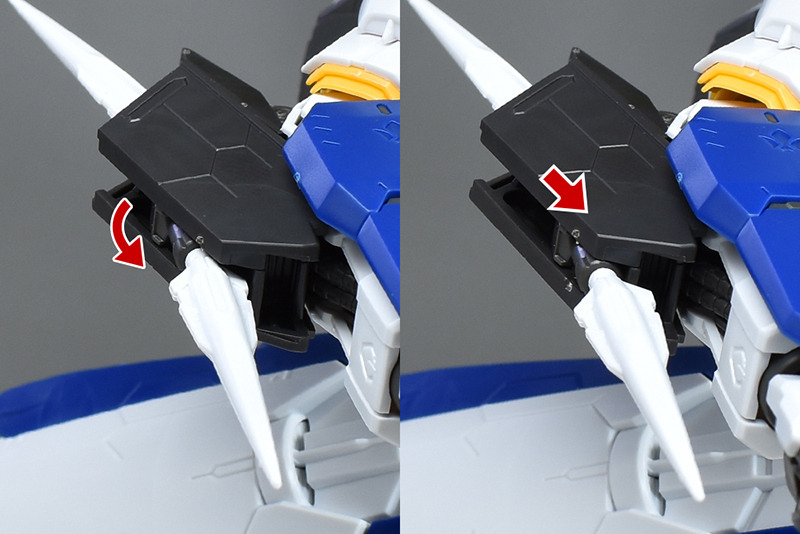
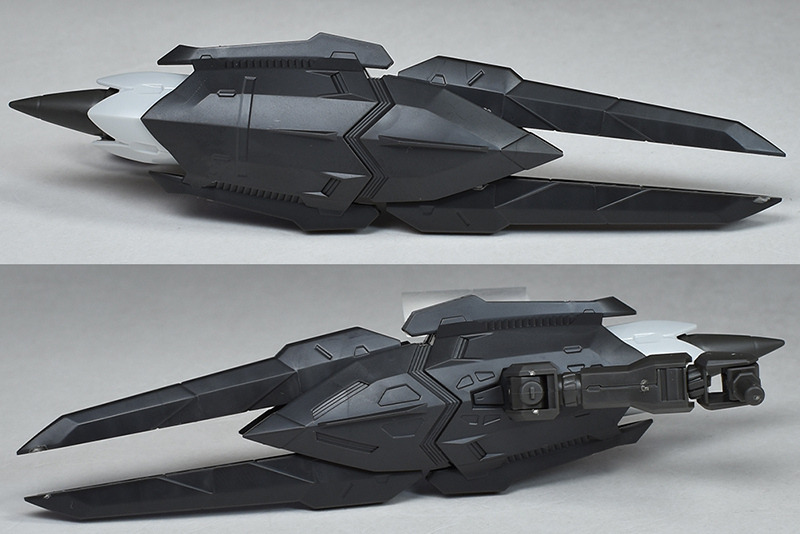
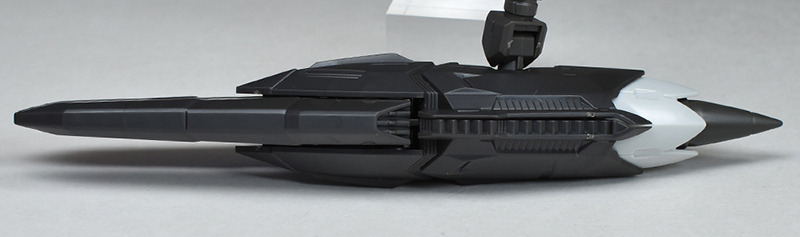
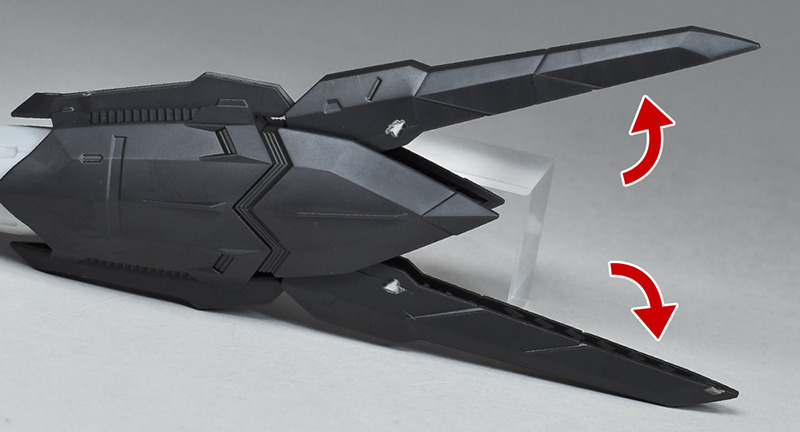
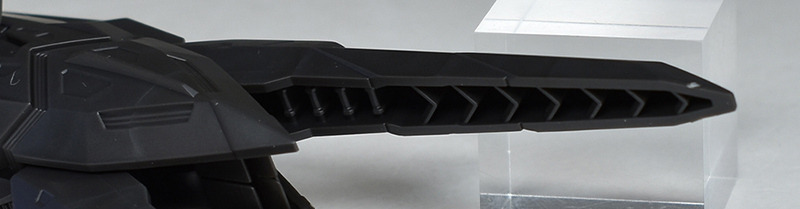
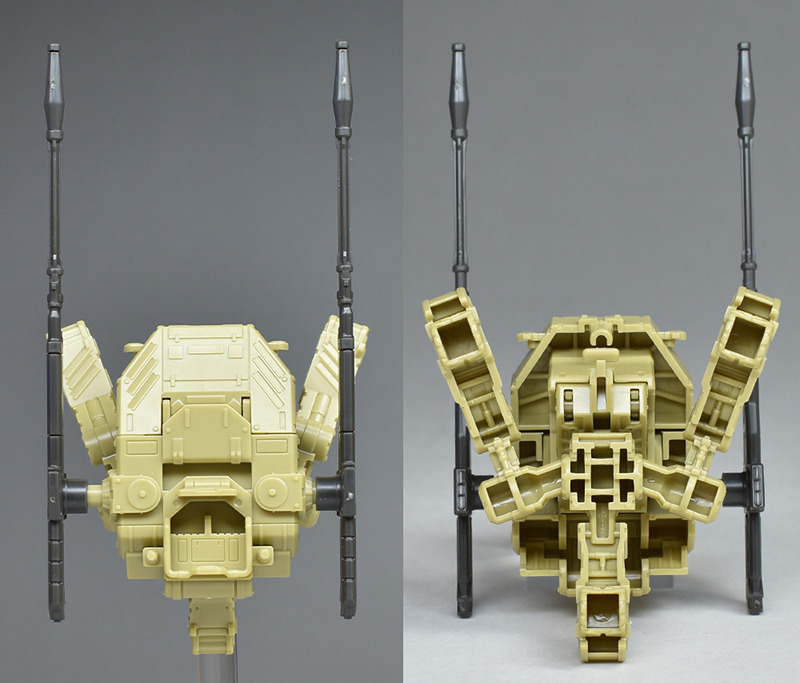
腰部フライトユニット。リアアーマーからフレキシブルアームを介して左右に配置されています。
フレキシブルアームは複数パーツの組み合わせによって各部が細かく可動。
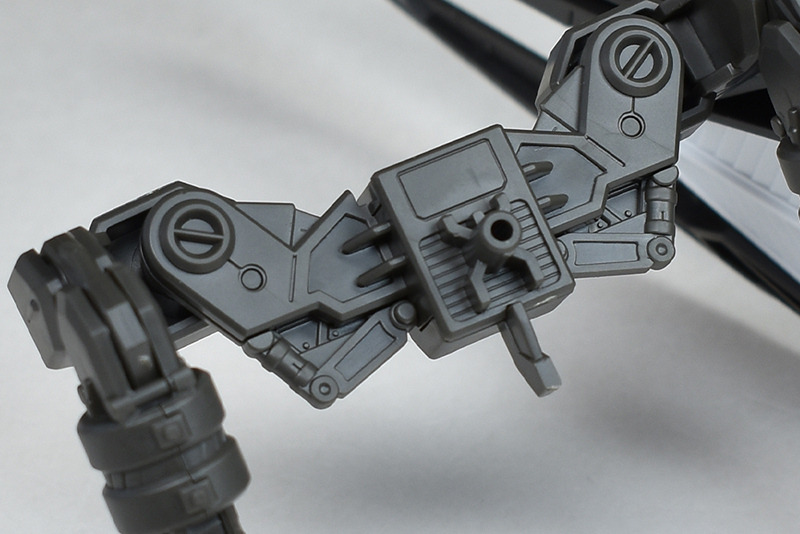
リアアーマーとは1ダボ接続ですが、固定強度はまずまずあるのでぽろりの心配はなさそうです。

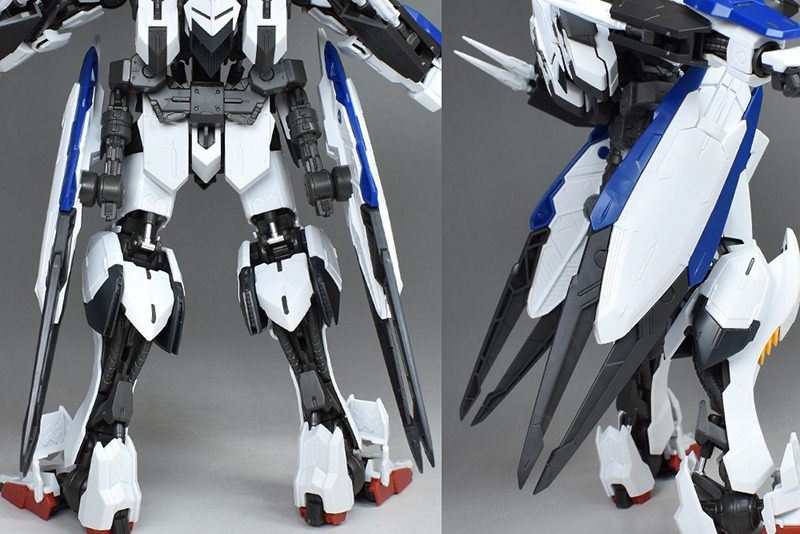
フライトユニットのスラスター。シンプルな配色ですがモールドも適度に入っていて見栄えは良さそうです。ただ、裏面には肉抜き穴があるのでその点は少しもったいなく感じますね。

下部のダークグレーの装甲は展開が可能です。
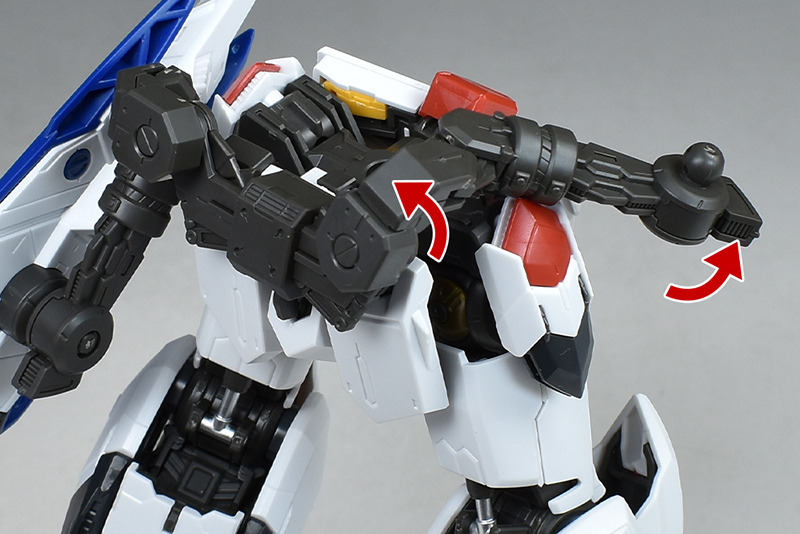
腕部の装甲が少し太めで少し干渉しやすそうですが、肘はV字程度まで曲げることができます。腰も干渉なく360度回転が可能。肘の追撃砲と腰のフライトユニットが干渉する場合があるので注意が必要です。

重武装型なのでやや干渉しがちですが、ある程度のポーズはできますし、ディスプレイさせても厚みのある装甲には迫力が感じられます。
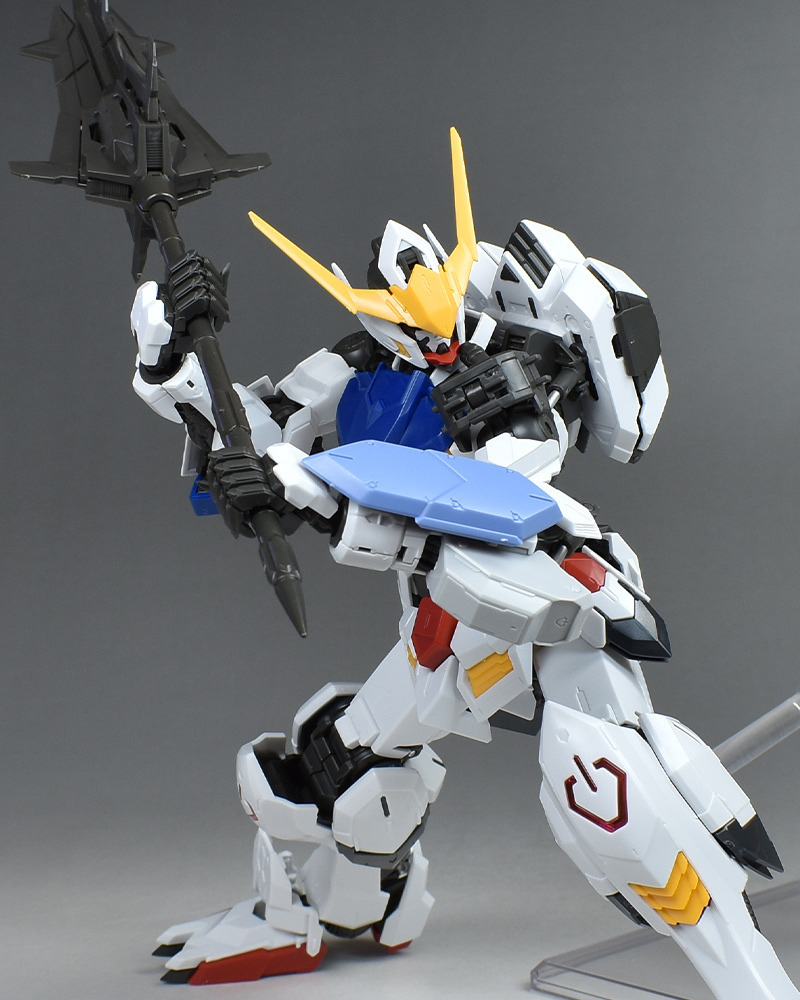
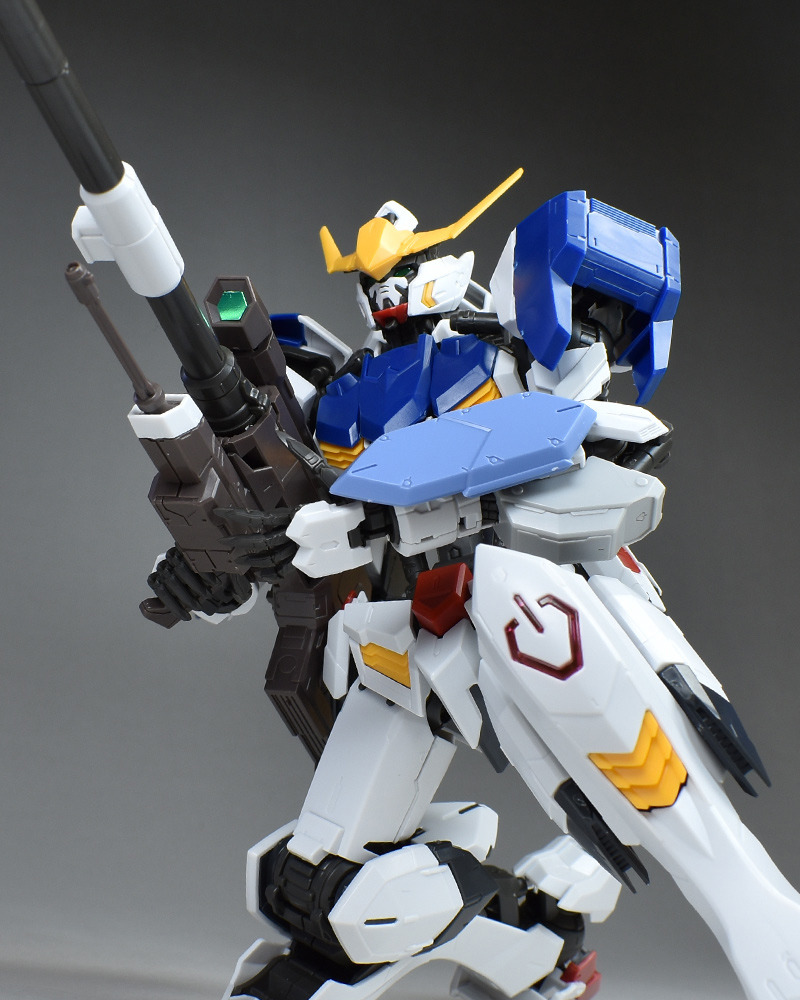
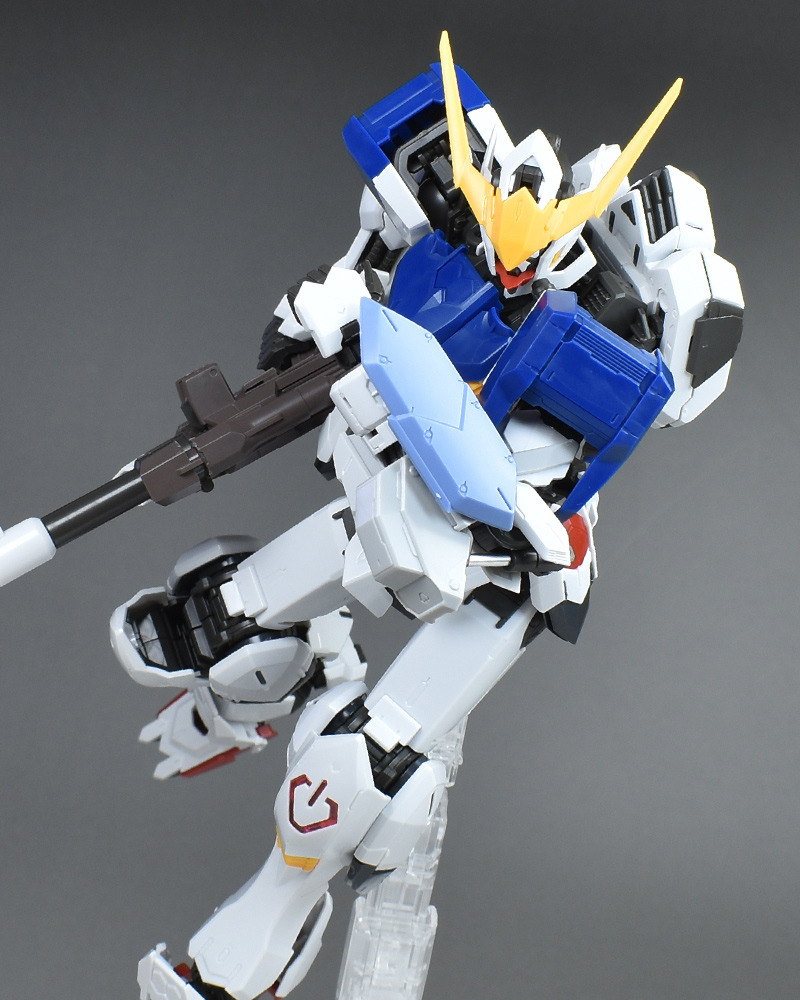
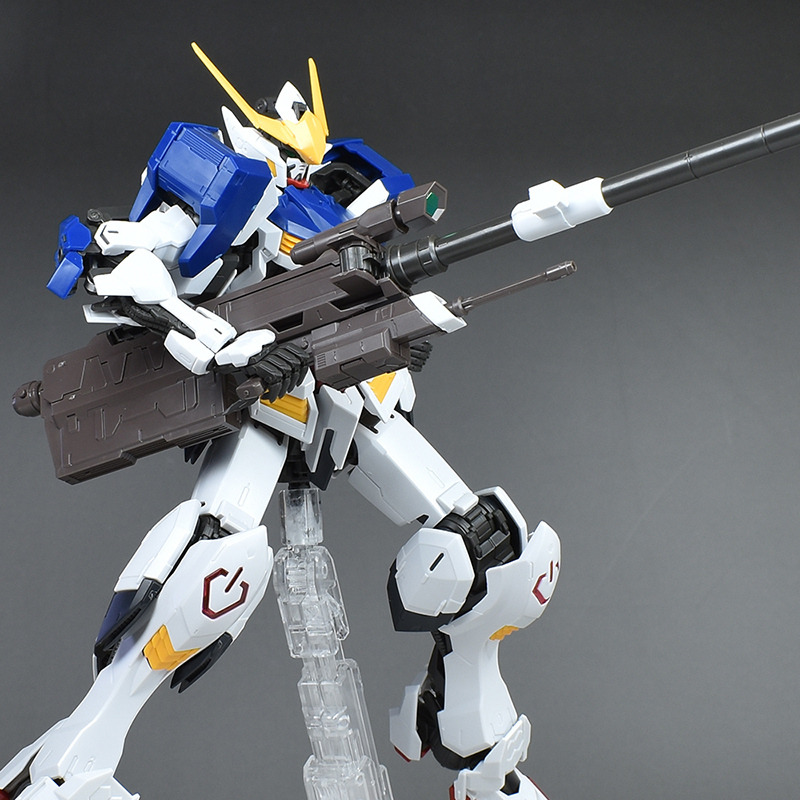
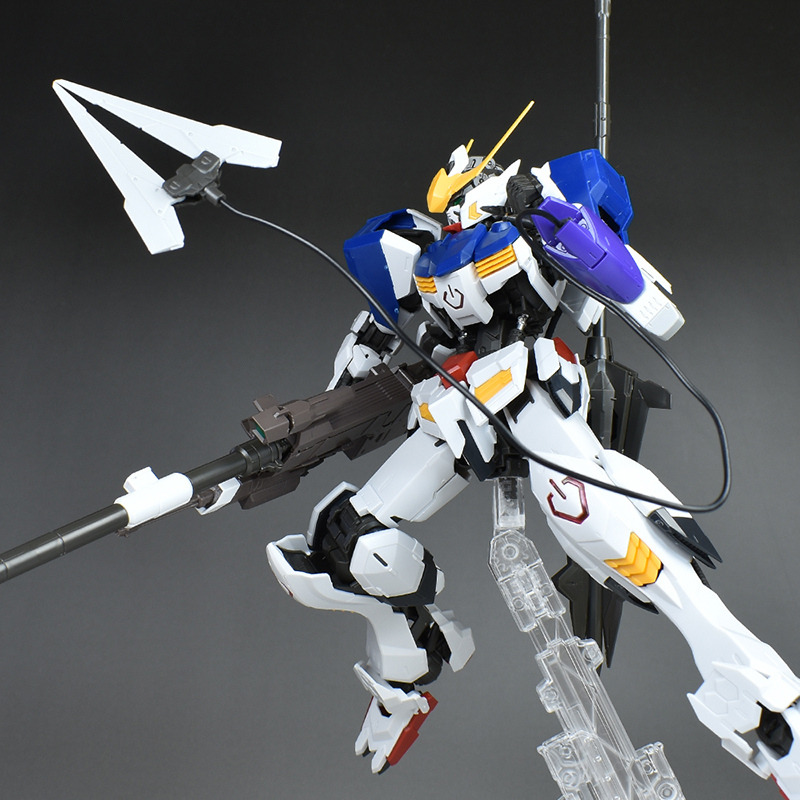
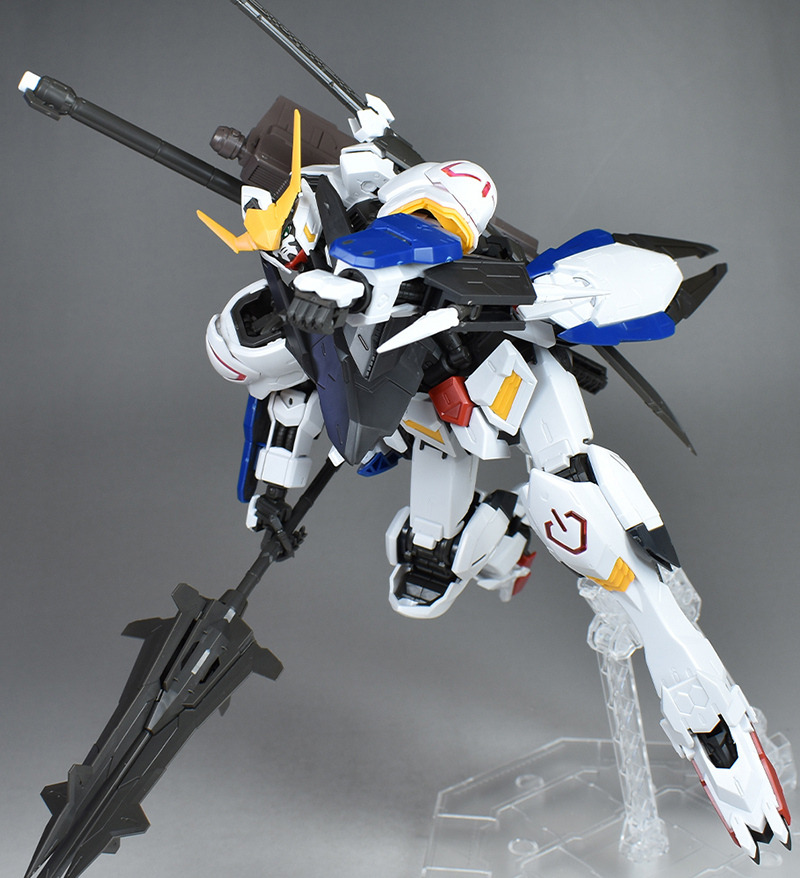
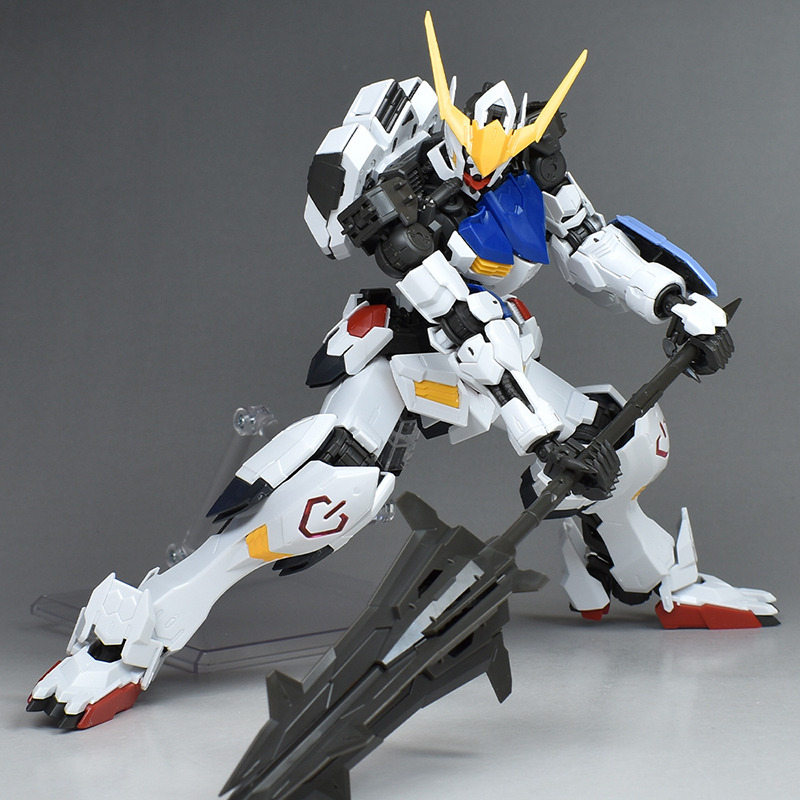
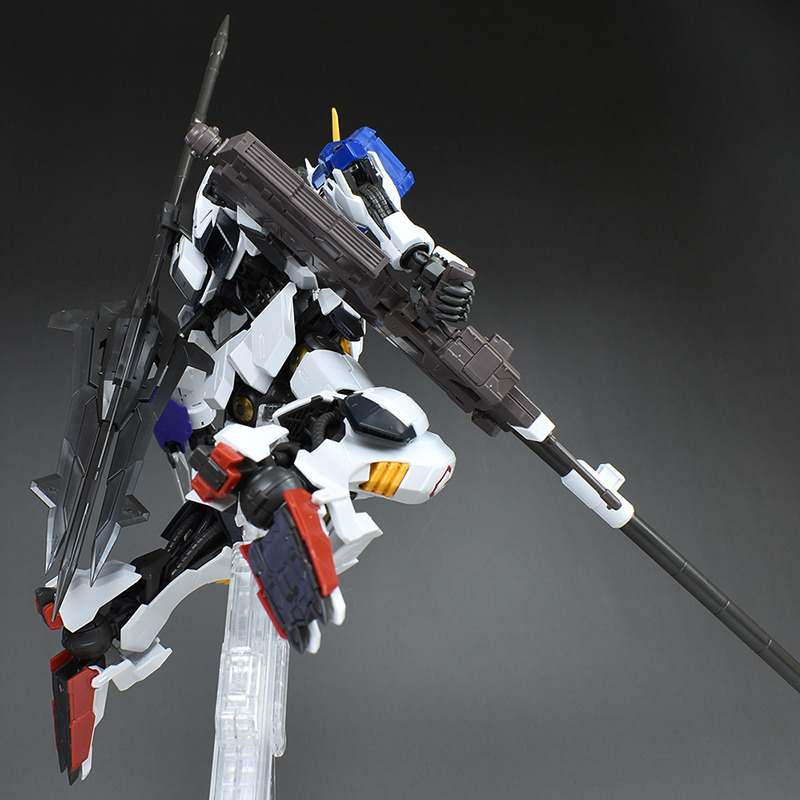
■第5形態(地上戦仕様)
続いて第5形態の地上戦仕様です。

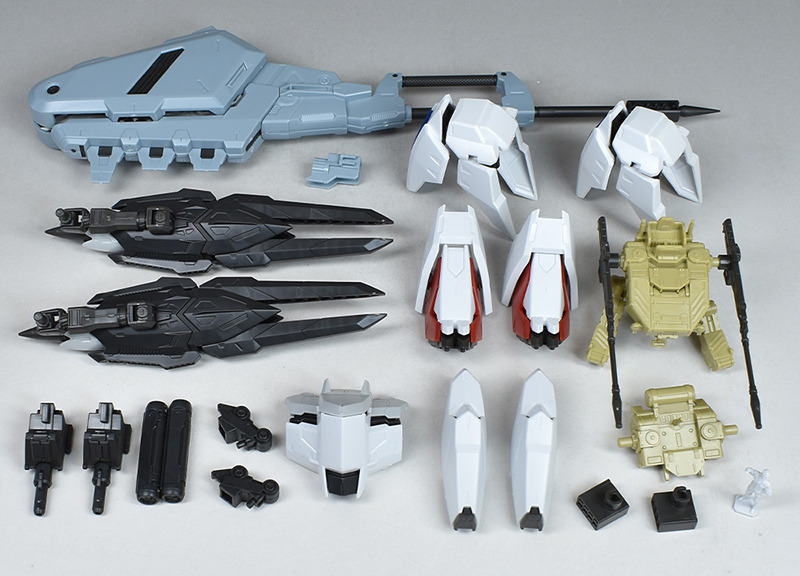
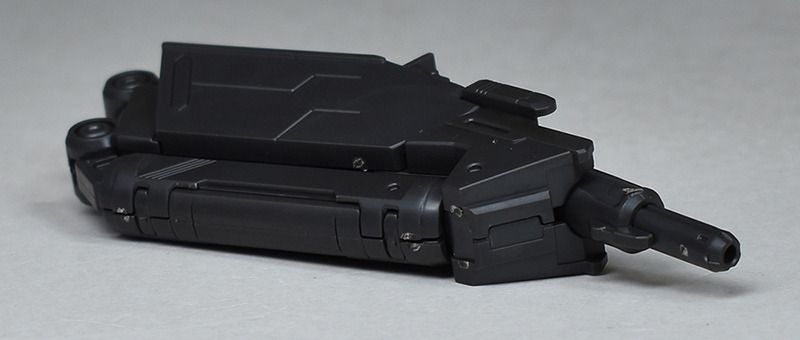
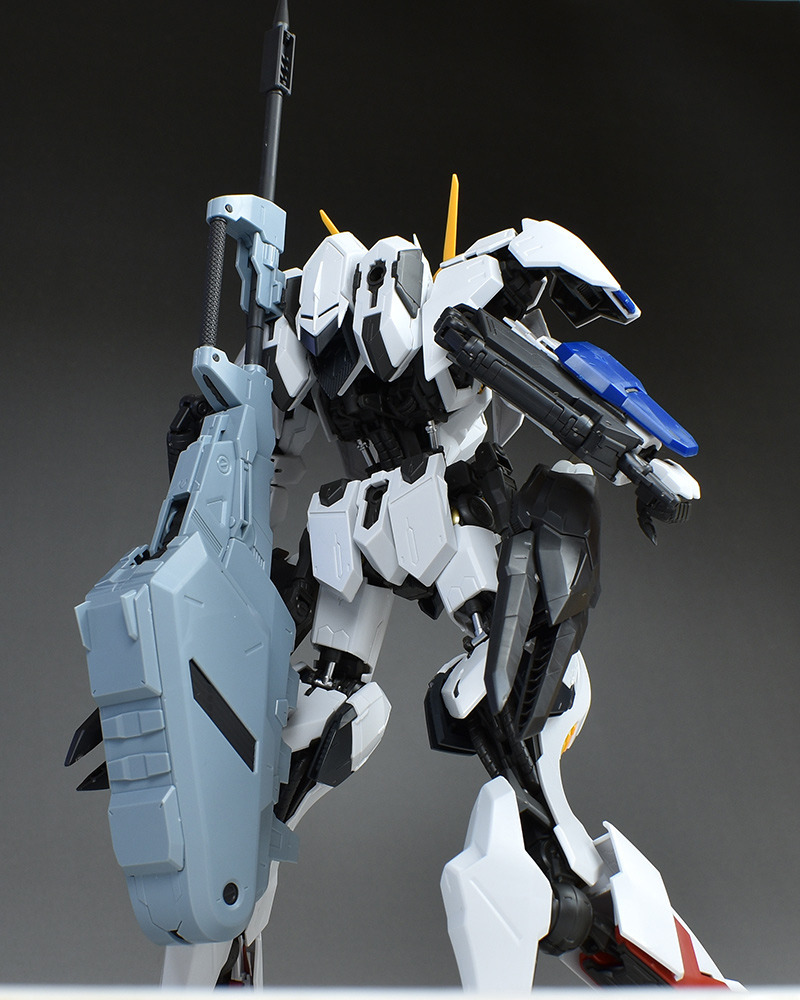
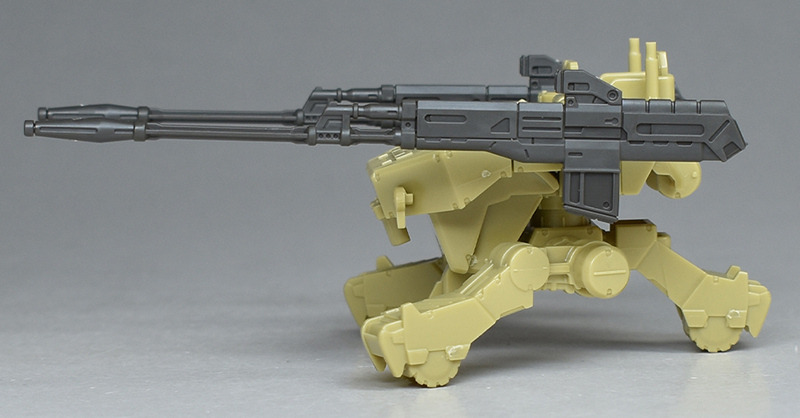
第5形態(地上戦仕様)用の換装パーツです。前腕の一部装甲は第5形態と共通ですが、前腕の170mm機関砲、ハイヒール型のソール部パーツ、レンチメイスが付属しています。
第5形態(地上戦仕様)。通常版(第4形態)から前腕を組み換えて170mm機関砲を装備。ソール部は通常版のものを分解し、つま先とかかとを組み換えることで再現可能です。
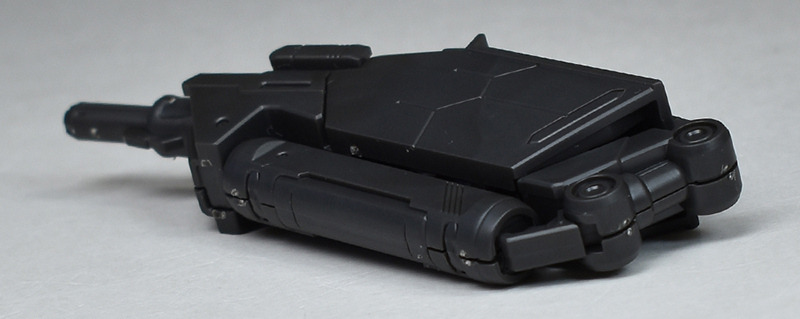
第5形態と比べて胸部リアクティブアーマーや背部フライトユニットはなく、前腕には追撃砲に変わって170mm機関砲が造形されています。ソールにはハイヒール型に変化し、全体的にスマートな印象に。
腕部は第5形態の追撃砲を省いた状態から、別途170mm機関砲やマガジンなどのパーツを組み合わせたものを前腕に装備しています。それ以外の腕部装甲は第5形態と共通。
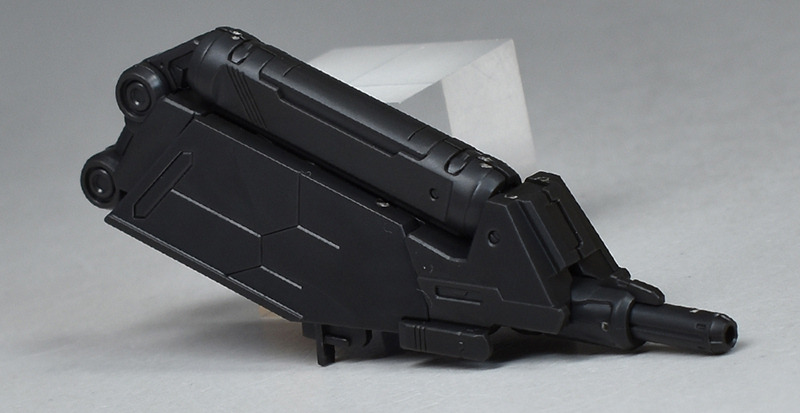
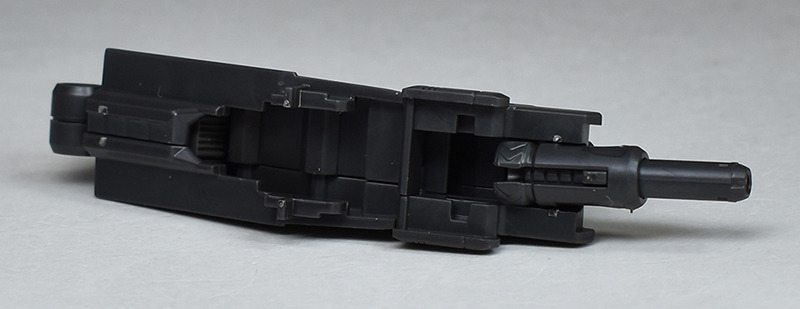
170mm機関砲は細部まで細かく造形されています。各部の合わせ目もすべて段落ちモールド化。
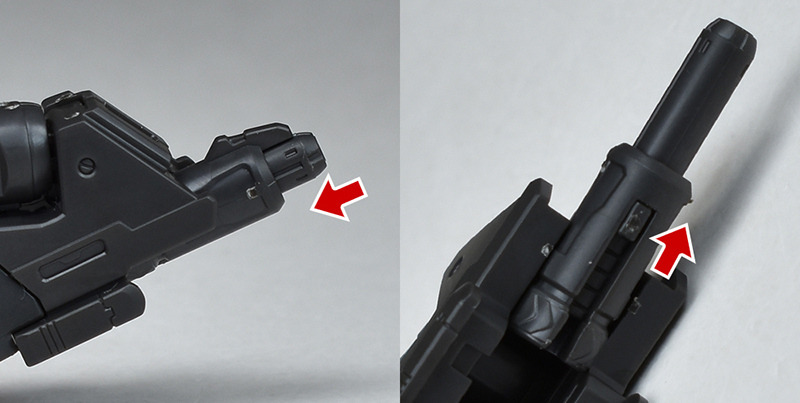
砲口は伸縮が可能。内側に浅めのレバーが造形されています。
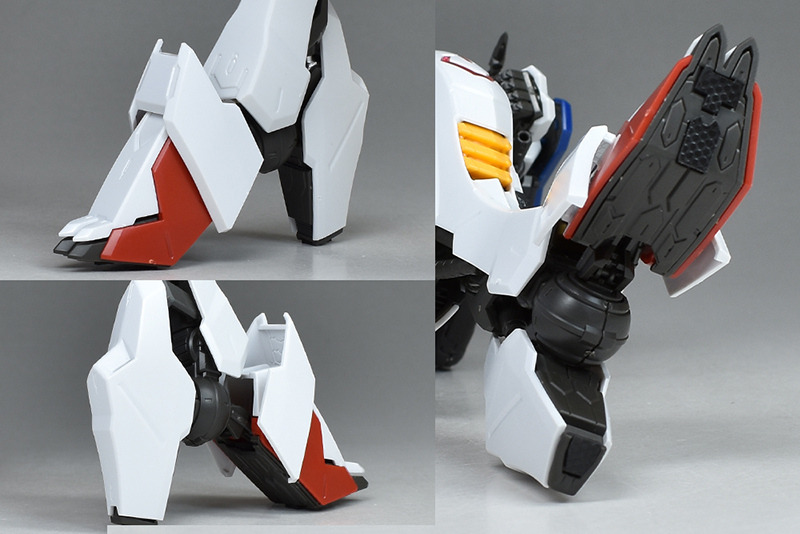
ソール部はハイヒール状の装甲が新造されています。部分的に浮き気味になりますが、自立は可能です。クネッとなりやすいので安定しているとは言えないかも。足裏にはラバーシールを貼るようになっているので、滑って脚が開いたりすることはないので自立に不安はありません。
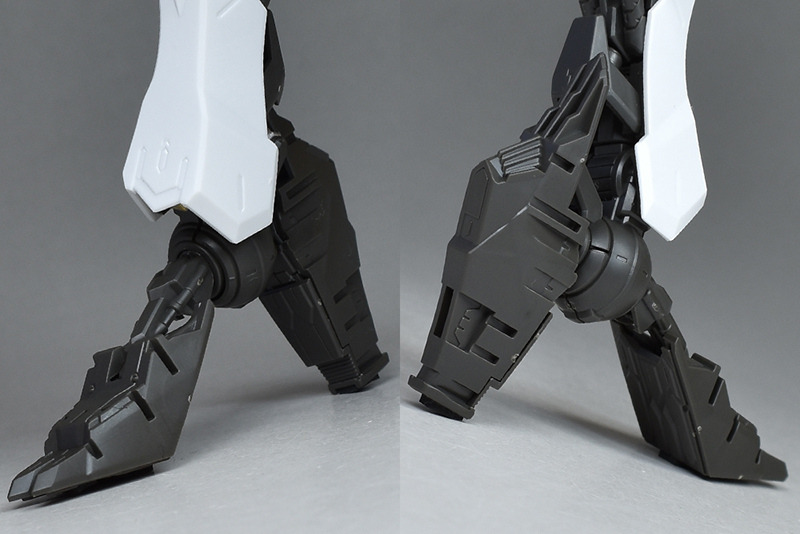
ソール部には内部フレームが造形。
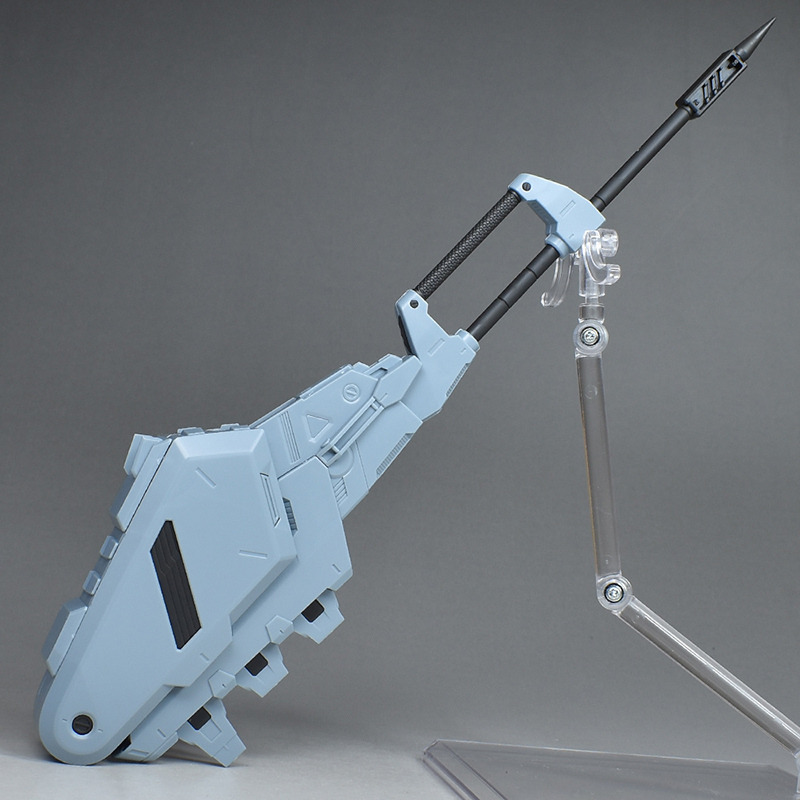
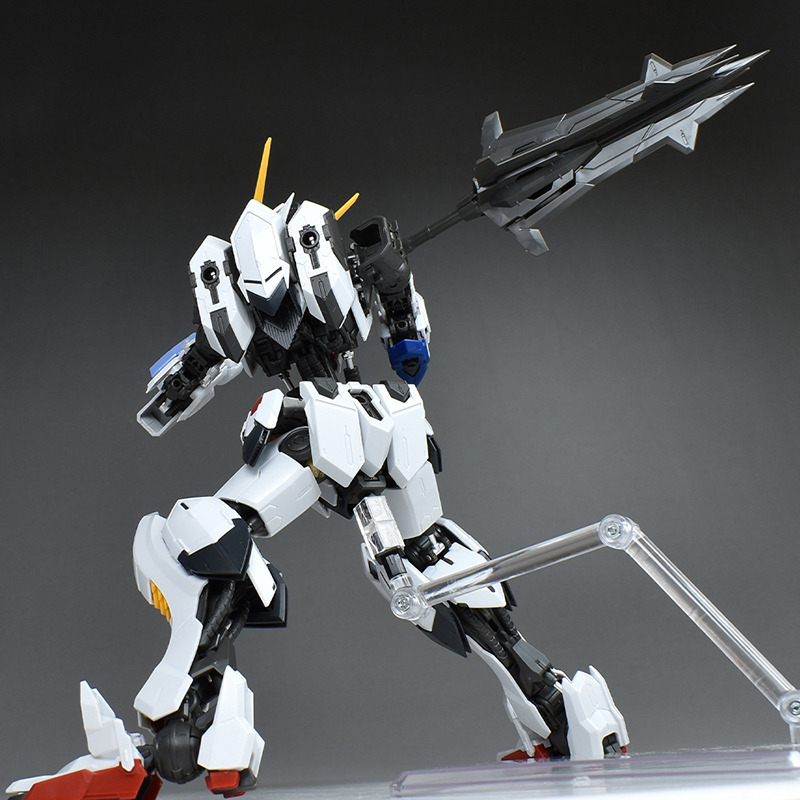
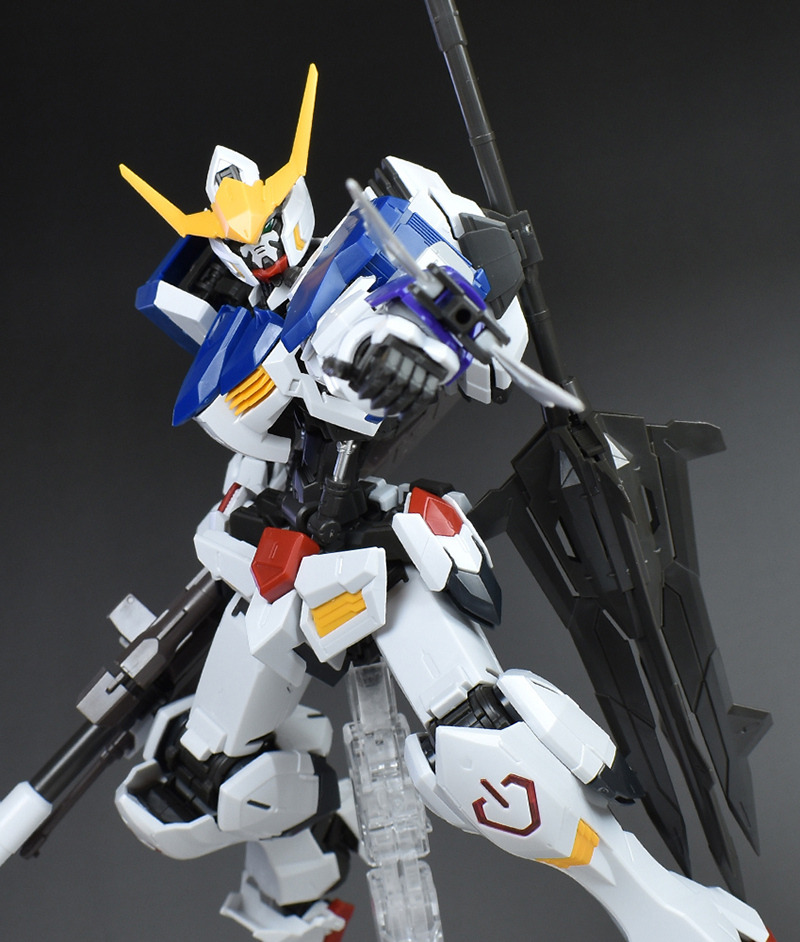
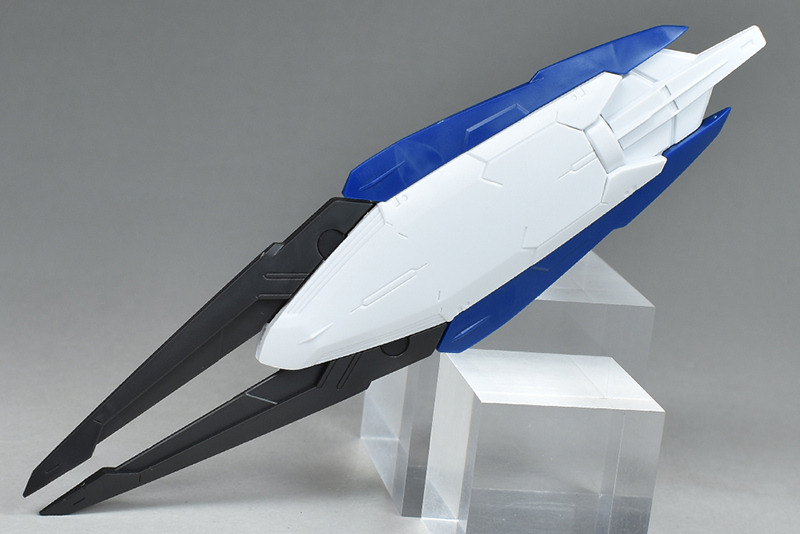
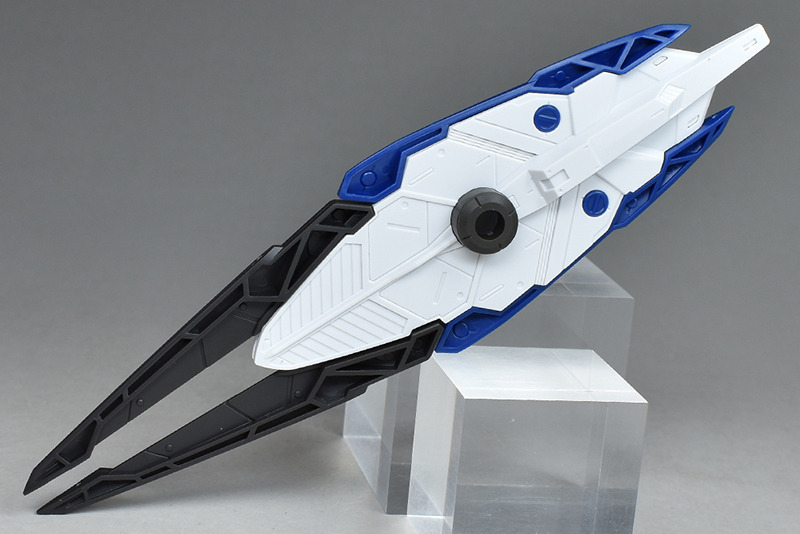
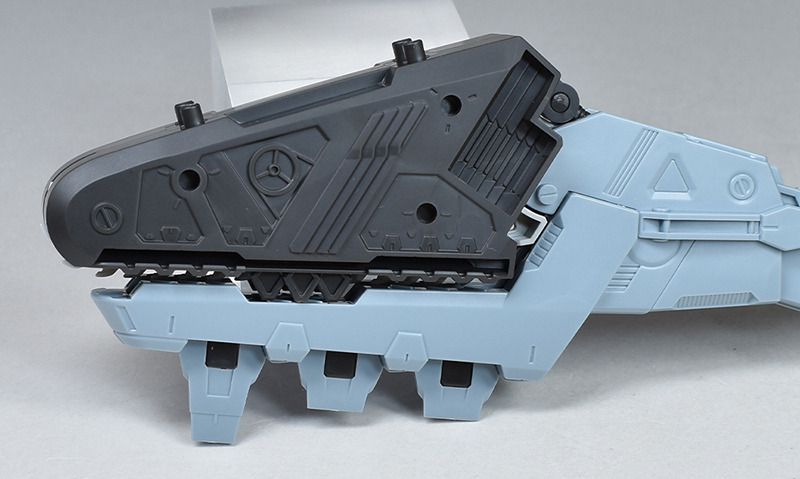
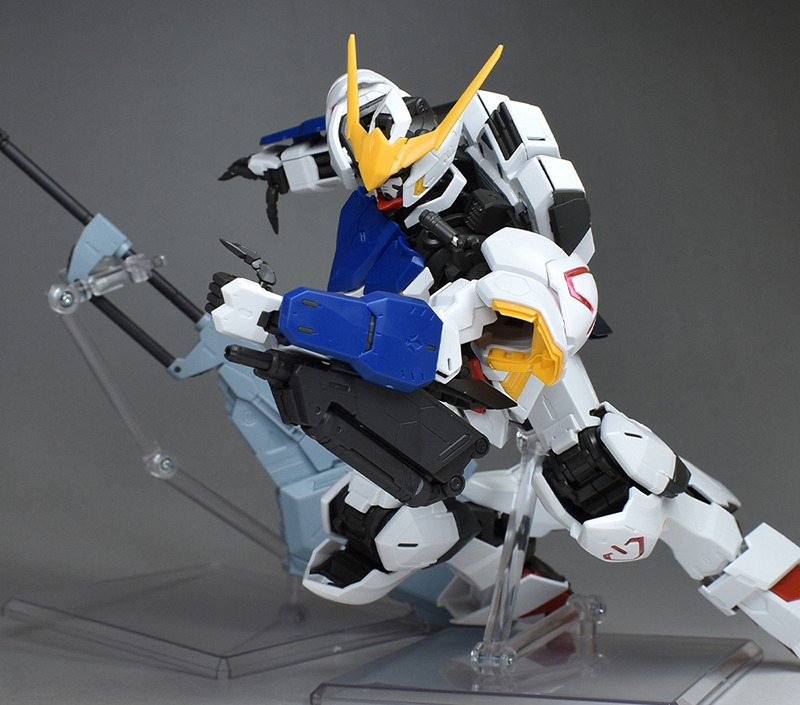
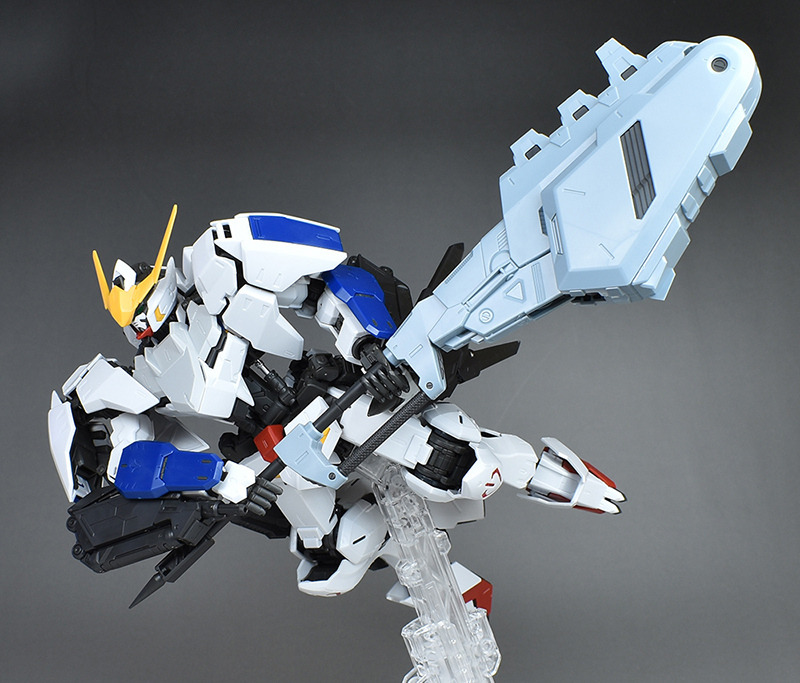
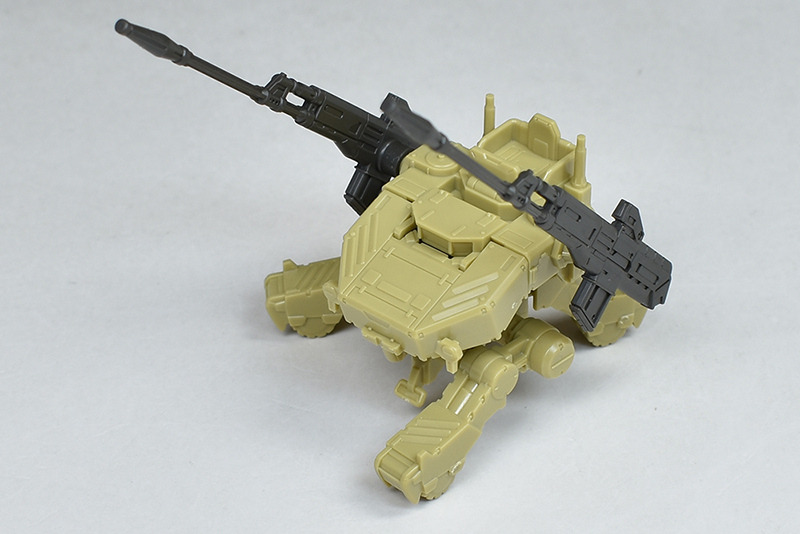
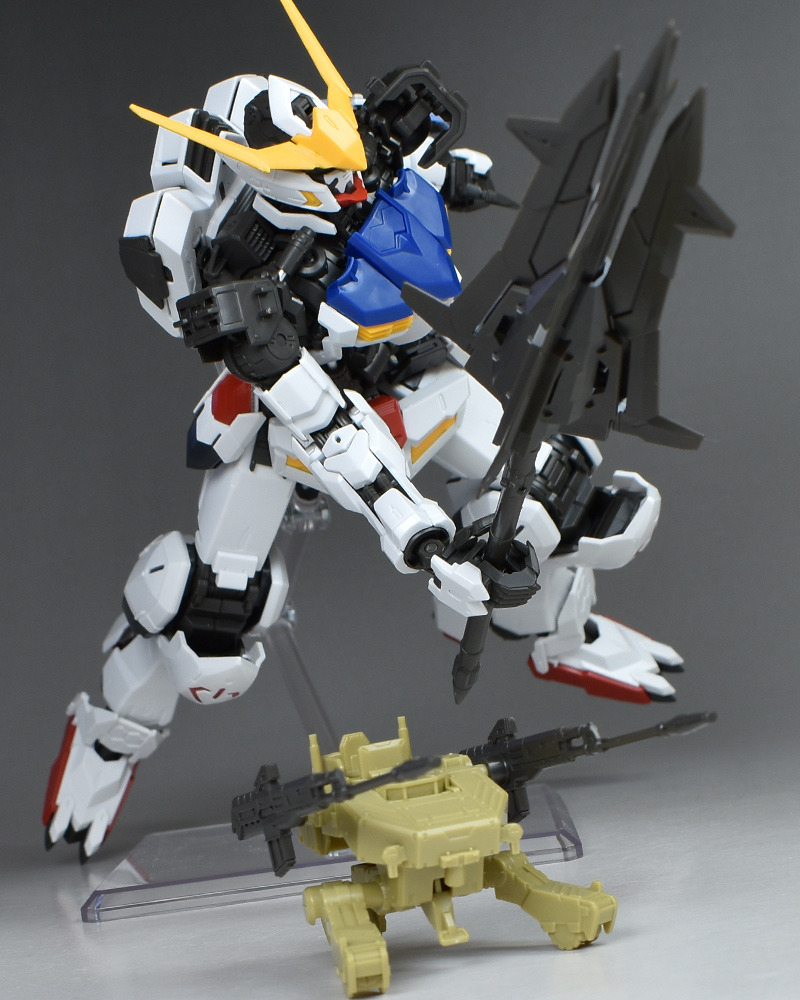
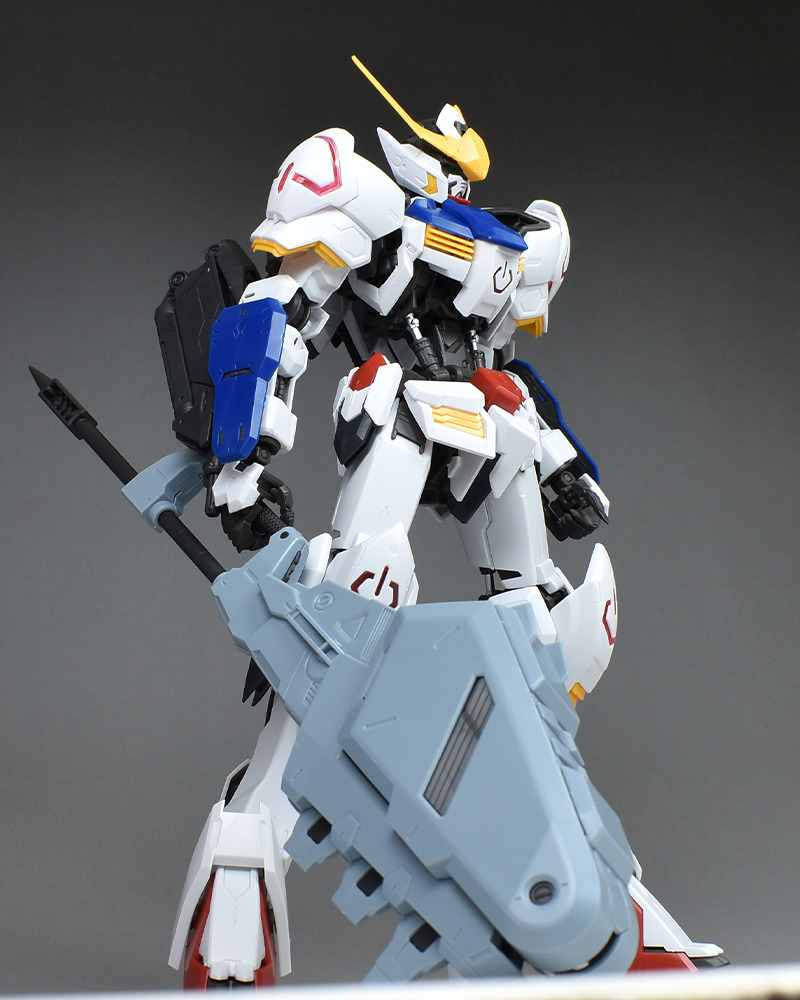
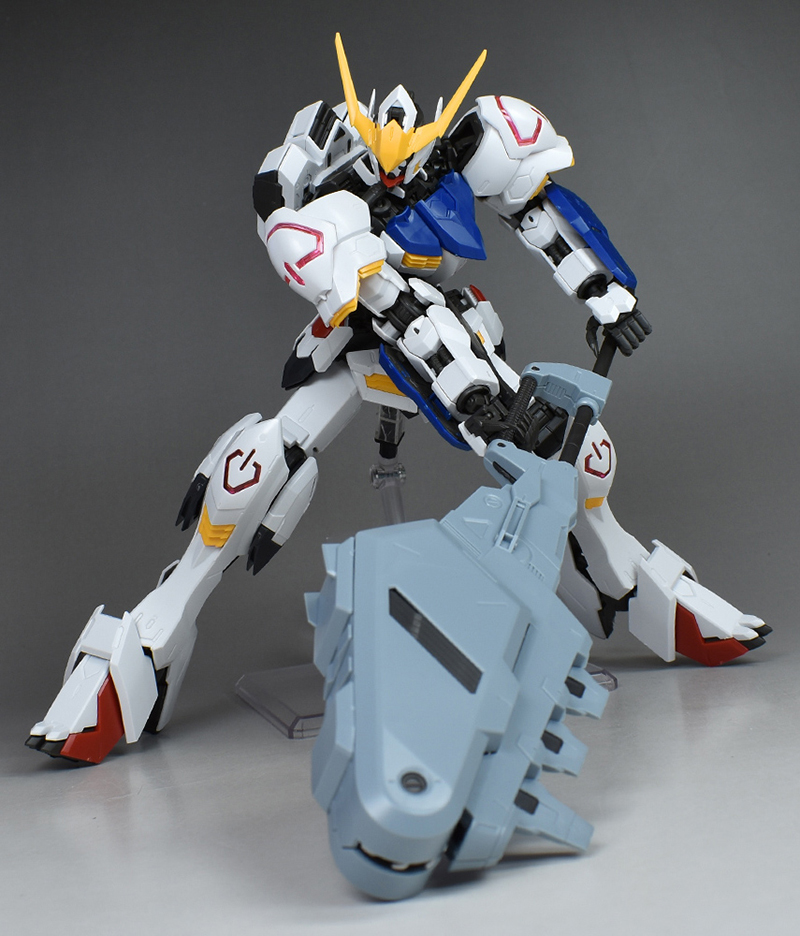
レンチメイス。内部に特殊チェーンソーを備えた大型特殊メイスになります。マスターグレードらしい作り込まれた構造になっています。
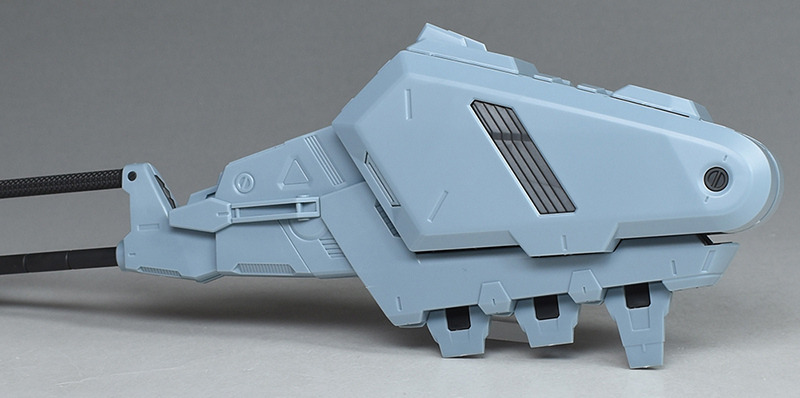
内外パーツで構成されていて部分的な色分けもパーツによって再現。グリップ周りなど各部にできる合わせ目も段落ちモールド化されています。
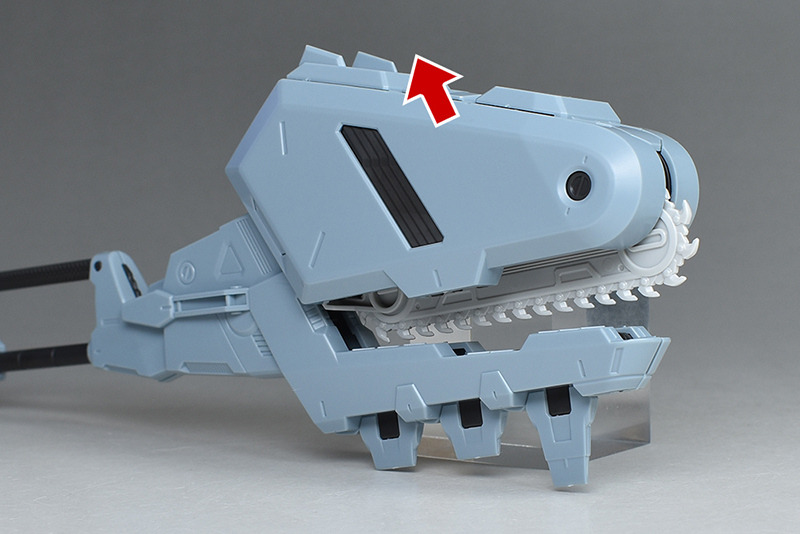
上部の装甲をスライドさせることでチェーンソー刃が露出。
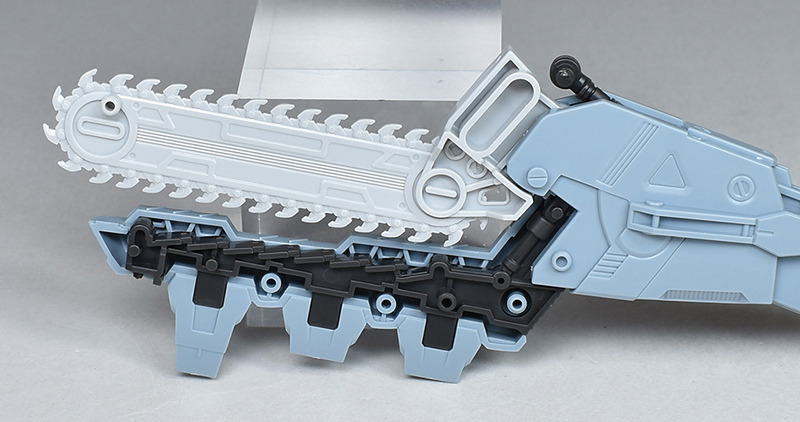
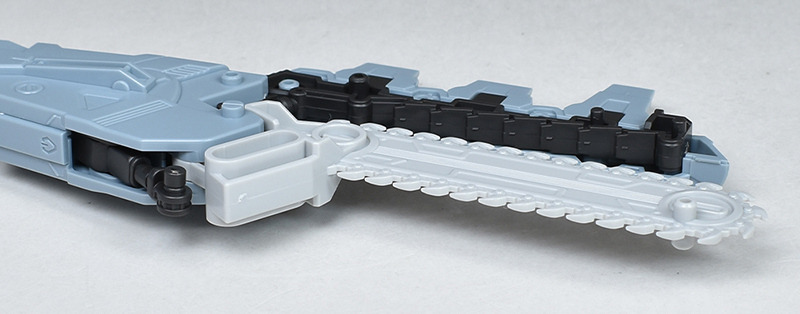
開閉部分の内部。チェーンソー刃もしっかりとした造形が再現されています。
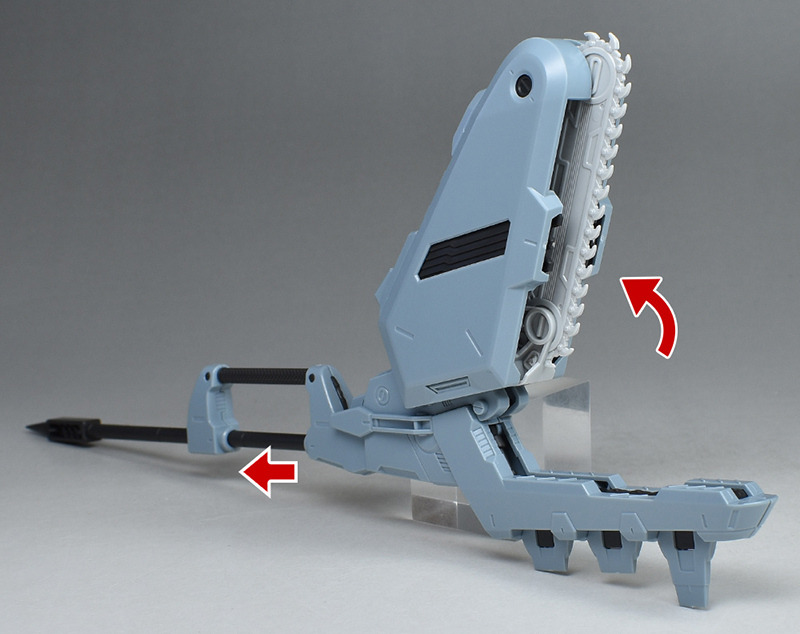
グリップを引くことで先端部の装甲が開閉します。
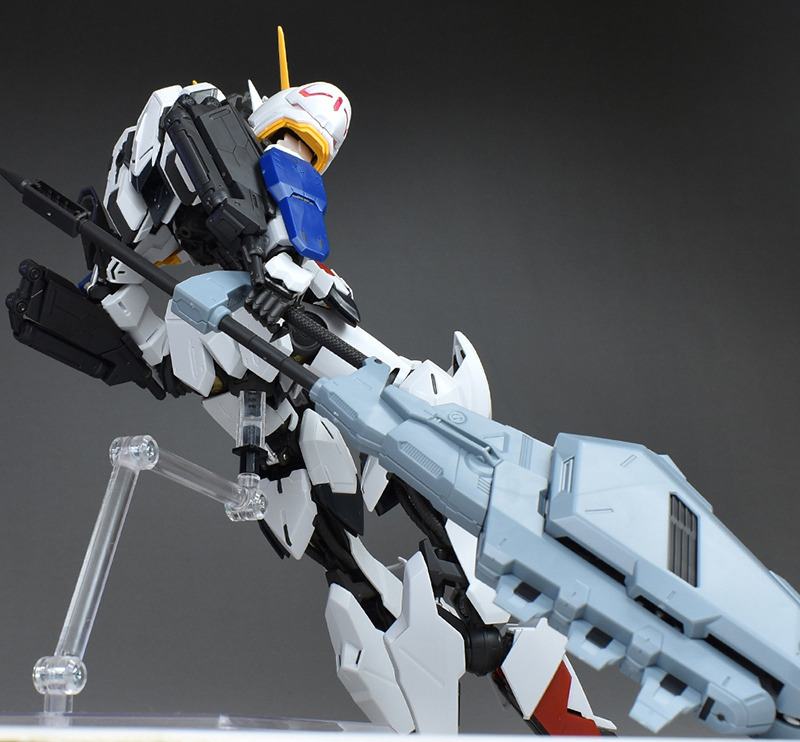
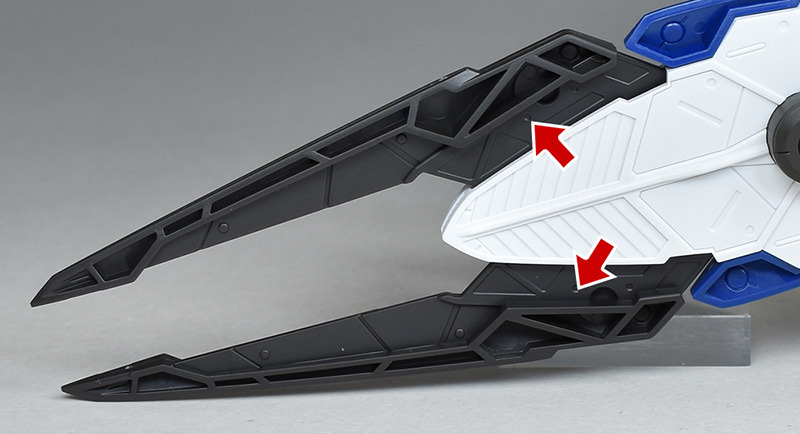
レンチメイスはかなりの重量があるので、劣化でヘタれている指パーツだとハンドパーツから抜けてしまって保持が難しいです。購入から時間が経っているバルバトスと組み合わせる場合は予め補強しておいたほうが良さそうです。

両手持ちも前腕のガントレットや補強した指パーツが外れやすいので、打撃系のきれいなポーズを再現するのはかなり難易度が高いです。レンチメイスを接地させて自然なポーズでディスプレイさせるのが無難かと。
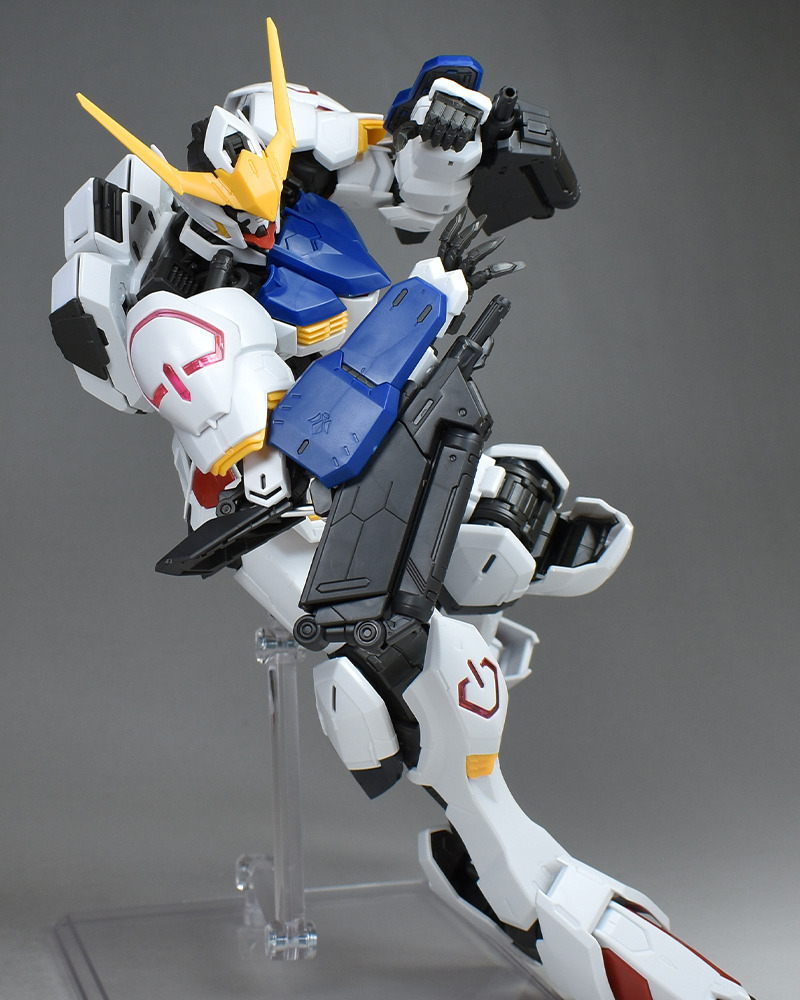
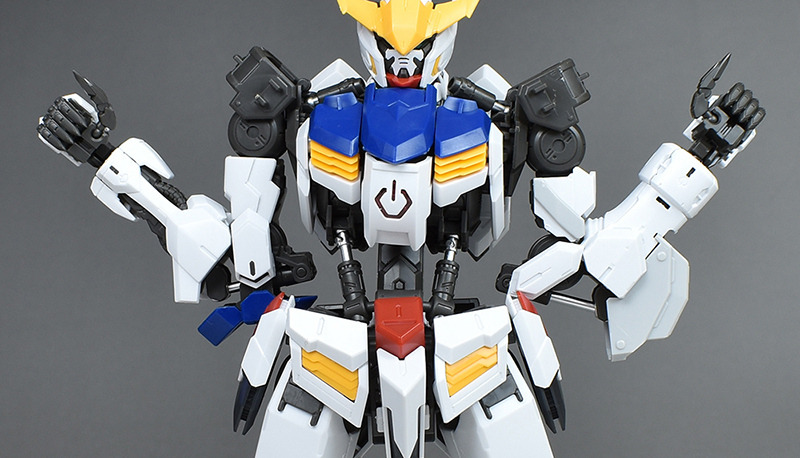
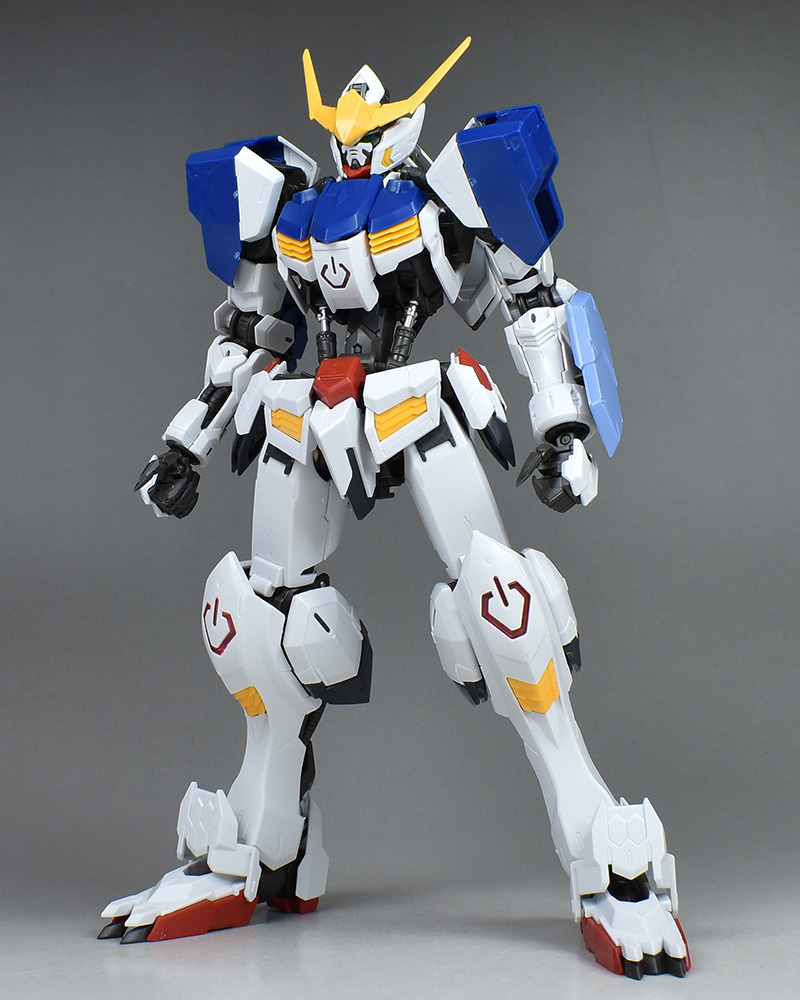
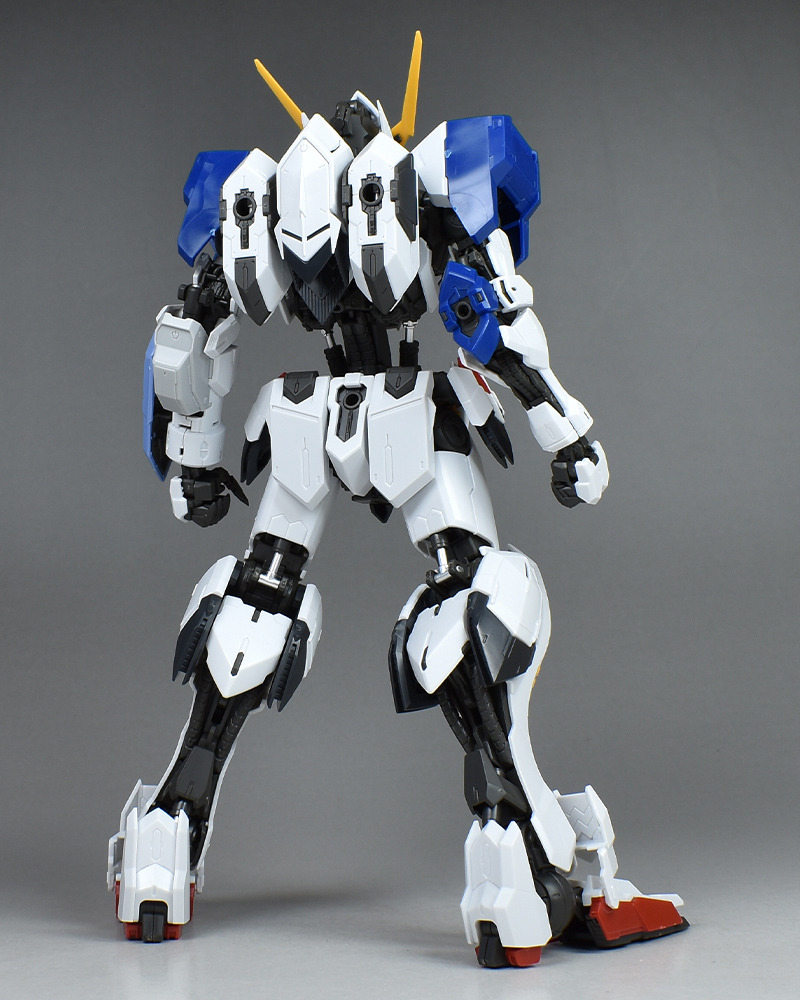
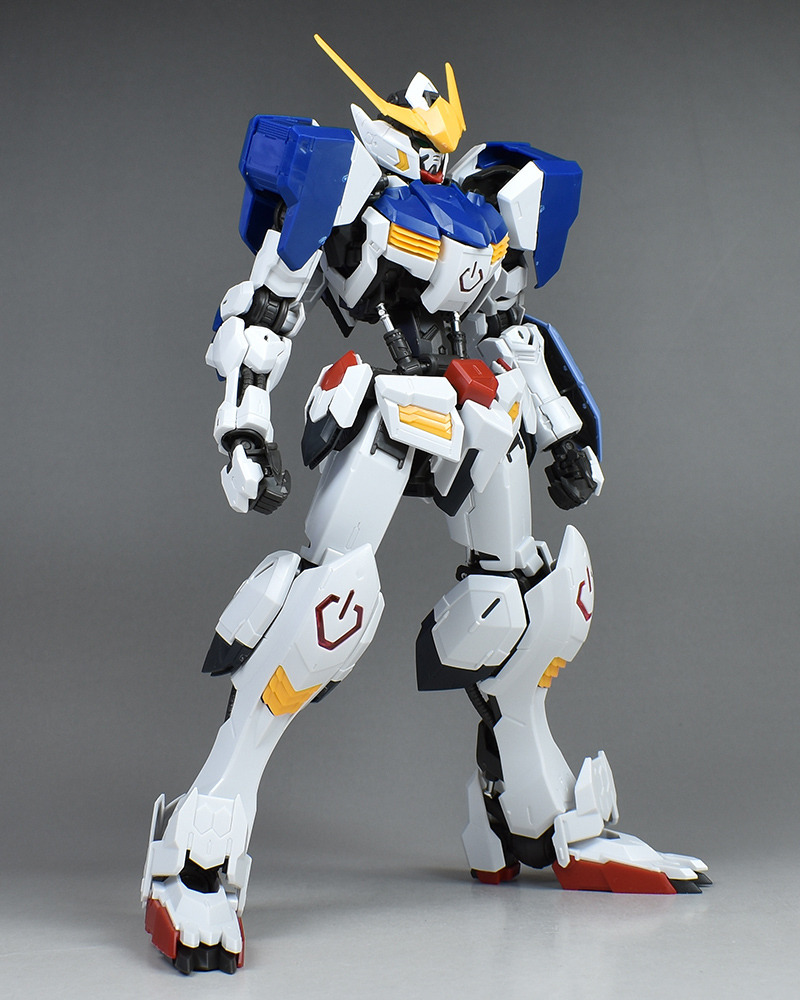
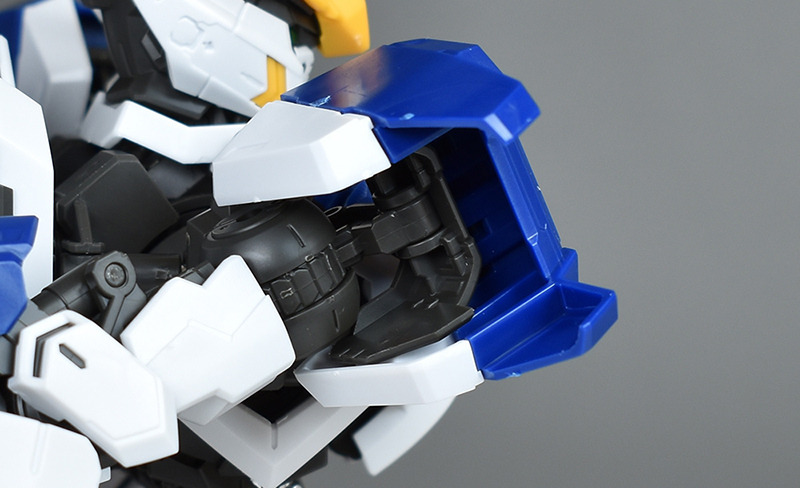
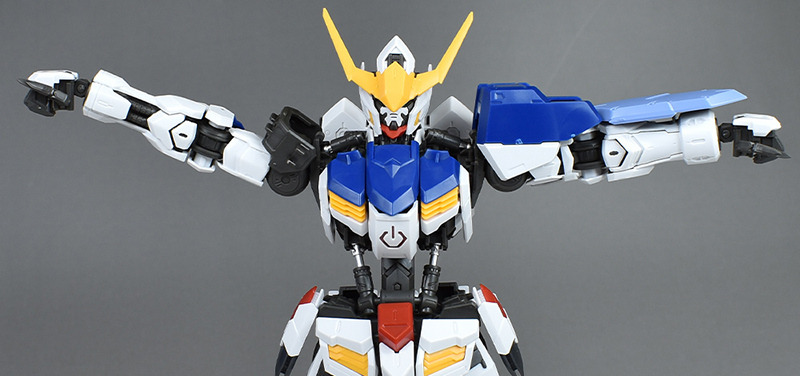
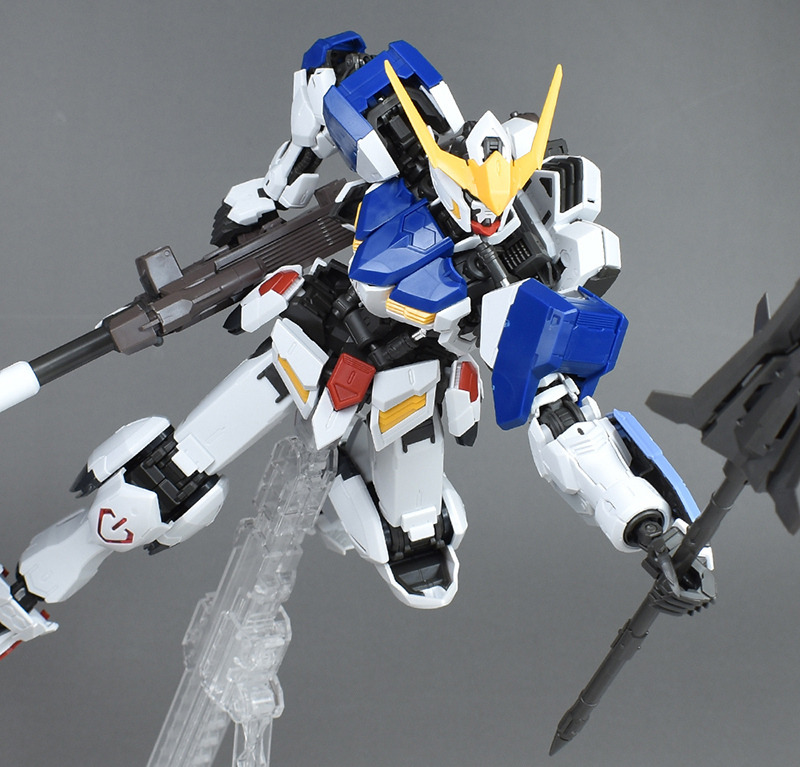
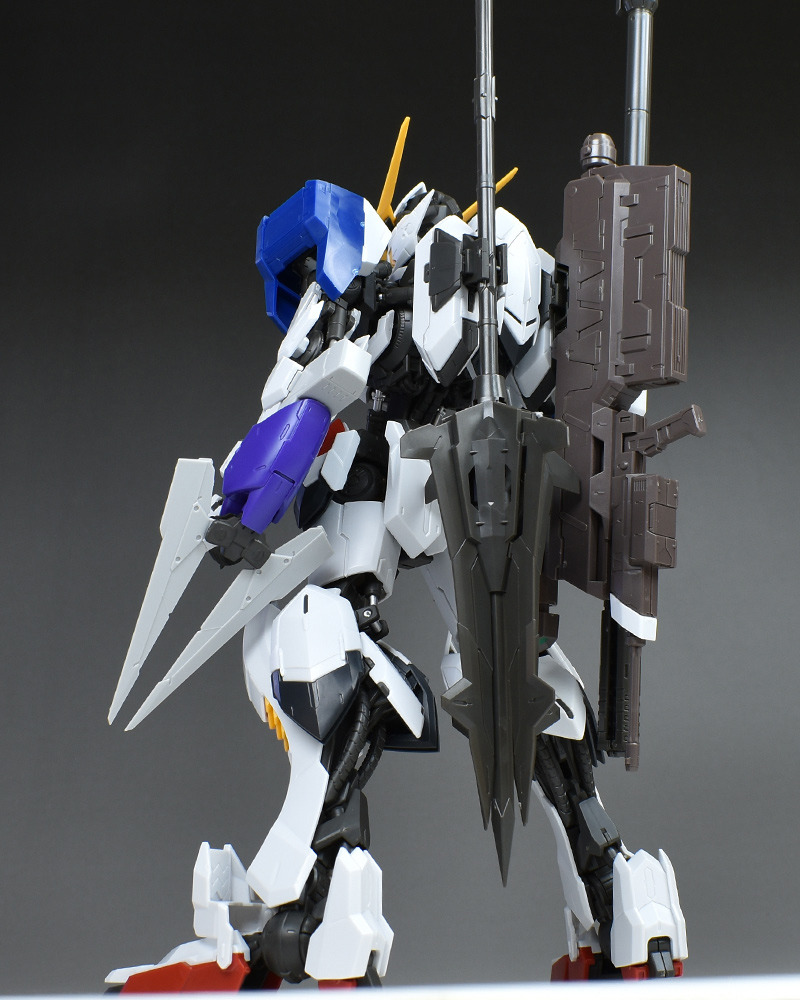
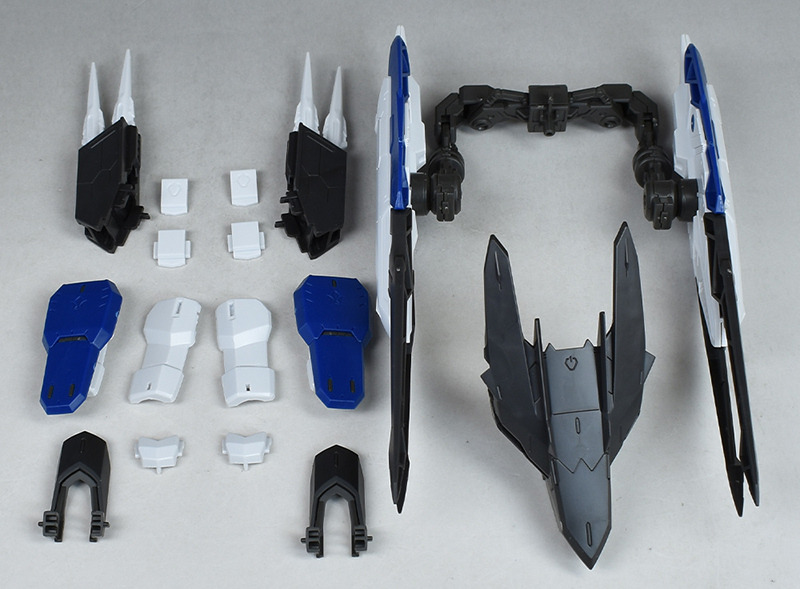
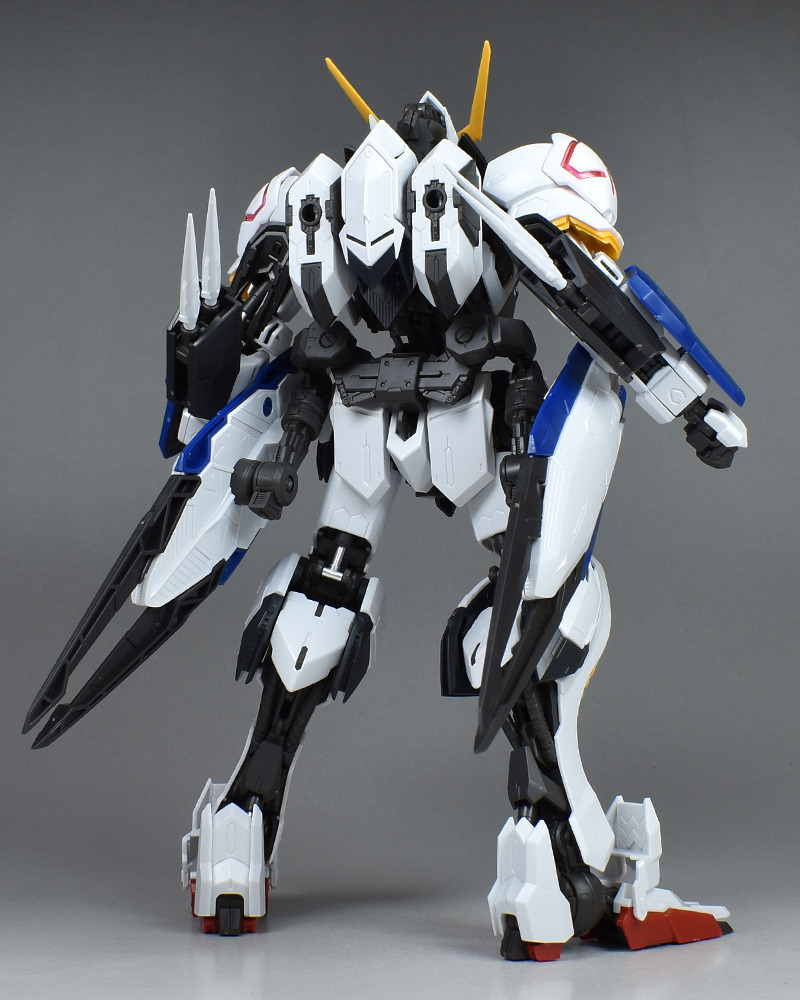
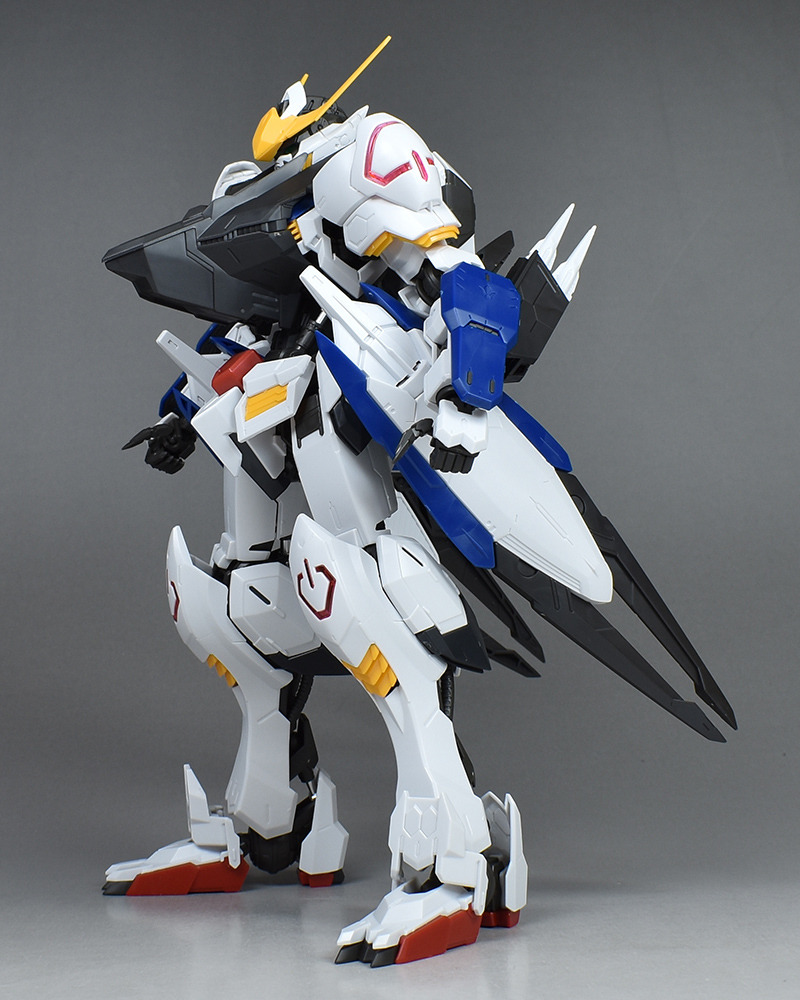
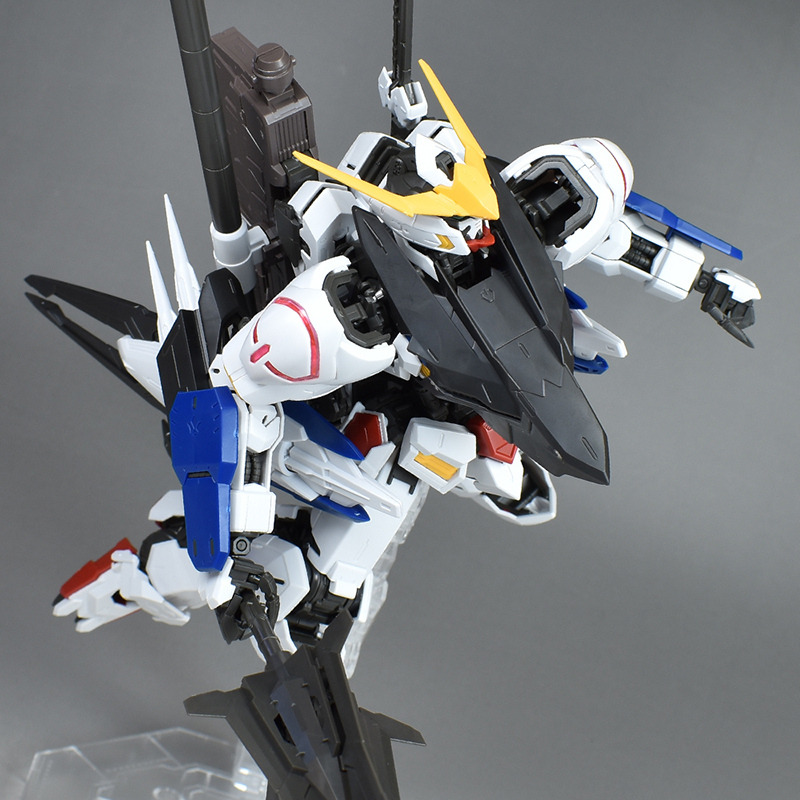
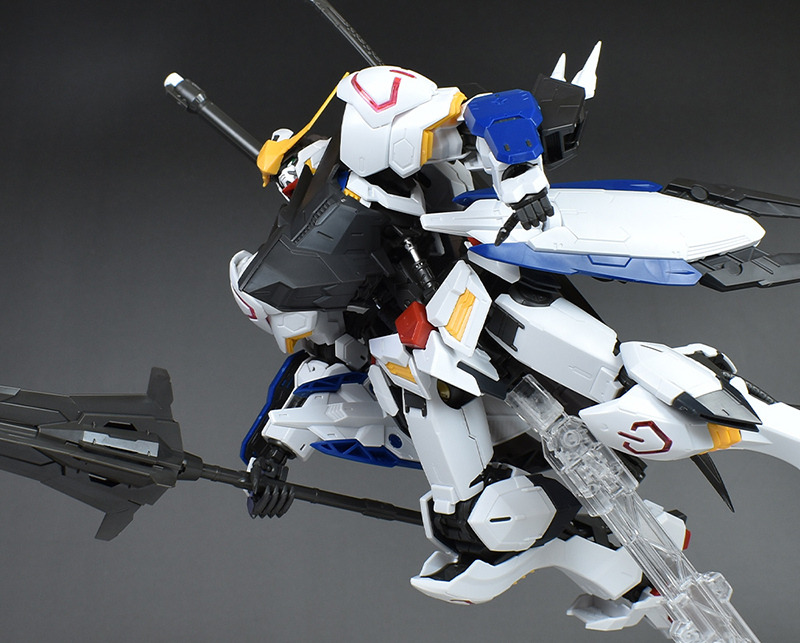
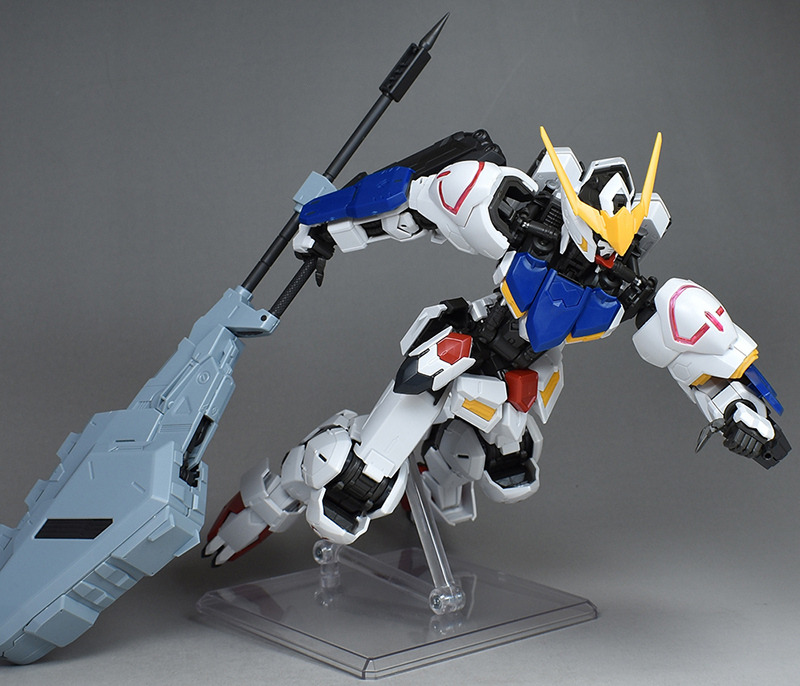
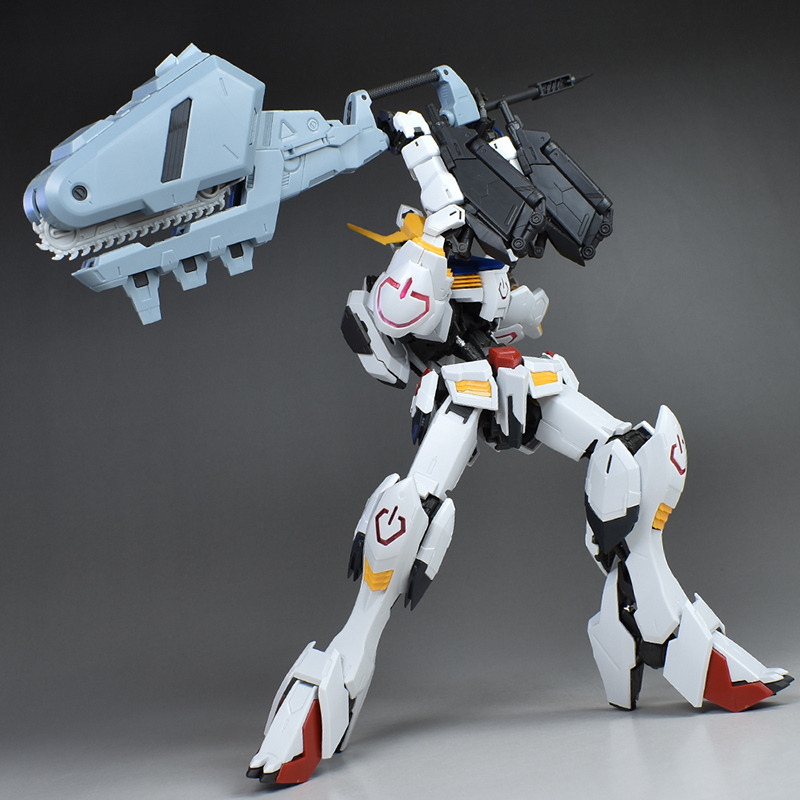
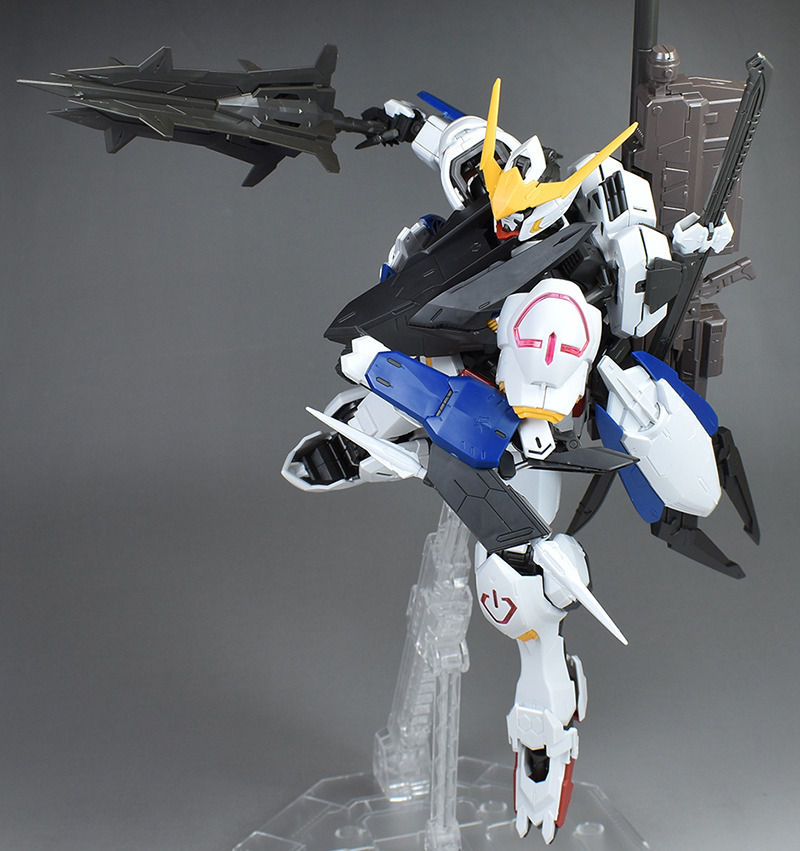
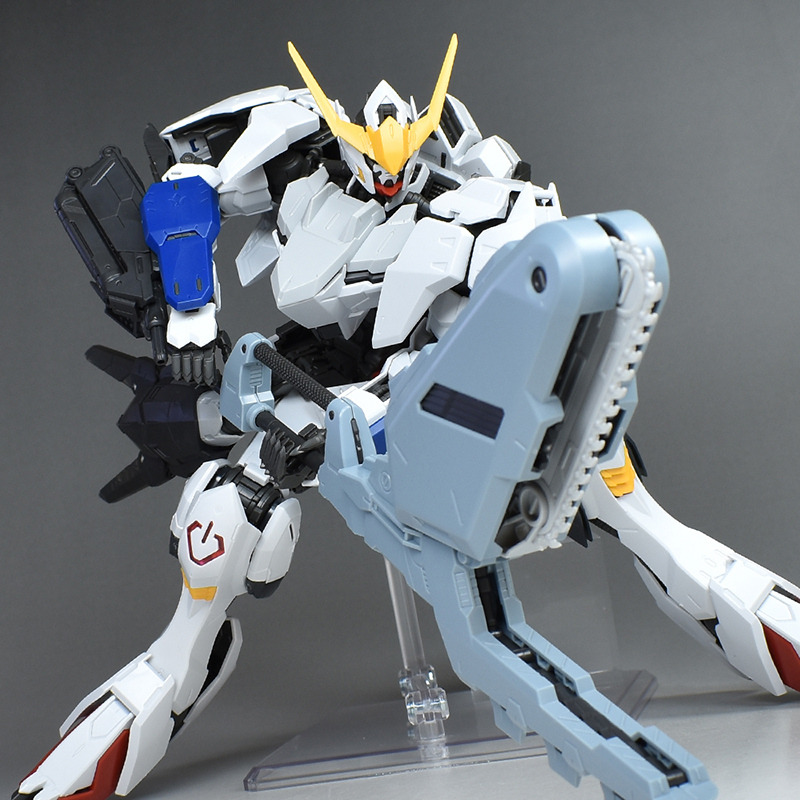
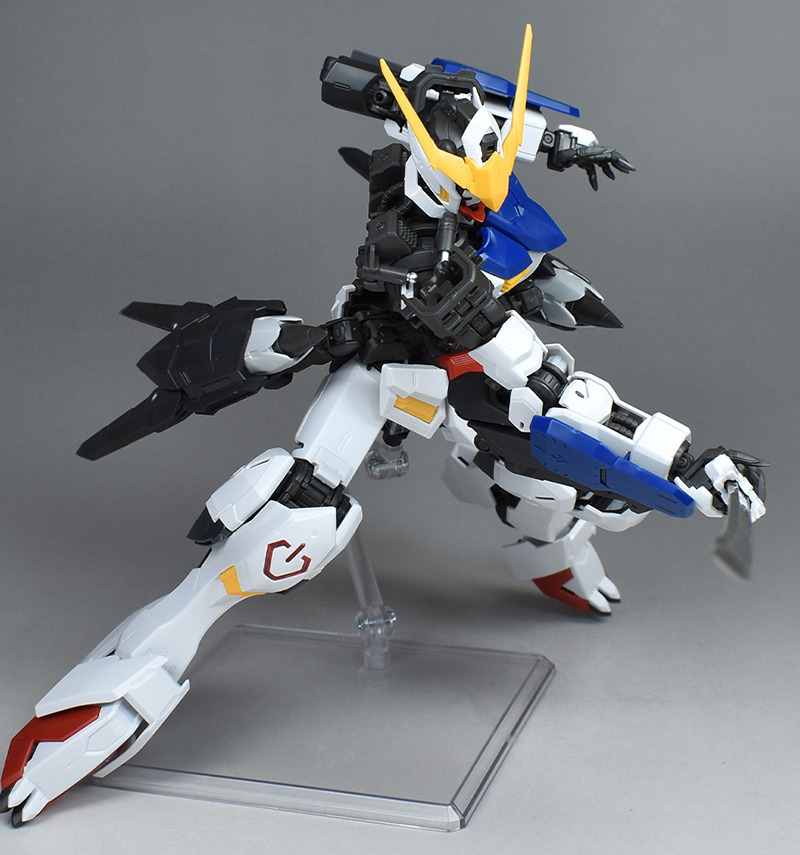
■第6形態
第6形態です。
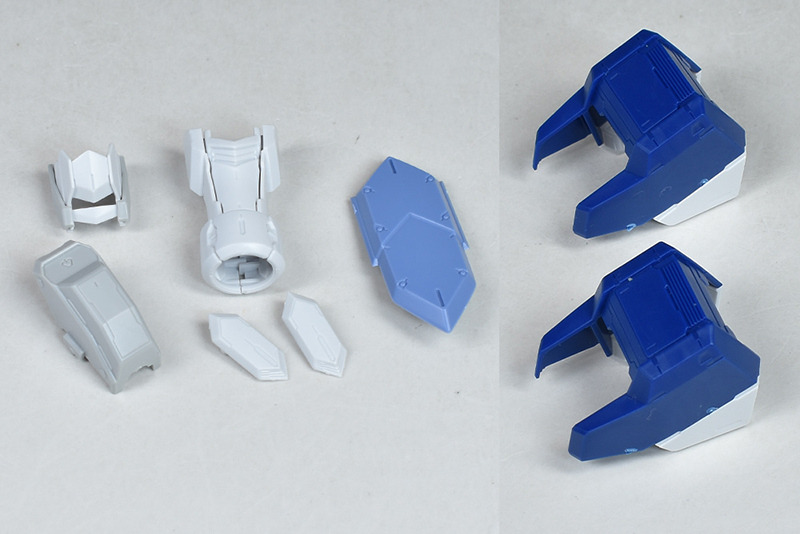
第6形態用の換装パーツです。前腕の装甲やハイヒール状のソール部、前腕の170mm機関砲、レンチメイスは第5形態(地上戦仕様)と共通です。第6形態用として、胸部肩部の増加装甲、腰のブースターユニットが付属しています。
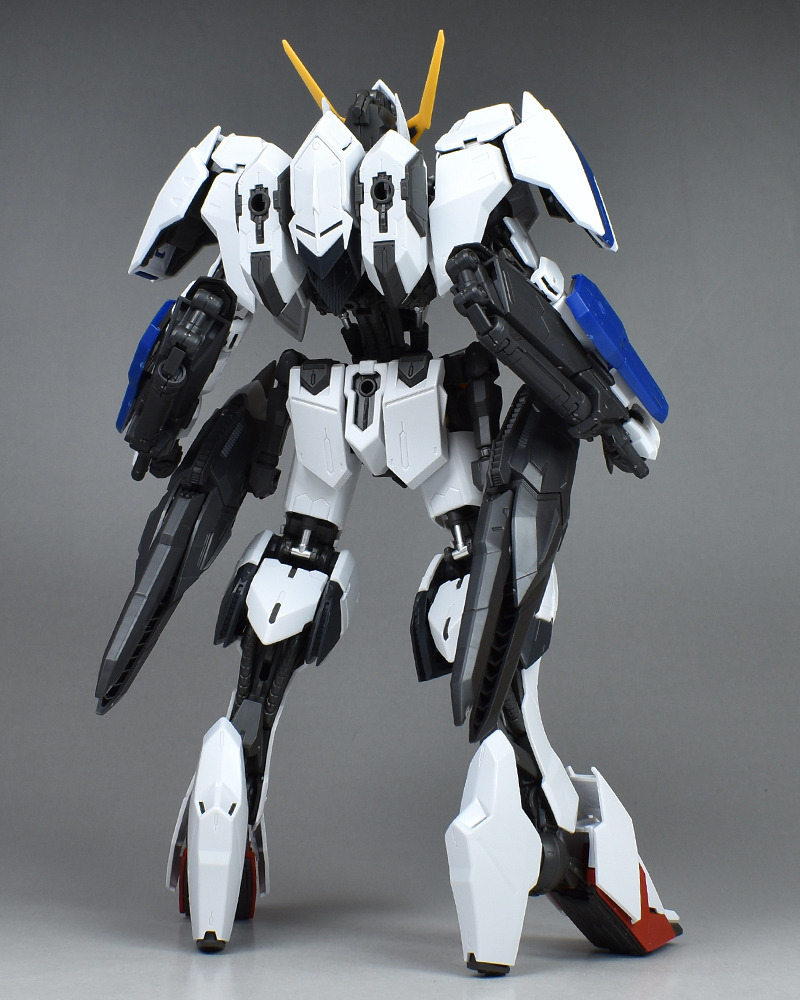
第5形態(地上戦仕様)からショルダーアーマーを組み換え、胸部増加装甲を取り付けます。腰部にはブースターユニットを装備。
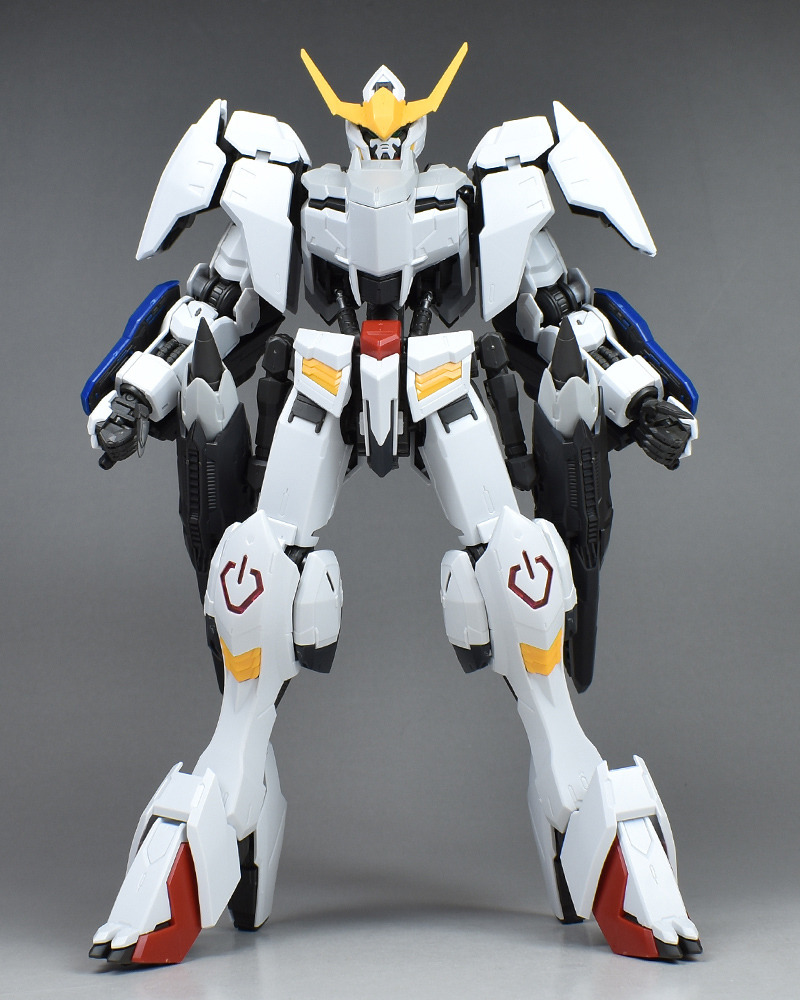
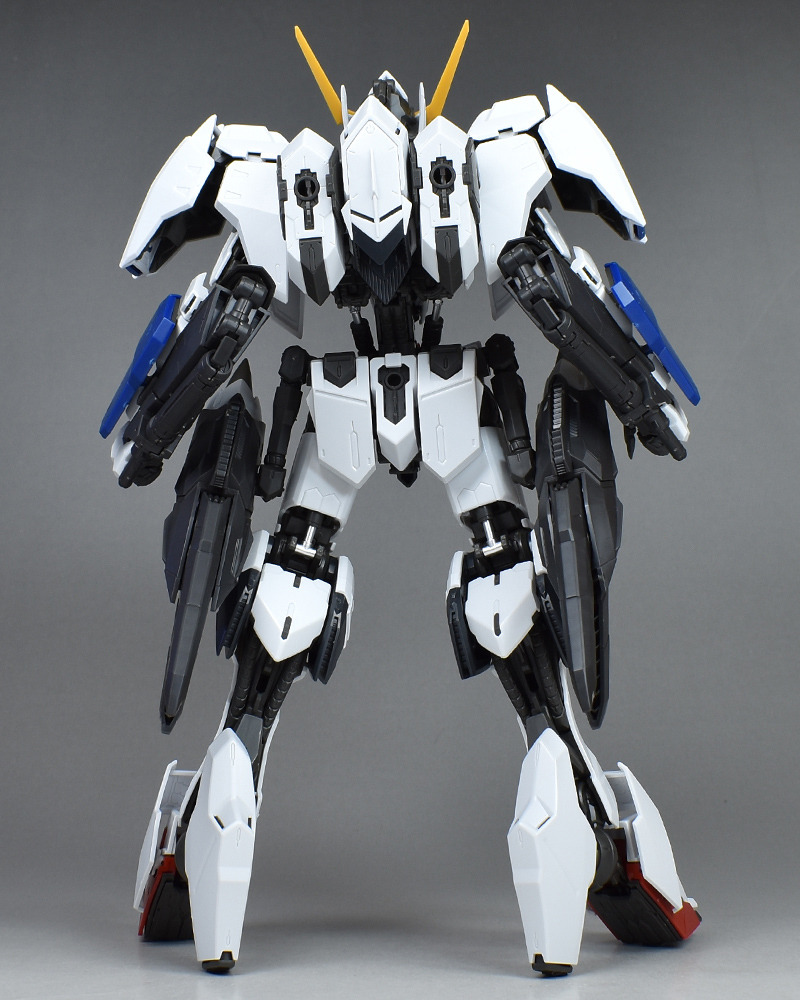

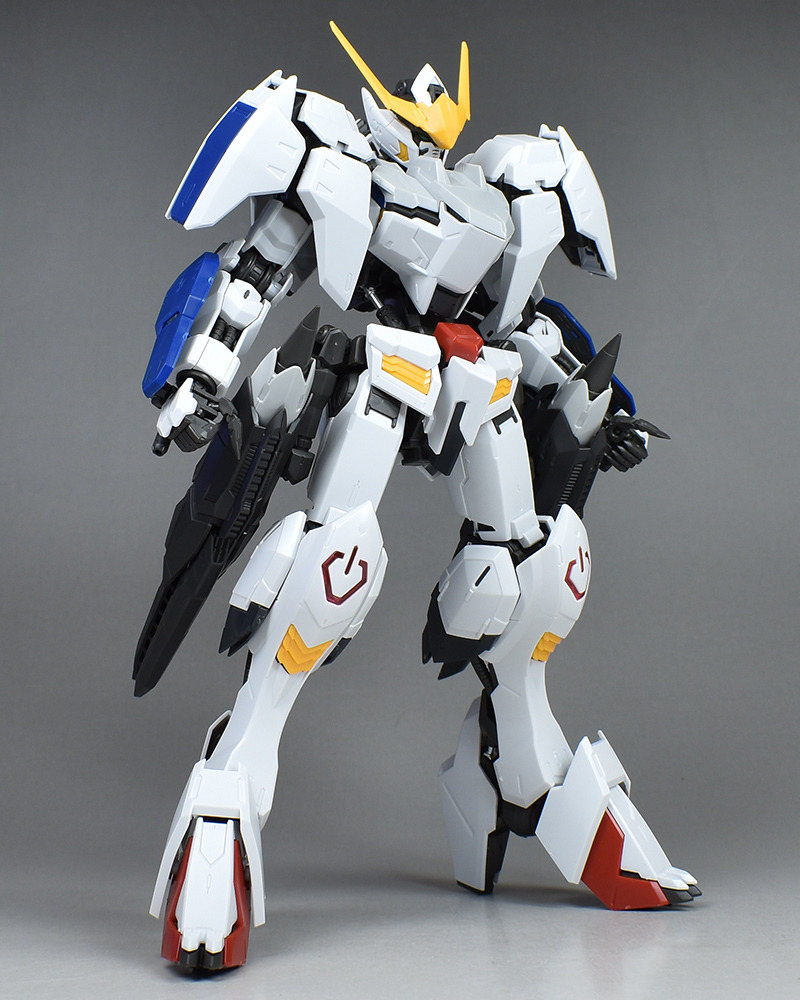
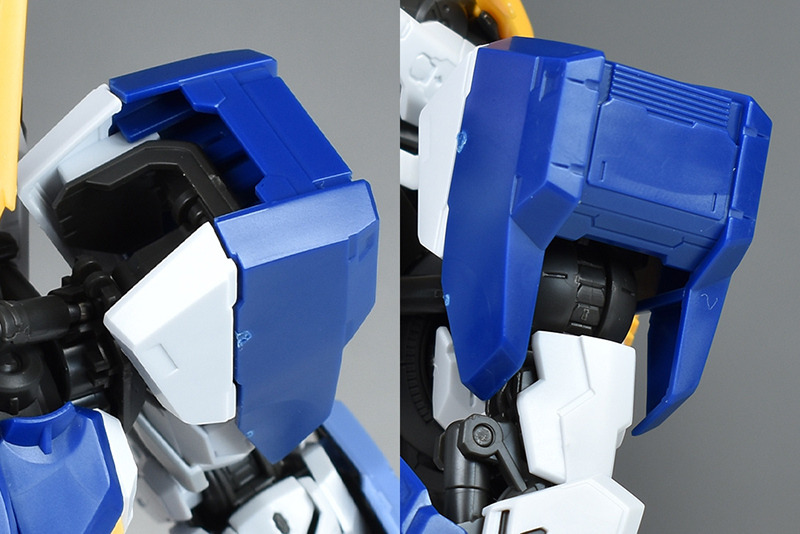
キマリストルーパーとのバトルなど、エドモントンでの決戦時の形態になります。胸部に増加装甲、肩部にはグレイズリッター用の増加装甲を装備し、腰部には機動性能を上げるためのブースターユニットを装備した形態。
胸部増加装甲。エアインテークのような部分もパーツで色分けされています。
正面から装甲を被せ、上から外装パーツを取り付けるだけの簡単装備。ですが通常版の胸部に引っかけてしっかりと固定されるので強度は高めです。多少顎と干渉しやすいので、頭部を動かしていると顎の赤いパーツが外れることもあるかも。
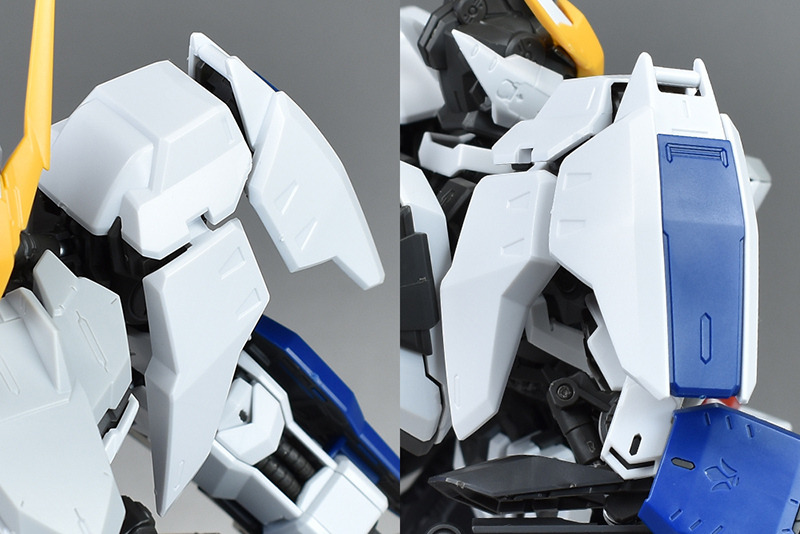
肩部装甲。グレイズリッター用のものを換装し、前後左右に装甲を纏った印象的な装甲パーツになります。1/100のガンダムバルバトス第6形態のものとは異なり、側面の装甲もパーツによってきっちりと色分けされています。
各部の装甲は展開が可能。裏面にはモールドや別パーツによるスラスターも造形されています。
外側の装甲は付け根が少しスイング可動します。

腰部にはサイドアーマーの代わりにブースターユニットを装備。
ブースターユニットはシンプルなダークグレー成型色ですが、一部がライトグレー成型色パーツで色分けされています。表面にはモールドも細かく造形。
挟み込みタイプですが、側面の合わせ目はモールド化されています。
アームは2箇所の可動部によってフレキシブルに可動します。
下部の装甲は展開可能。内側は肉抜き穴っぽい作りです。
肩に増加装甲を装備していますが、外側の装甲が展開したり構造的に腕部が干渉しないようになっているので、通常版(第4形態)などと変わらず広く腕を上げることができます。
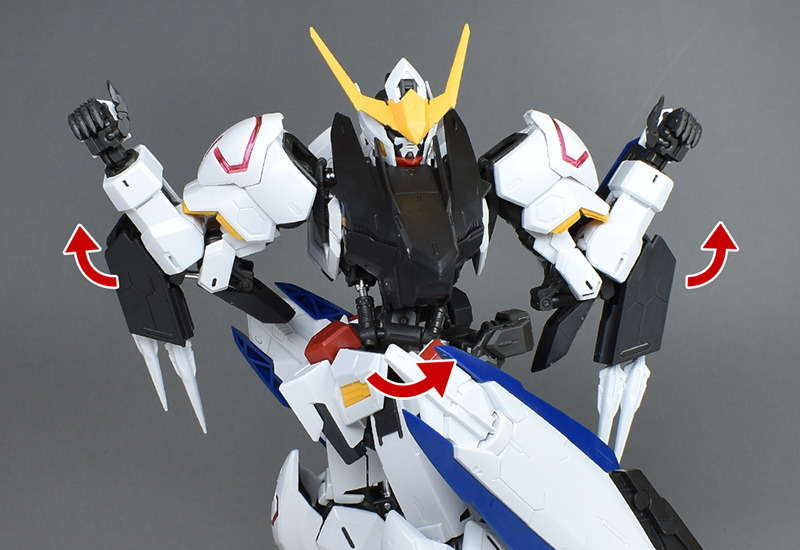
バックパックにジョイントパーツを取り付けることで、レンチメイスをマウントさせることができます。多少背部に比重がかかりますが、自立は問題なく可能です。
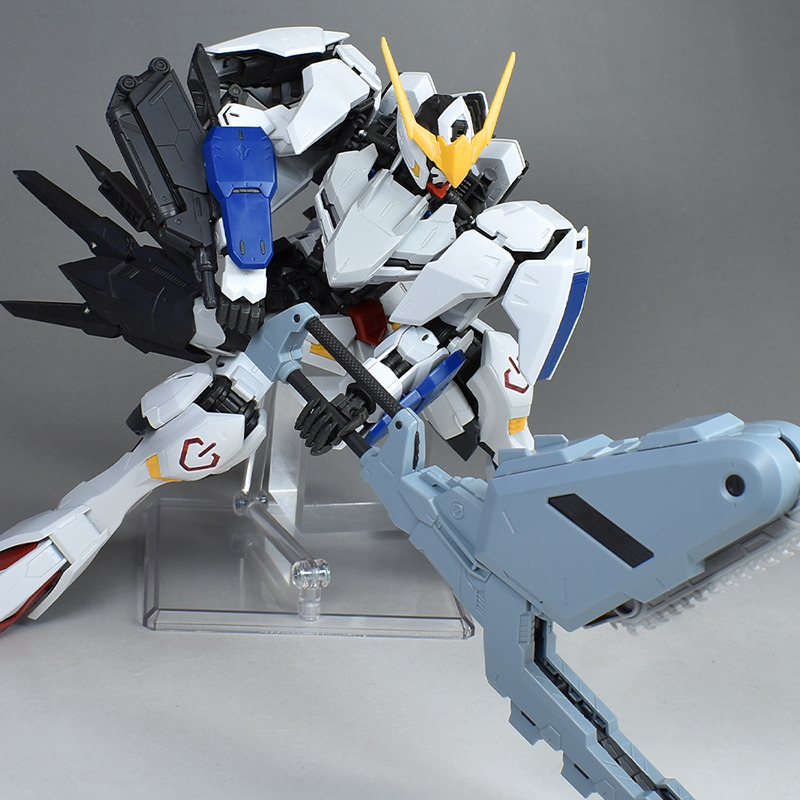

指パーツなどがバラけやすいので、レンチメイスを使ったポージングにはかなり苦労しました;レンチメイスを使ってポーズを取りたい場合は各部の補強をしたほうがいいと思いますが、補強する場合は補強しすぎてダボをねじ切ったりしないように注意も必要です。
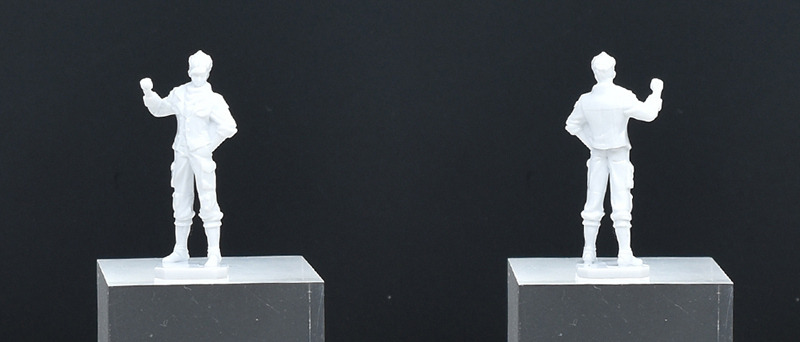
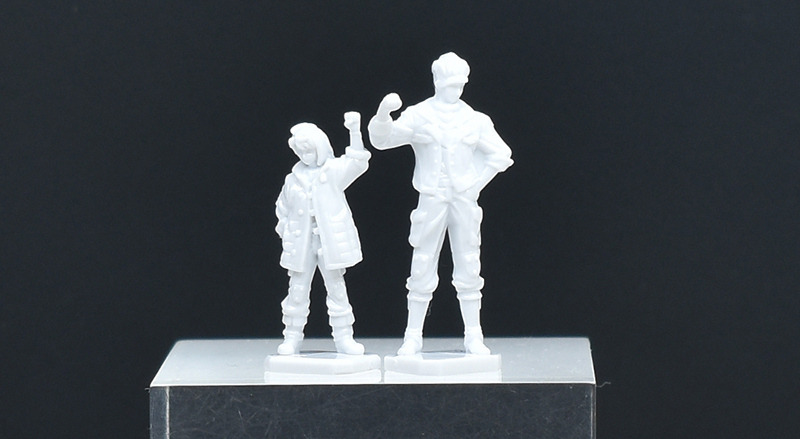
オルガ・イツカフィギュア。拳を上げたポーズで、MGガンダムバルバトスに付属している三日月・オーガスフィギュアと組み合わせることで、OPなどのシーンを再現することができます。
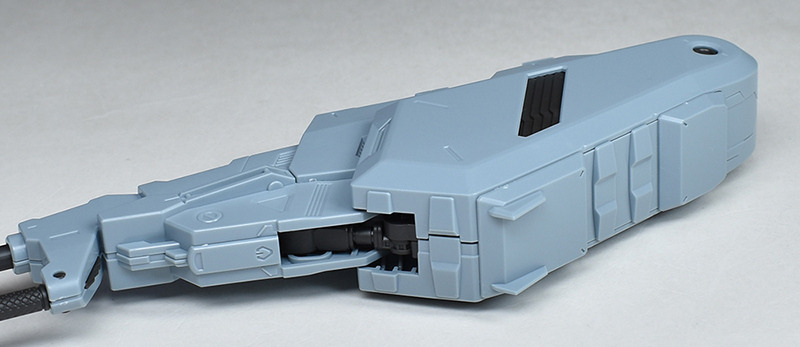
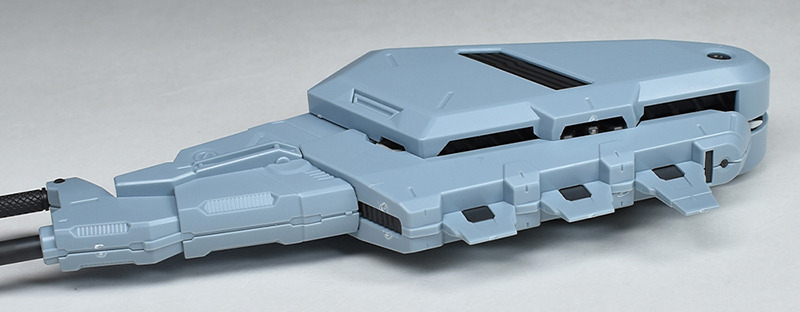
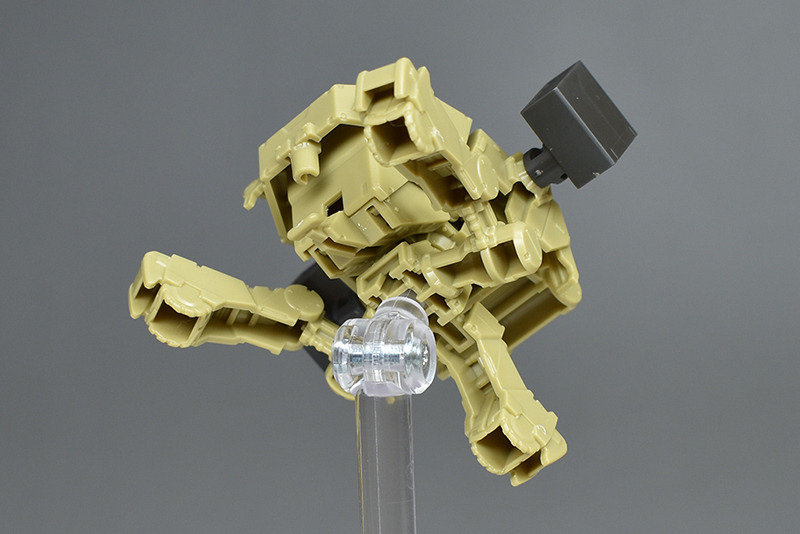
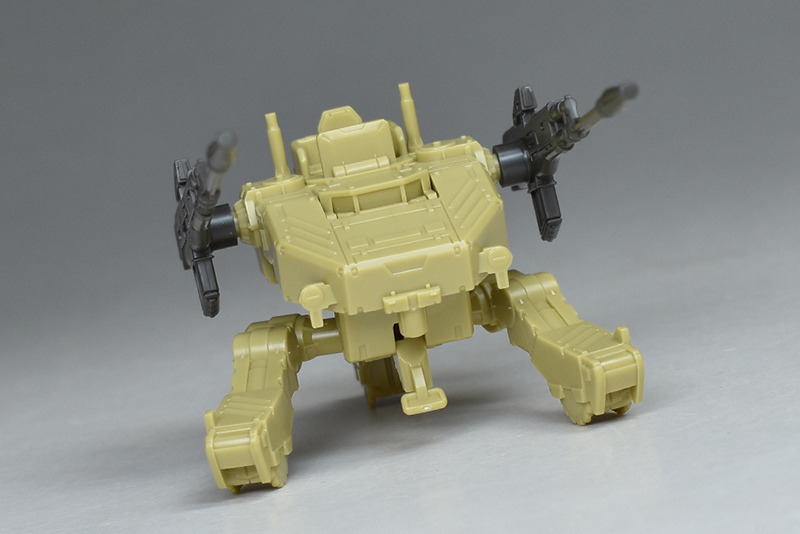
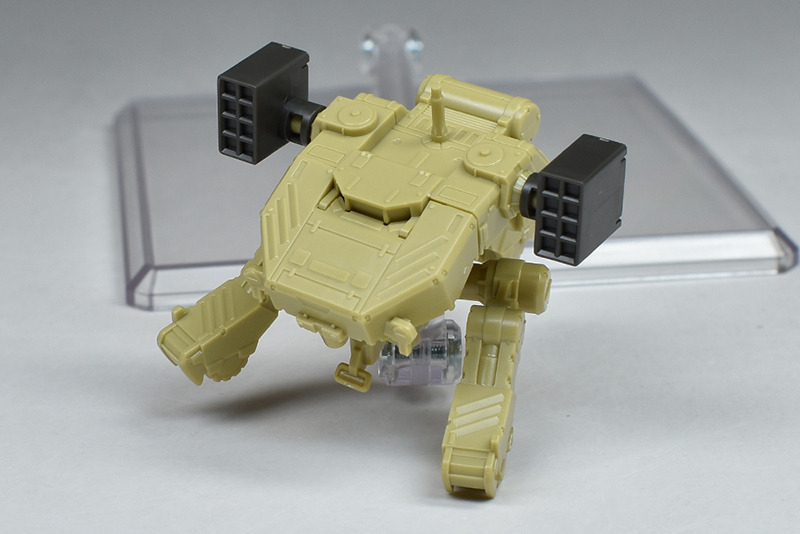
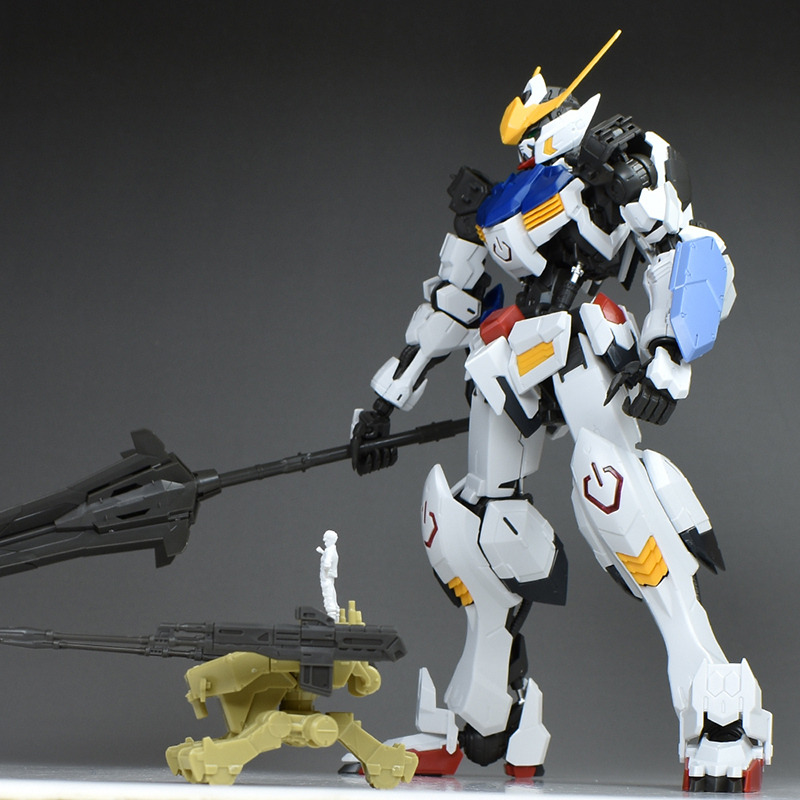
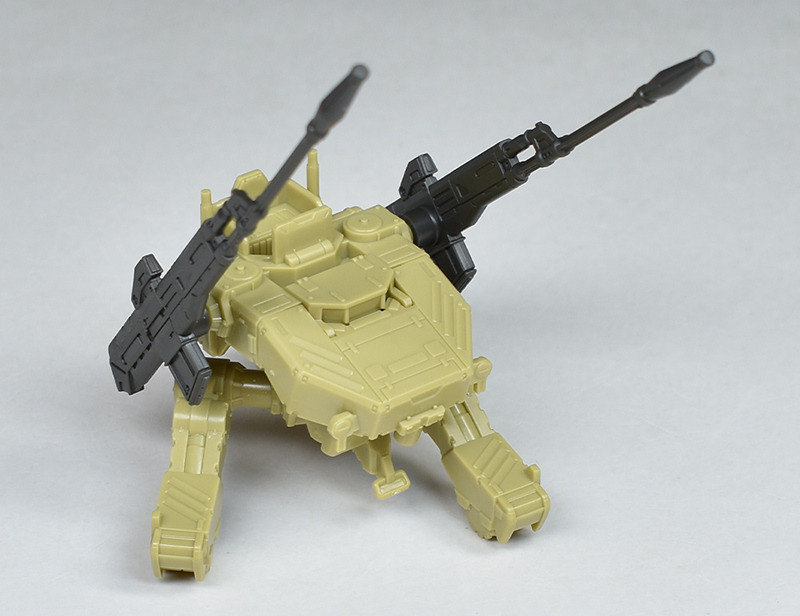
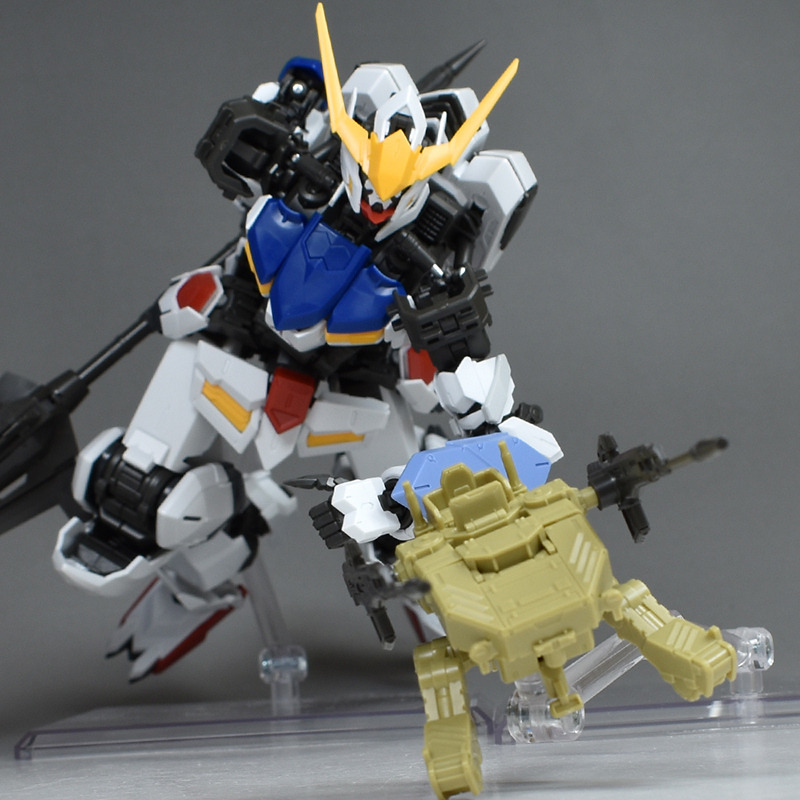
■モビルワーカー
ラストはモビルワーカーです。
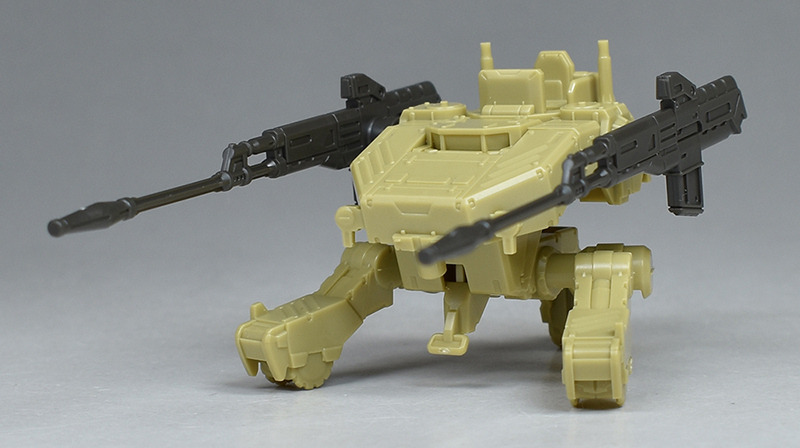
Each part is molded in detail, giving it a realistic and mechanical look. This is the commander version, with a seat molded on the top. It is equipped with 30mm machine guns on both sides. (The 30mm machine guns are not fitted properly.)
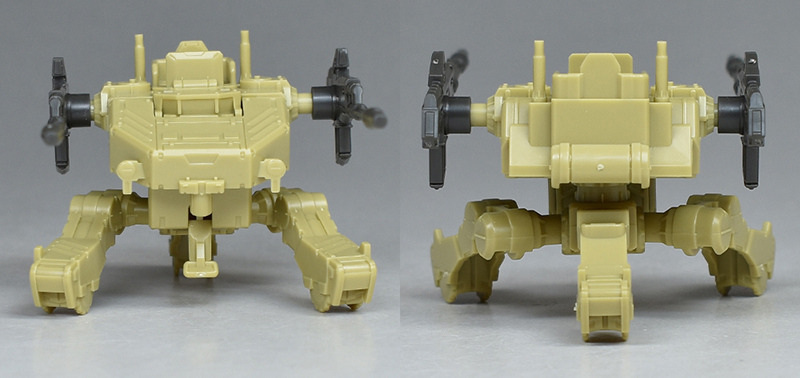
The back side has a generous hole for meat.
The 30mm machine gun can move up and down, and the upper armor can swing slightly left and right.
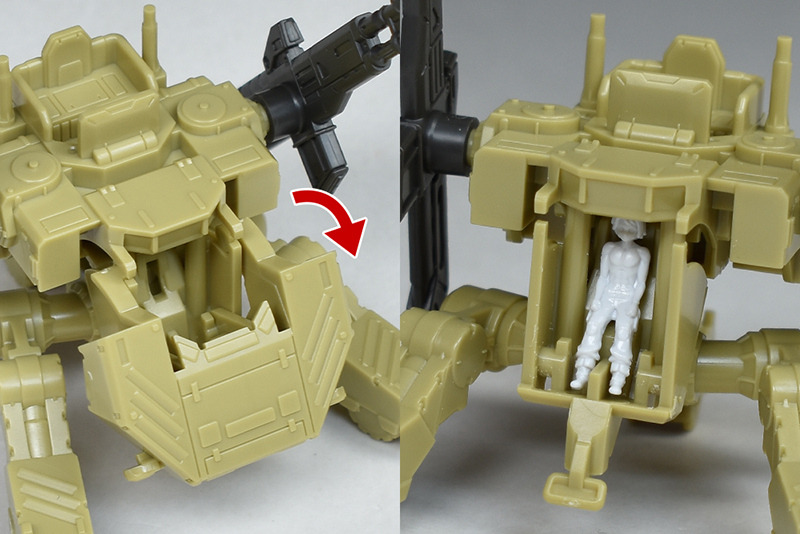
The cockpit hatch can be opened and closed, and the Mikazuki Augus figure that comes with the MG Gundam Barbatos can be stored inside.
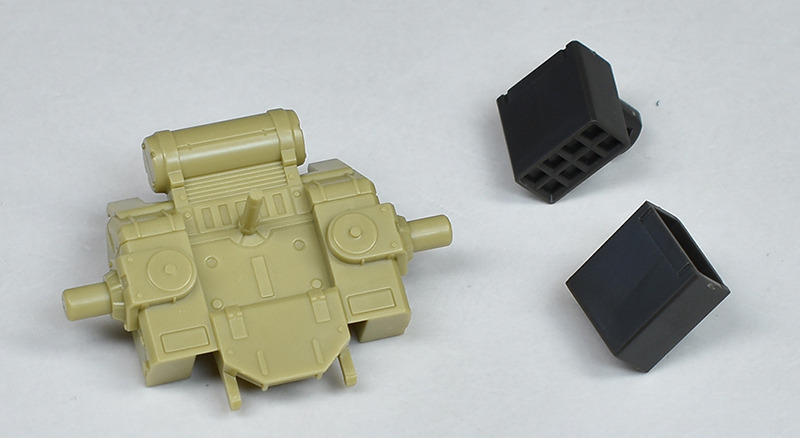
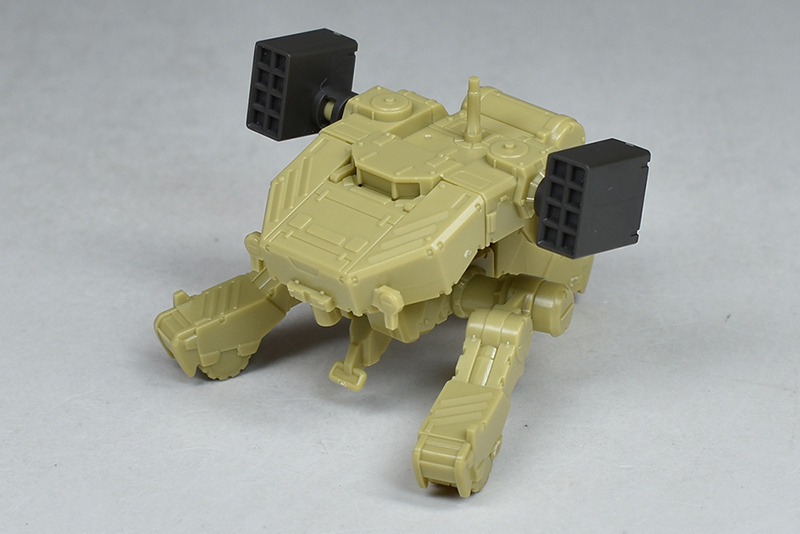
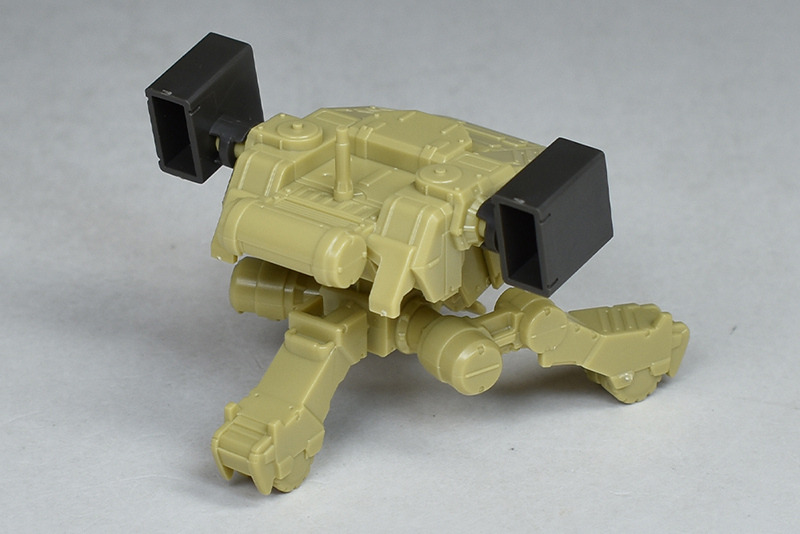
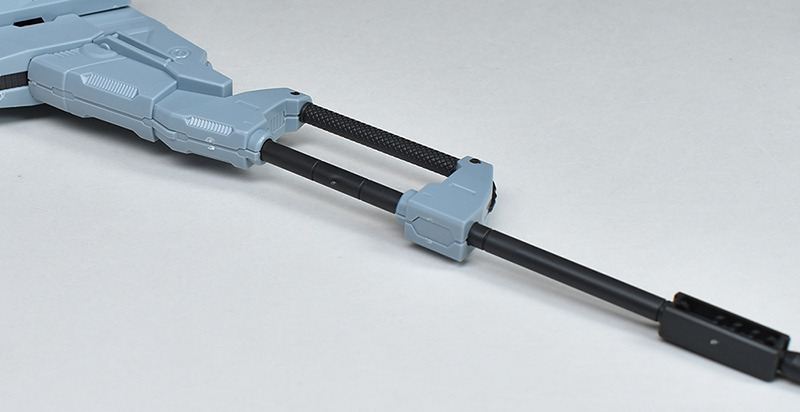
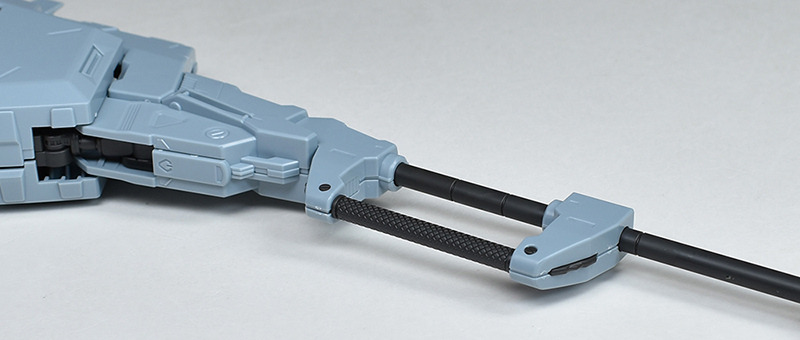
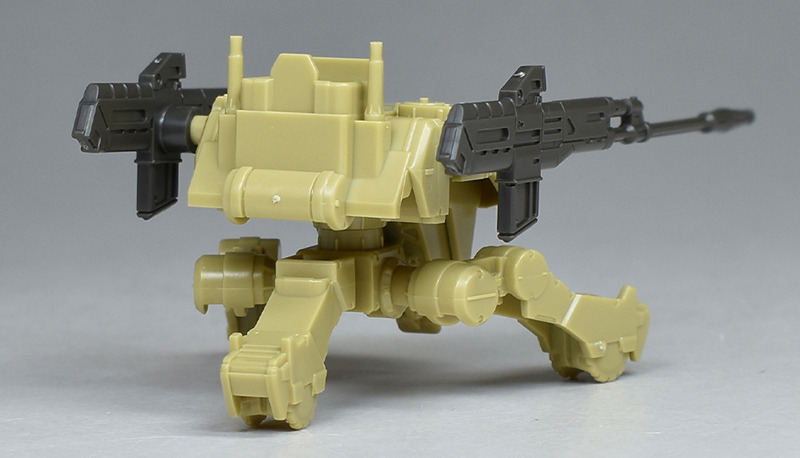
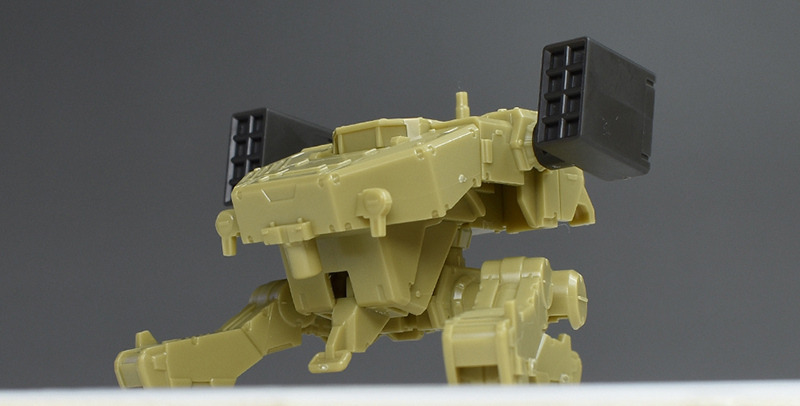
The upper part and left and right missile launchers for the standard model are also included, and by rearranging them, you can recreate the standard model of the mobile worker. The missile launcher is a single part with a hole on the back.
There is no specific 3.0mm hole and it’s not mentioned in the instructions, but it seems that if you insert a 3.0mm shaft into the central hole it will be fixed in place and you can also display it in a floating position.

If it is placed next to Barbatos like in the scene in the movie, it will give the impression of the actual size of Barbatos.
Please feel free to take a few.


By removing the chest and shoulder armor, you can also recreate the form seen during the final battle.
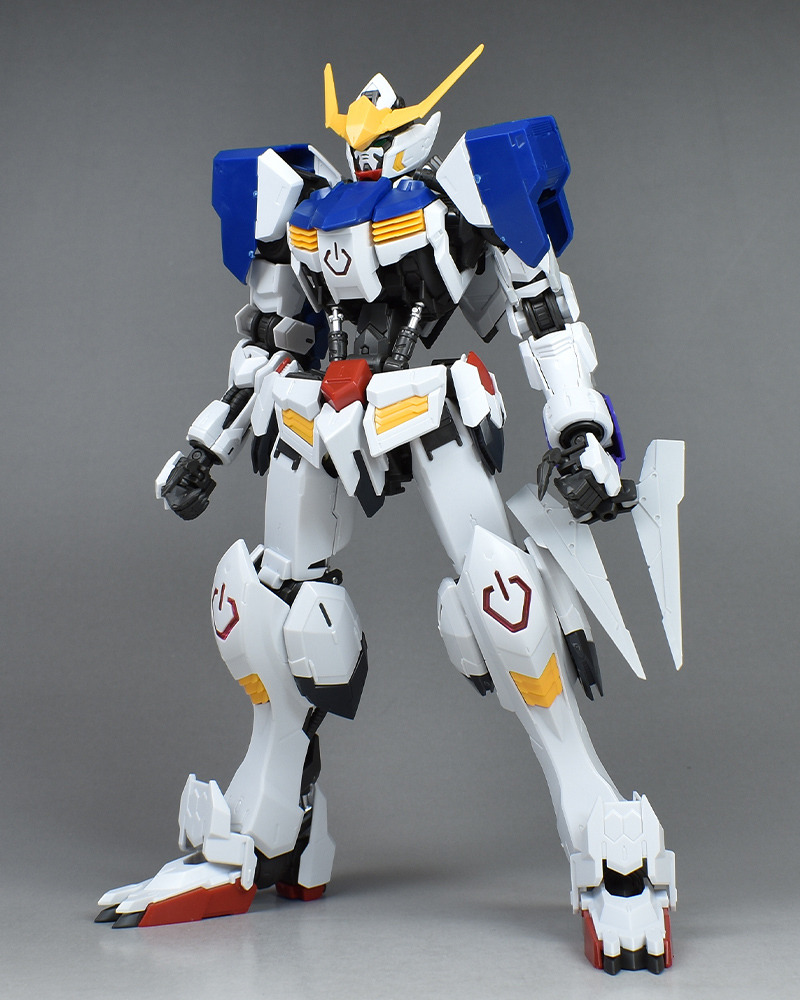
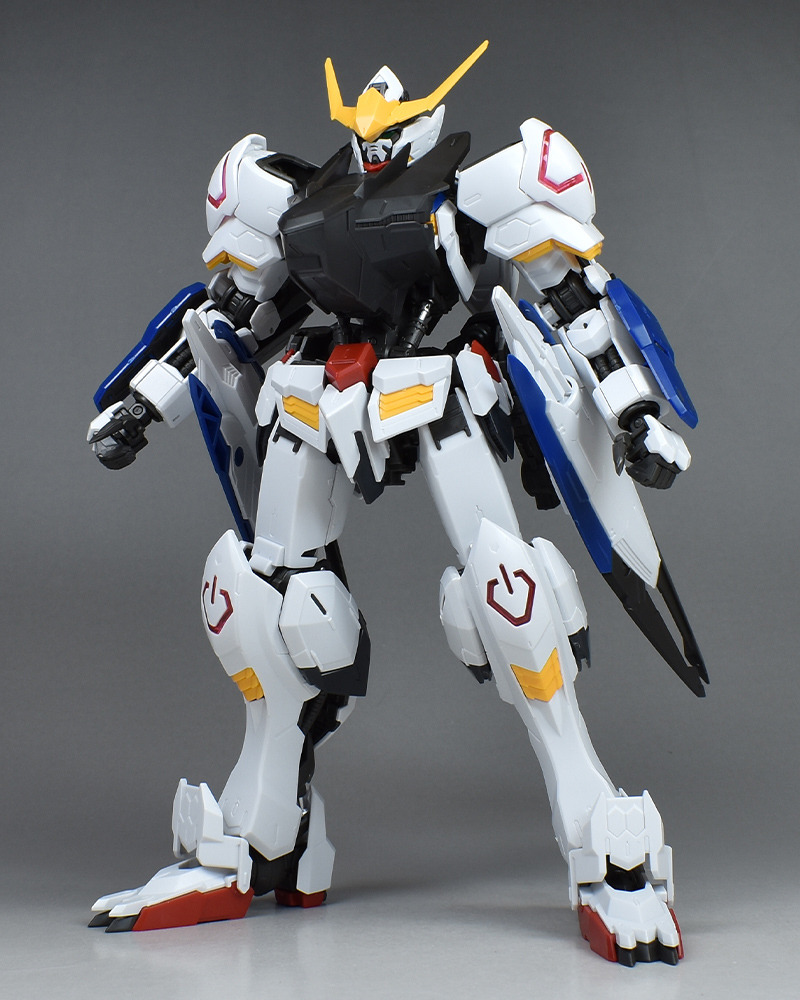
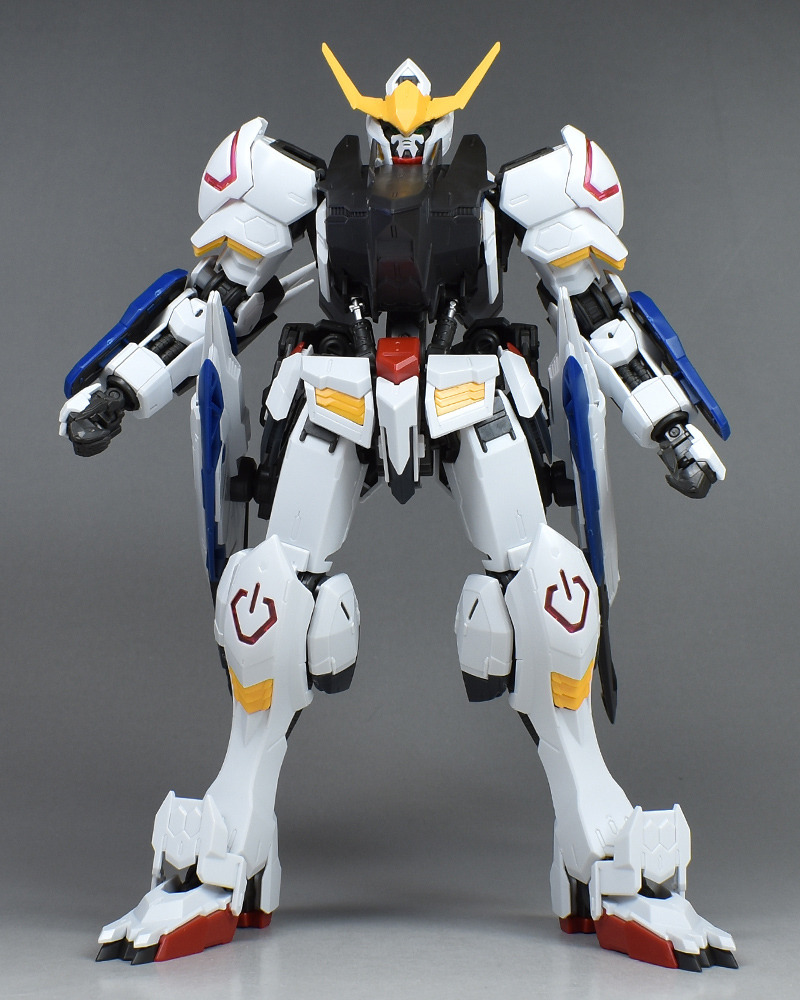
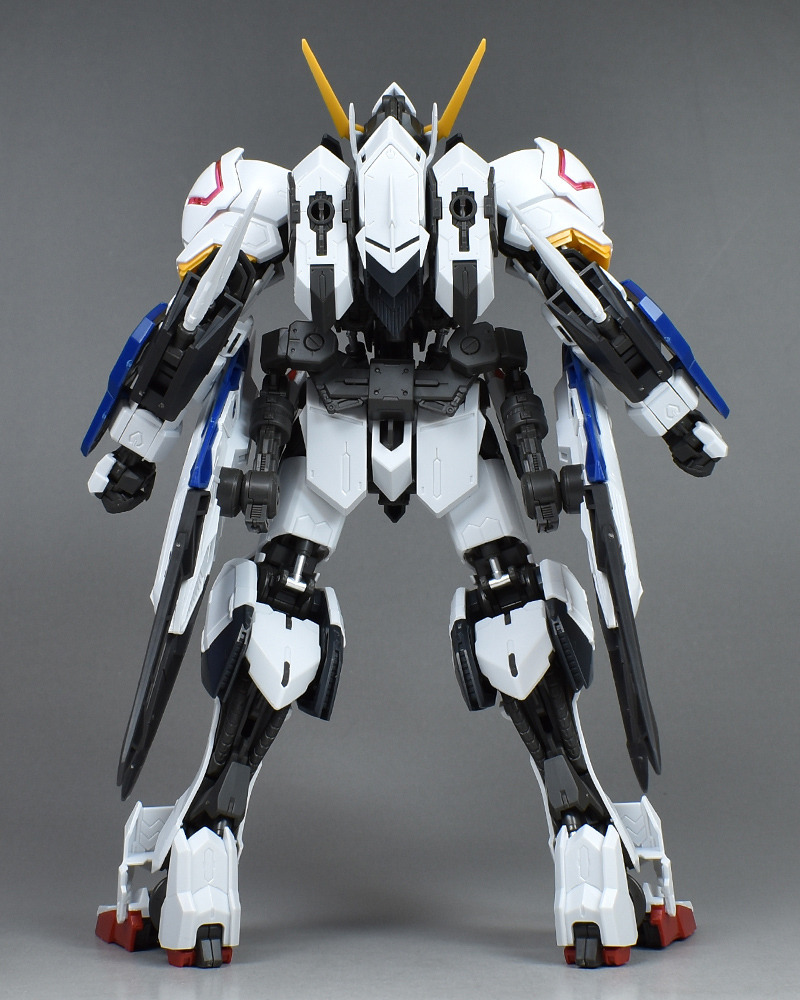
As is typical of MG, the armor of each form is realistic and detailed, and even when combined with the main body of MG Gundam Varvatos, it is well made and has enough gimmicks to have a lot of fun. It is not that difficult to recombine with the completed Barbados, and it is also very satisfying to play with and enjoy each form of recombination.
On the downside, the complicated configuration of the wrench mace makes it quite difficult to hold in the finger-reconstructed MG Barbados. The finger parts will soon come off or the gauntlets on the forearms will come off, so posing is likely to be quite difficult. It would be better to keep the figure in a standing pose with a hand on the ground. Also, there are some holes in some parts, which is a little worrisome.
The mobile worker is also finely molded and looks good, and there are many thoughtful parts such as the cockpit opening/closing gimmick and the reconfiguration between the general machine and the captain’s machine. Since it is possible to recreate various scenes of Barbados in the play, it is good to enjoy all forms of Barbados together with the main body.

Leave a comment